

Wix Bookings: Adding and Managing Waitlists for Classes
9 min
In this article
- Allowing waitlists for class bookings
- Managing your waitlist
- FAQs
Waitlists help keep your classes full by allowing clients to join when spots open up. If a participant cancels or reschedules, clients on the waitlist are notified in order. You control how long each client has to book before the spot is offered to the next person. If no one claims the spot, it becomes available to the public.

Note:
Clients can only join a waitlist via a Wix mobile apps. This option isn't available on desktop.
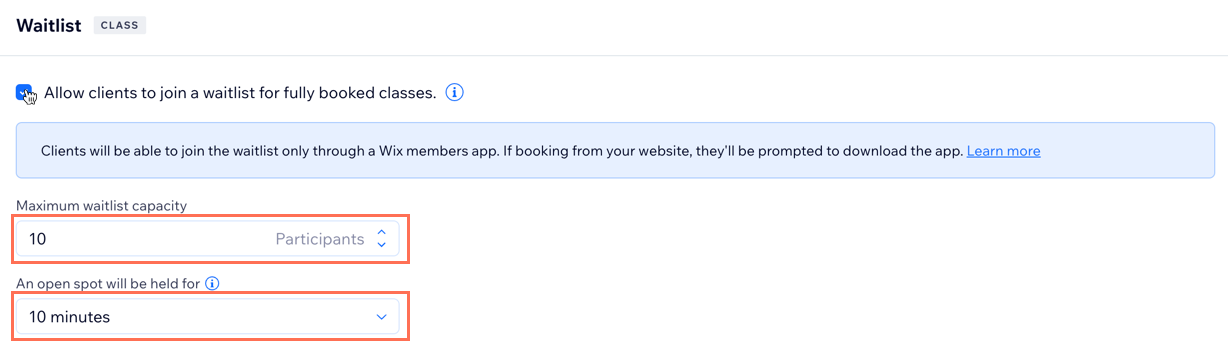
Allowing waitlists for class bookings
To get started, enable waitlists for your class from your booking settings. Then, decide how many participants can join the waitlist and how long a spot remains open for a client before it's offered to the next person.
Important:
Clients can only join waitlists through a Wix mobile app (e.g. Spaces by Wix, your native mobile app). To enable this feature, you need to have an agenda widget on your mobile site. Clients cannot join waitlists through the services or upcoming sessions widgets on the website or desktop.
Dashboard
Wix app
Wix Studio app
- Go to Booking Policies in your site's dashboard.
- Click the relevant policy you want to edit.
- Scroll down to the Waitlist section.
- Click the checkbox next to Allow clients to join a waitlist for fully booked classes.
- Set the Maximum waitlist capacity.
- Click the An open spot will be held for drop-down and choose a booking time limit before the spot is offered to the next client on the waitlist.
- Click Save.
Managing your waitlist
Manage your waitlist to keep sessions full and minimize wait times. You can manually add clients, move them into sessions (even fully booked ones), or remove them to free up space. This ensures open spots are filled quickly and efficiently.
Dashboard
Wix app
Wix Studio app
- Go to Booking Calendar in your site's dashboard.
- Click the relevant session in your calendar.
- Click Manage next to participants.
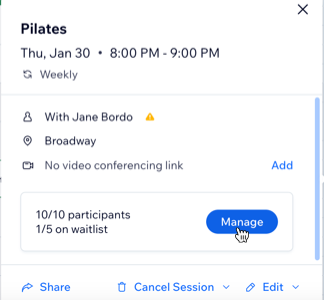
- Click the Waitlist tab at the top.
- Choose what you want to do next:
Add a participant to the waitlist
Add a participant in the waitlist to a session

Remove a participant from the waitlist
 next to the relevant participant.
FAQs
Click a question below to learn more.
Can clients join waitlists on their desktop and mobile apps?
Can clients join waitlists without the agenda widget?

Why can’t I select the message notification option when adding clients from the waitlist to a session?
Can I add a waitlist for appointment and courses?
