Studio Editor: Editing and Customizing Images
6 min
In this article
- Choosing the image's fit mode
- Cropping an image
- Setting the image focal point
- Masking an image with a shape
- Editing an image with Wix Photo Studio
- Adding a watermark for copyright protection
Enhance the images on your client’s site with powerful editing and customization options in the Studio Editor. Adjust image sizes, crop to focus on key details, and set focal points to ensure the most important areas are always visible across all screen sizes. Use Photo Studio for advanced edits and effortlessly add watermarks to protect your work.
Tip:
Images have unique scroll animations - Parallax Fill and Reveal Fill - that can help you make the visitors' experience more dynamic.
Choosing the image's fit mode
In the Studio Editor, every image has a bounding box that acts like a responsive container. These are the blue edges that you see around the image. You can choose how the image is displayed within the bounding box (e.g. Fill, Fit).
To choose the image's fit mode:
- Select the relevant image.
- Click the Settings icon
.
- Select an option from the Display mode drop-down:
Fill bounding box

Fit to bounding box

Keep image ratio

Working with breakpoints:
The display mode you choose for the image applies to all breakpoints.
Cropping an image
You can choose how an image is cropped for each breakpoint. This allows you to further customize the image to suit your specifications, and provide an ideal experience for visitors on all devices.
To crop an image:
- Click the relevant breakpoint at the top of the Studio Editor.
- Select the image.
- Click the Crop icon
.
- Customize the crop to your needs.
- Click Apply.
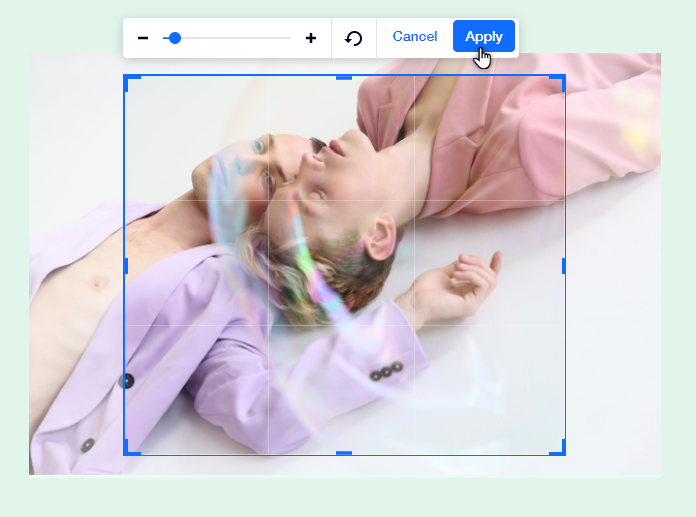
Tip:
If you want to uncrop your image, you can reset it by clicking the Settings icon , then Reset Image.
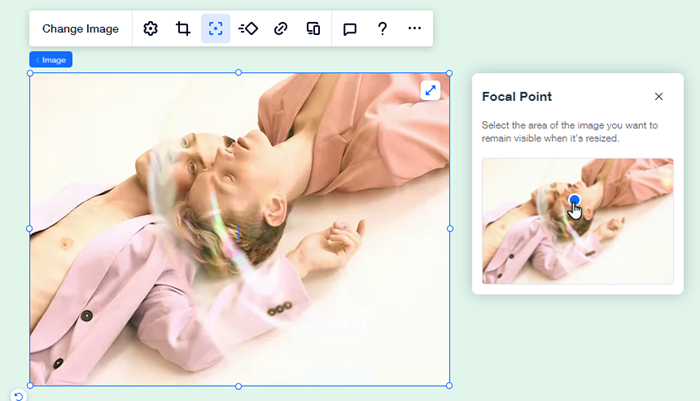
, then Reset Image.Setting the image focal point
You can choose the image focal point for each breakpoint. This allows you to select which part of the image is visible when it's resized for different breakpoints on different screen sizes.
Tip:
Whenever a dominant face is detected, we automatically set it as the focal point of the image, however, you can change or adjust the focal point as needed.
To set the image focal point:
- Click the relevant breakpoint at the top of the editor.
- Select the image.
- Click the Focal Point icon
.
- Select the area of the image that you want to remain visible when it's resized.
Masking an image with a shape
Image masks allow you to easily crop images into different shapes, giving you the flexibility to fit them seamlessly into the design. Choose from thousands of unique designs or upload your own SVG file.
To mask an image:
- Select the relevant image.
- Click the Mask icon
 .
. - Choose the shape you want:
- Explore the different shapes available in the panel.
- Click the Add icon
 to browse through more designs or upload your own file.
- (Optional) Make the image fit the shape's original aspect ratio by clicking Reset to shape's ratio
Note: This might resize the image.
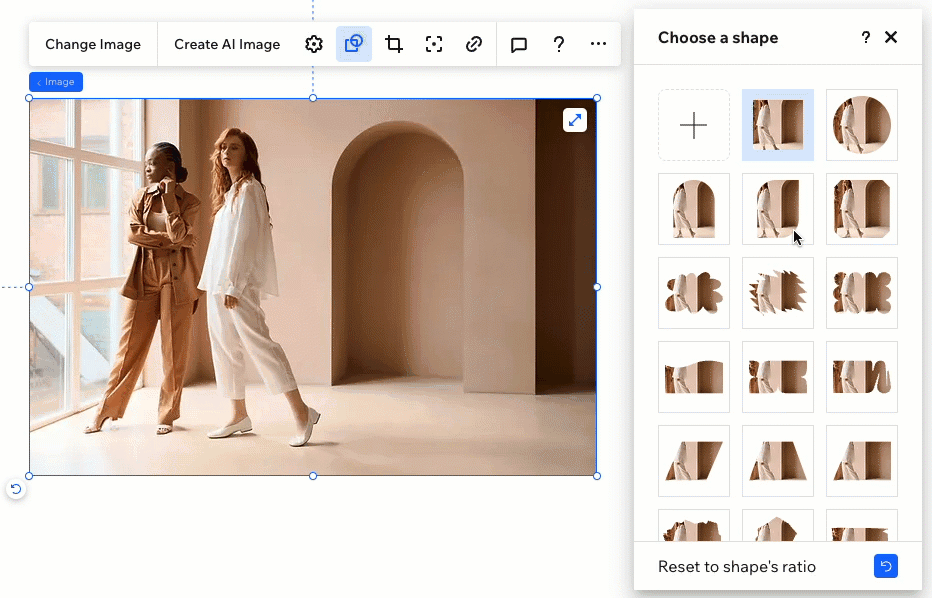
Changed your mind?
Click the square shape at the top of the panel. This removes any mask previously applied to the image.
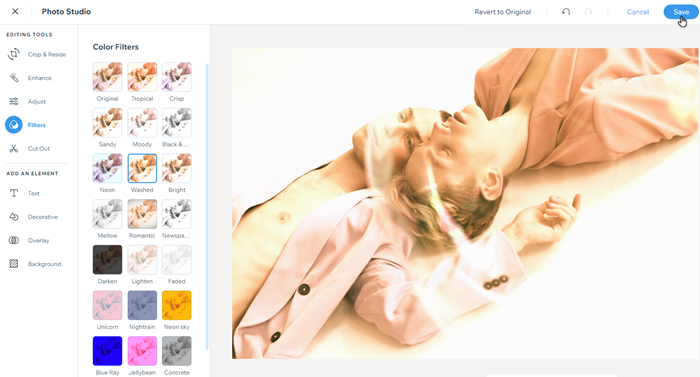
Editing an image with Wix Photo Studio
Use the Wix Photo Studio to create beautiful images without leaving the Editor. The Photo Studio allows you to customize images that you've already uploaded and saves the newly edited version to the Media Manager.
There are a variety of editing options available, such as filters, rotation, and overlays, so you can revamp any image on the spot.
Tip:
You can also edit images directly from the Media Manager by clicking Crop & Edit under the thumbnail image.
To edit an image:
- Select the relevant image in the Editor.
- Click the Settings icon
- Click Adjust.
- (In the Photo Studio) Edit the image using the available options.
- Click Save.
What's next?
The newly edited version is automatically replaced on all breakpoints, as the Wix Photo Studio makes changes to the image source. However, changes done on the canvas (to the image design or crop) still only apply to the current breakpoint.
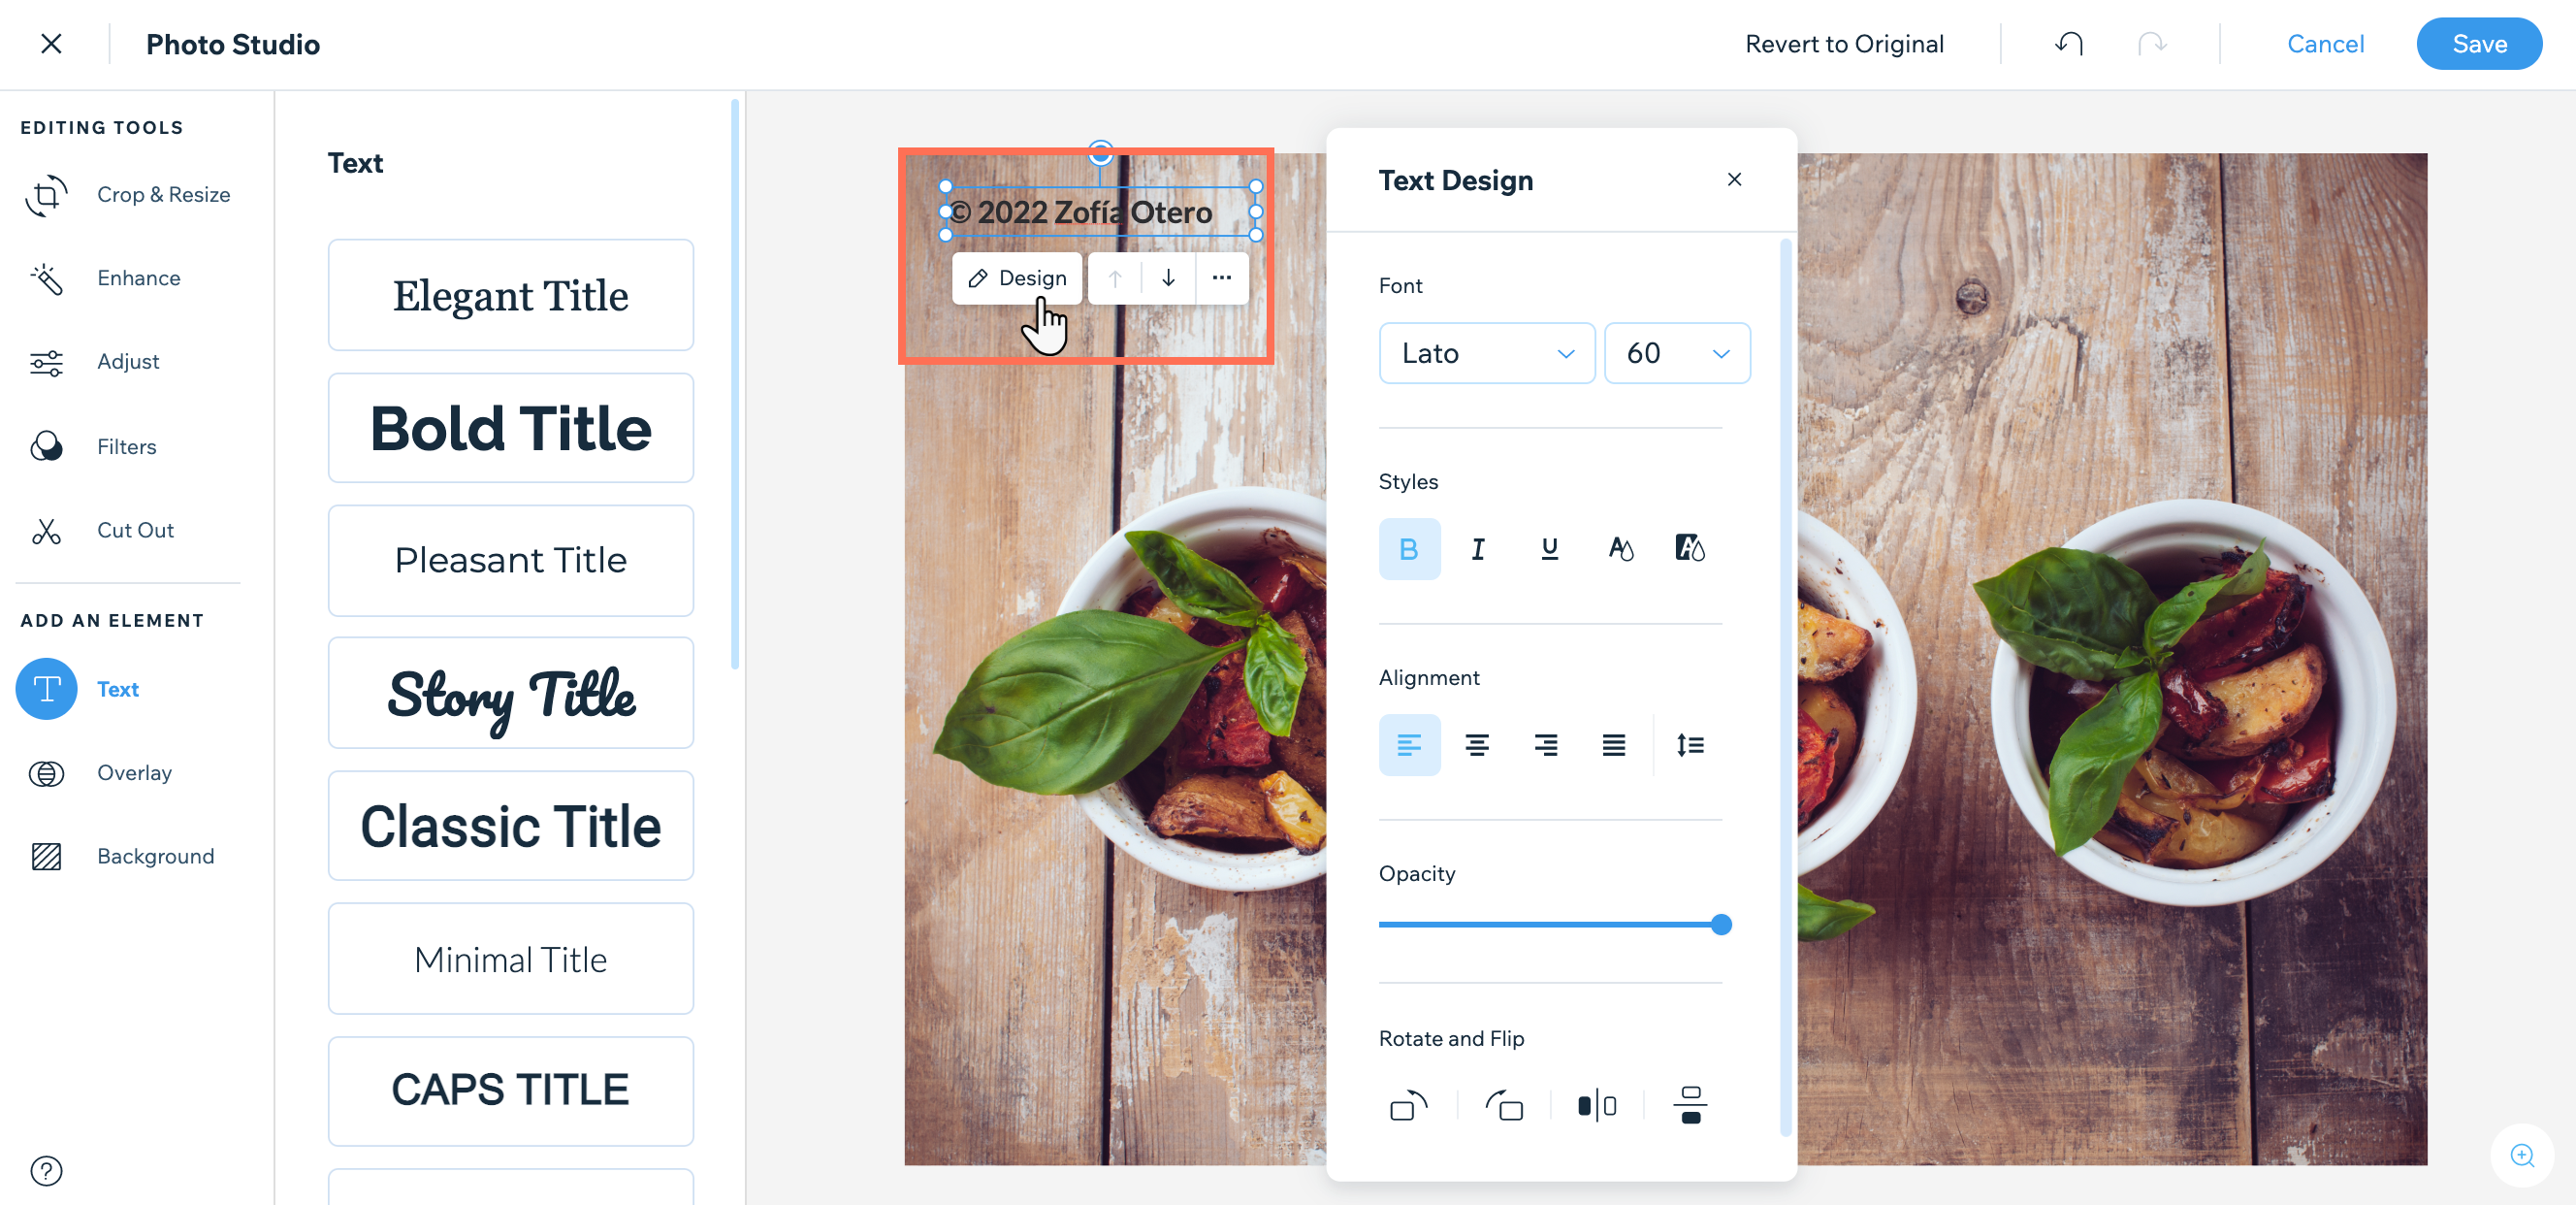
Adding a watermark for copyright protection
Protect images on the site by adding watermark text in the Photo Studio. The text can be designed and customized to suit your client, and cannot be removed from the file if downloaded.
To add a watermark to an image:
- Select the image in the Editor.
- Click the Settings icon
- Click Adjust.
- (In the Photo Studio) Click Text under Add An Element.
- Browse the text styles and click to add one to the image.
- Type your watermark message.
- (Optional) Click Design to customize the text.
- Click Save.