

Managing Your Wix API Keys
9 min
In this article
- Generating a Wix API key
- Rotating a Wix API key
- Duplicating a Wix API key
- Editing a Wix API key
- Deleting a Wix API key
- Choosing Wix API key permissions
- Getting your Account ID
Wix API keys are codes that you can generate to authorize a user or application and give them access to your site and account data.
Use Wix API keys to access data like your orders, products, and events to build your own custom functionality and connect with third-party services.
Generating a Wix API key
You can generate an API key to access your site's data in your Account Settings.
Important
- By default, each API key you generate has access to all of the sites in your account. This is because API keys are generated at an account level.
- For added security, each API key token you generate is only displayed once when you create it.
- It is not possible to view an API key's token again after you close the You generated an API key pop-up. Make sure to store your token in a safe location so you can access it in the future.
To generate an API key:
- Go to API Keys in your Account Settings.
- Click Generate API Key.
- Enter a name for your new API key under Key details.
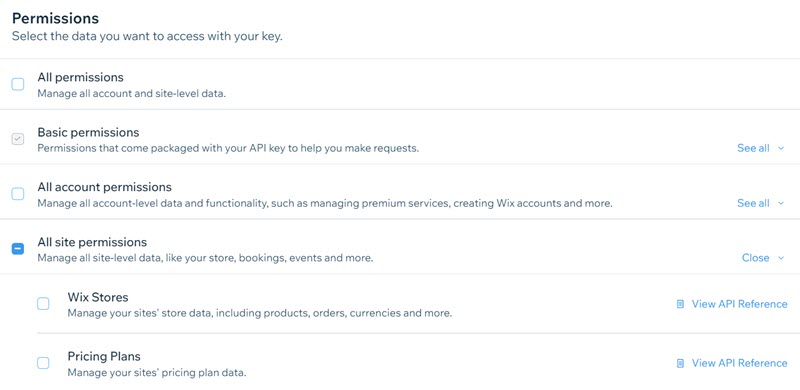
- Select the permissions that you want to assign to the API key.
- The basic permission to return the IDs of all the sites on your account is selected by default. It cannot be deselected.
- For security, only add the permissions that you need. Learn more
- Click Generate Key.
- Click Send Code to send a 6-digit verification code to the email address linked to your account.
- Get your verification code from the email.
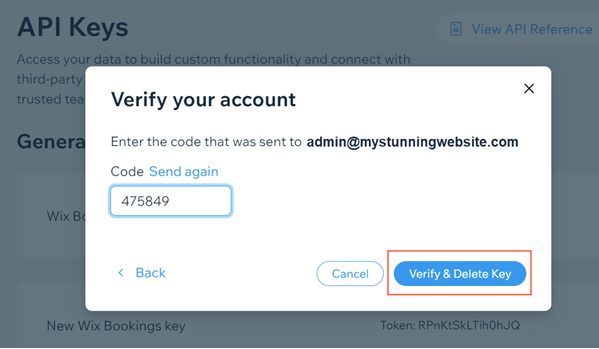
- Enter the code in the Verify your account pop-up.
- Click Verify & Generate Key.

- Click Copy Token & Close.
- Store the token in a safe location.
Tip:
If you need another API key with the same permissions, you can rotate the API key or duplicate the API key.
Rotating a Wix API key
You can rotate an API key to create a new token for it while maintaining the same name, description, and permissions. After you rotate an API key, anyone who previously had access will no longer be able to use it and you will need to share the new token with them.
Important:
- After you rotate an API key, any user or application that previously used it will immediately lose access to your data.
- It is not possible to recover a previous token after you rotate its API key.
Tip:
- In most cases, it's better to duplicate the API key, add the new token to your API calls, share the new token with any team members that need it, and delete the old API key.
- This ensures that APIs that use the key will not have any interruption in service.
- We recommend only rotating an API key if you think your key has been compromised.
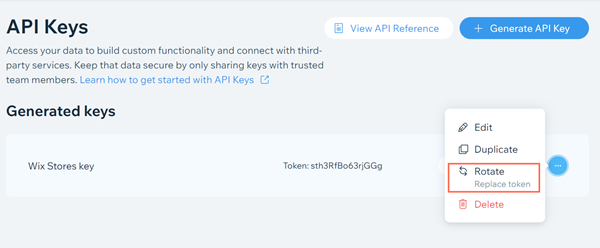
To rotate an API key:
- Go to API Keys in your Account Settings.
- Click the More Actions icon
 next to the API key you want to rotate.
 - Select Rotate.
- Click Rotate Key on the pop-up.
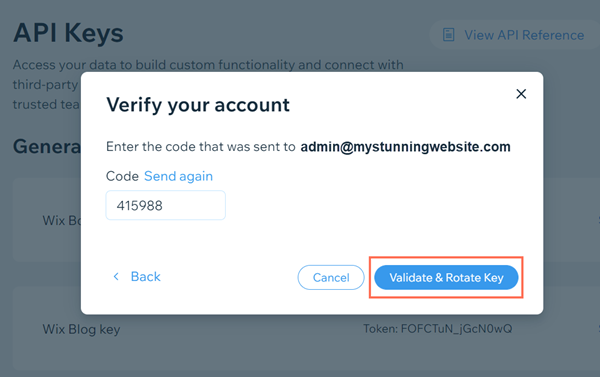
- Click Send Code to send a 6-digit verification code to the email address linked to your account.
- Get your verification code from the email.
- Enter the code in the Verify your account pop-up.
- Click Validate & Rotate Key.
- Click Copy Token & Close.
- Store the token in a safe location.
Duplicating a Wix API key
You can duplicate one of your existing API keys if you need another API key with the same permissions. After you duplicate a key, you can also edit its description and permissions if you need to customize it further.
Important
- By default, each API key you generate has access to all of the sites in your account. This is because API keys are generated at an account level.
- For added security, each API key token you generate is only displayed once when you create it.
- It is not possible to view an API key's token again after you close the You generated an API key pop-up. Make sure to store your token in a safe location so you can access it in the future.
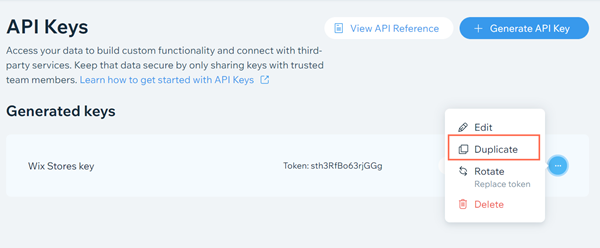
To duplicate an API key:
- Go to API Keys in your Account Settings.
- Click the More Actions icon next to the API key you want to duplicate.
- Select Duplicate.
- Enter a new name for your new API key under Key details.
- (Optional) Edit the permissions that are assigned to the API key.
- The basic permission to return the IDs of all the sites on your account is selected by default. It cannot be deselected.
- For security, only add the permissions that you need. Learn more
- Click Generate Key.
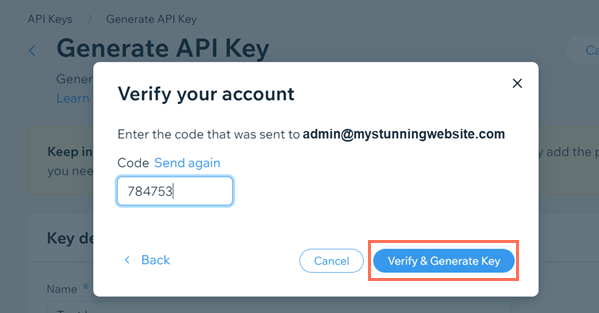
- Click Send Code to send a 6-digit verification code to the email address linked to your account.
- Get your verification code from the email.
- Enter the code in the Verify your account pop-up.
- Click Verify & Generate Key.
- Click Copy Token & Close.
- Store the key in a safe location.
Editing a Wix API key
You can update the name and permissions of an API key after you create it on its Edit API Key page.
Important:
Any authorized member of your team can edit the API keys on your account. To change who can edit your API keys, go to your site's Roles & Permissions or the Teams tab in your Wix Studio workspace.
To edit an API key:
- Go to API Keys in your Account Settings.
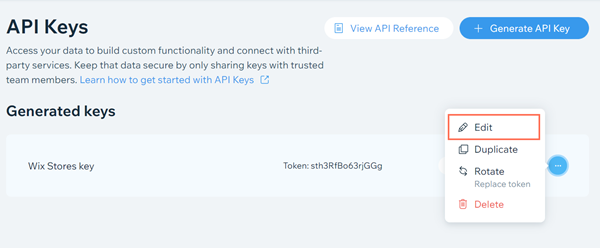
- Click the More Actions icon
 next to the API key you want to edit.
 - Select Edit.
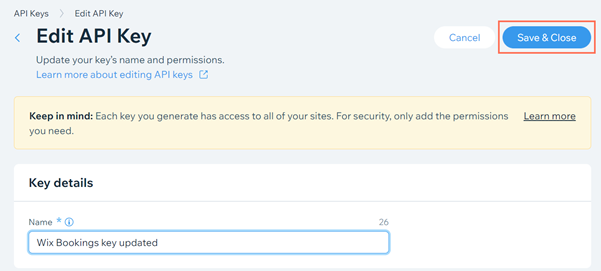
- Edit the API key's name or permissions.
- Click Save & Close.
- Click Send Code to send a 6-digit verification code to the email address linked to your account.
- Get your verification code from the email.
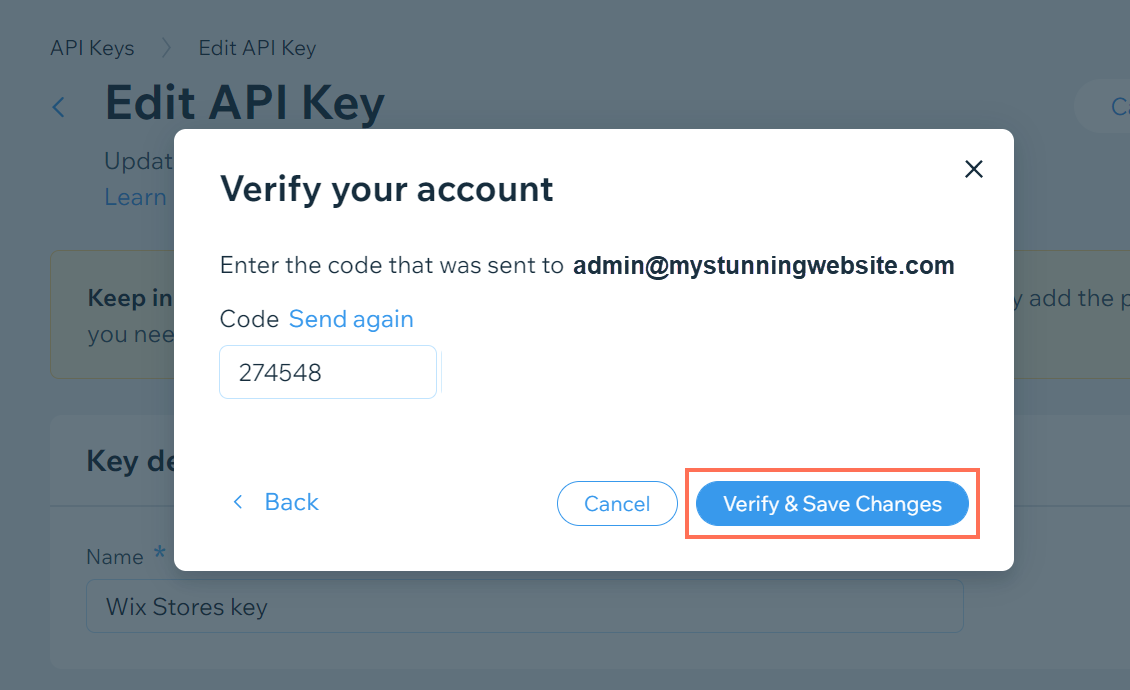
- Enter the code in the Verify your account pop-up.
- Click Verify & Save Changes.
Deleting a Wix API key
You can delete any API keys that you no longer need at any time.
Important:
- Any user or application that previously had access to the API key will lose access to your data after you delete it.
- It is not possible to recover an API key after you delete it.
To delete an API key
- Go to API Keys in your Account Settings.
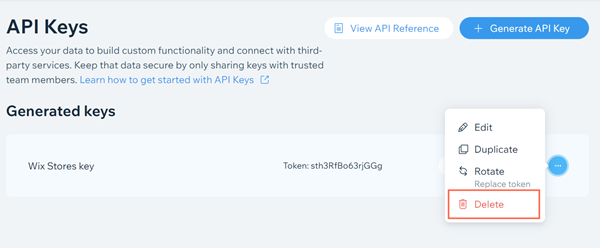
- Click the More Actions icon next to the API key you want to delete.
- Select Delete.
- Click Delete on the pop-up.
- Click Send Code to send a 6-digit verification code to the email address linked to your account.
- Get your verification code from the email.
- Enter the code in the Verify your account pop-up.
- Click Verify & Delete Key.
Choosing Wix API key permissions
The permissions that you assign to your API key control the kinds of data that API calls using the key can access.
For example, you can select the Wix Stores permission to only allow access to your site’s store data, including products, orders, and currencies.
Important:
Most permissions automatically give read and write access to your site's data. It's important to only assign the permissions you need to your API key so that you don't give more access to your site data than is necessary. Learn more about permissions and API key security
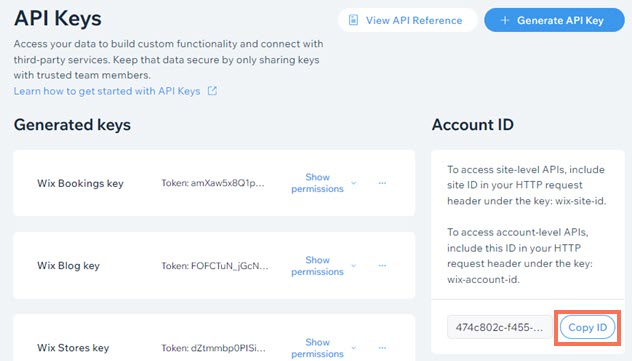
You can view an API key's permissions by clicking Show permissions next to it on the API Keys page.

You can also edit an API key's permissions at any time if you need to add or remove permissions.
To edit a key's permissions:
- Go to API Keys in your Account Settings.
- Click the More Actions icon next to the API key you want to edit.
- Select Edit.
- Select the new permissions you want to assign to the API key under Permissions.
- Click Save & Close.
- Click Yes, Save Changes on the pop-up.
- Click Send Code to send a 6-digit verification code to the email address linked to your account.
- Get your verification code from the email.
- Enter the code in the Verify your account pop-up.
- Click Verify & Save Changes.
Getting your Account ID
To use site-level APIs, you need to include your Wix Account ID in your HTTP request header. You can get your Account ID in the API Keys page of your Account Settings.
To get your Account ID:
- Go to API Keys in your Account Settings.
- Click Copy ID under Account ID.
Want to learn more about using Wix API keys?
Read our article about building requests using API keys.
