

Google Ads with Wix: Creating and Managing Your Campaign
10 min
In this article
- Creating a campaign
- Managing your campaign
- FAQs
Google Ads with Wix allows you to create and manage Google Ads campaigns directly from your site's dashboard. By guiding you through setup and best practices, you can launch targeted ads to reach new customers, boost product sales, and grow your business online.
Creating a campaign
Create a Google Ads with Wix campaign by following a step-by-step process on your site's dashboard. Throughout the process, you'll find tips on creating the best converting ad content.
After you launch your ad campaign, all the data is automatically synced to Google Ads in your Wix site's dashboard. It also syncs with Wix Analytics Marketing reports and Marketing Overview so you can see all your paid and organic marketing efforts in one place.
Important:
Before you create a Google Ads campaign with Wix, make sure you've completed the following setup steps in order to make your site eligible:
- Publish your site.
- Upgrade your site by purchasing a plan.
- Connect a custom domain.
To create your campaign:
- Go to Google Ads in your site's dashboard.
- Click Create New Campaign.
- Choose your advertising goal:
- Drive traffic and get leads: Performance Max (PMAX) Leads campaigns allow you to use text and images to help you connect with people searching for the products and services you offer. Use these campaigns to drive sales, leads, or traffic to your website by targeting people actively searching for your offerings.
- Boost product purchases: Performance Max (PMAX) Sales campaigns are designed for e-commerce businesses, letting you showcase your products across various Google surfaces, including Google Search, YouTube, Google Images, and the Google Display Network.
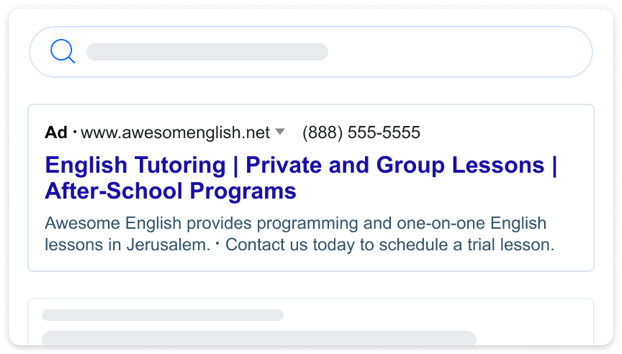
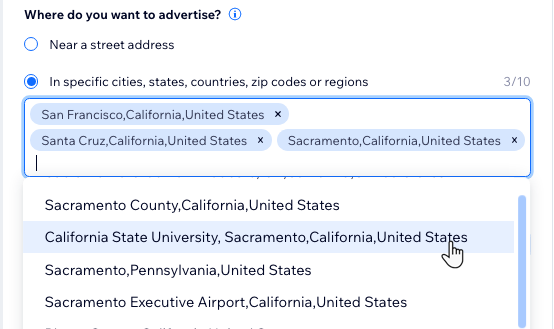
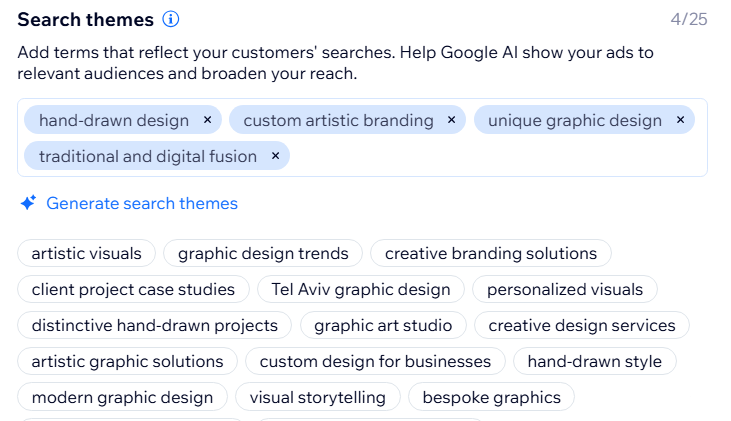
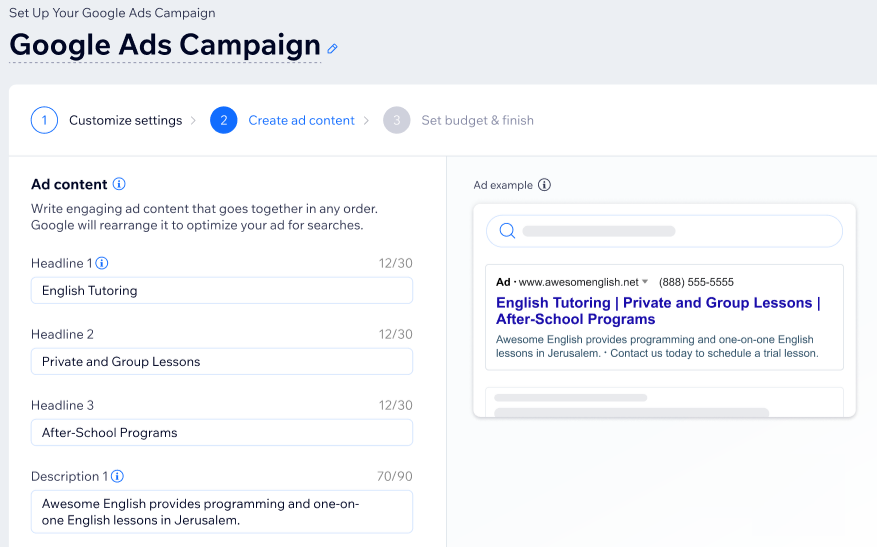
- Create your ad campaign based on your advertising goal:
PMAX Leads campaign
 Generate Suggestions next to the relevant text asset and AI will give you alternatives.
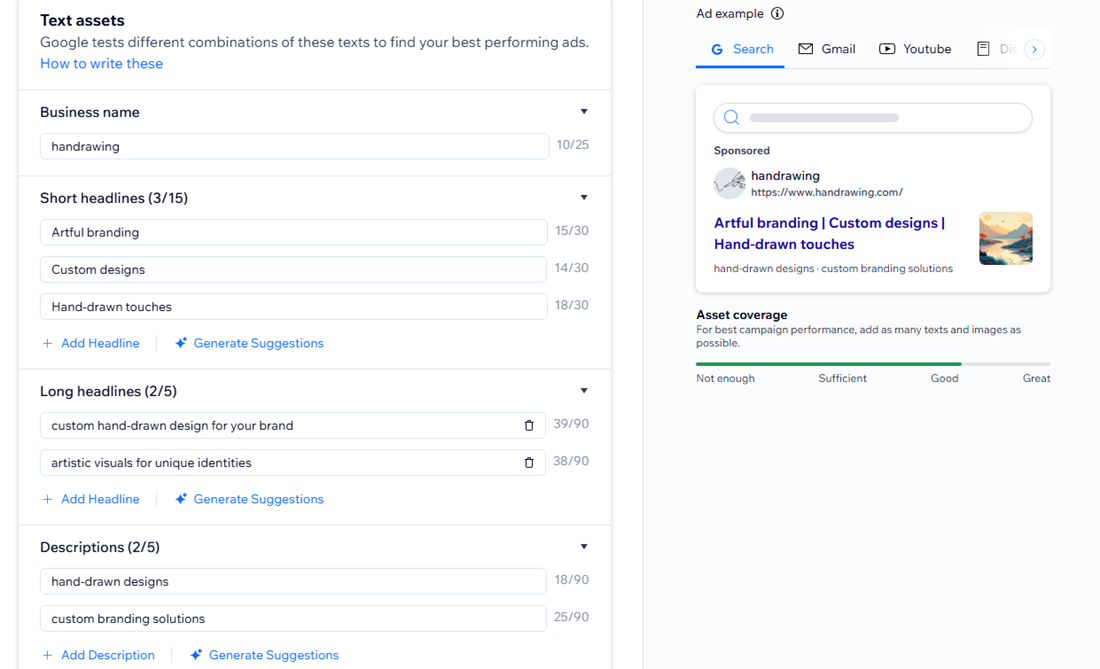
 to add an image from your media manager or generate an image with AI.
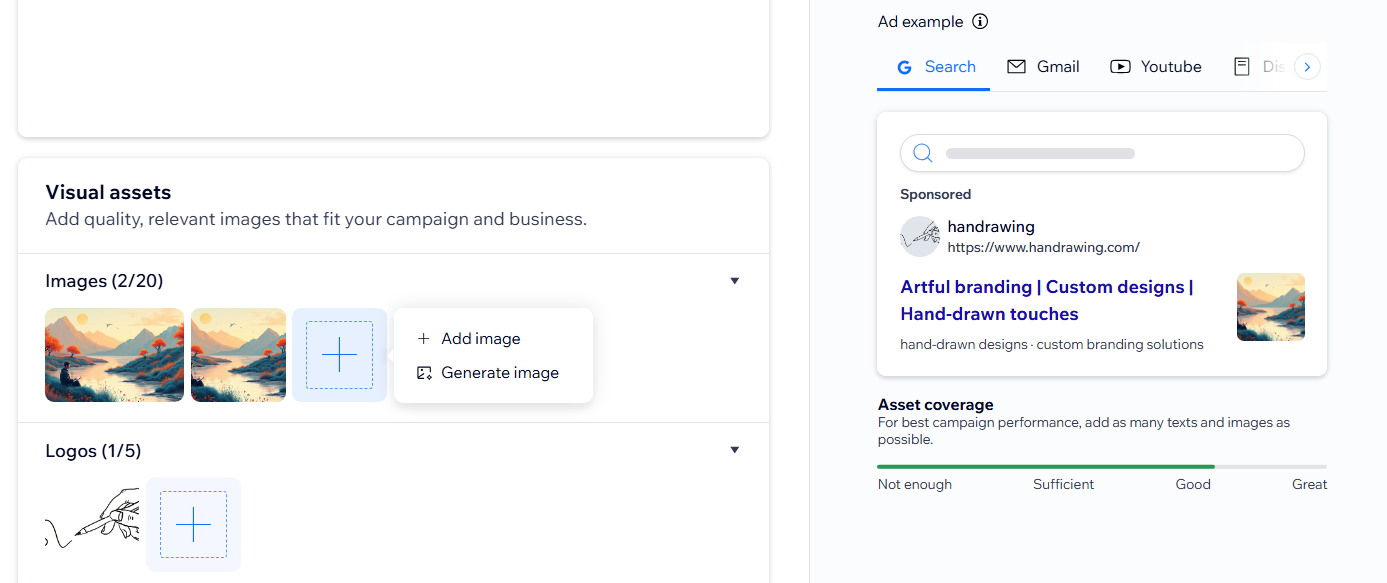
PMAX Sales campaign
Managing your campaign
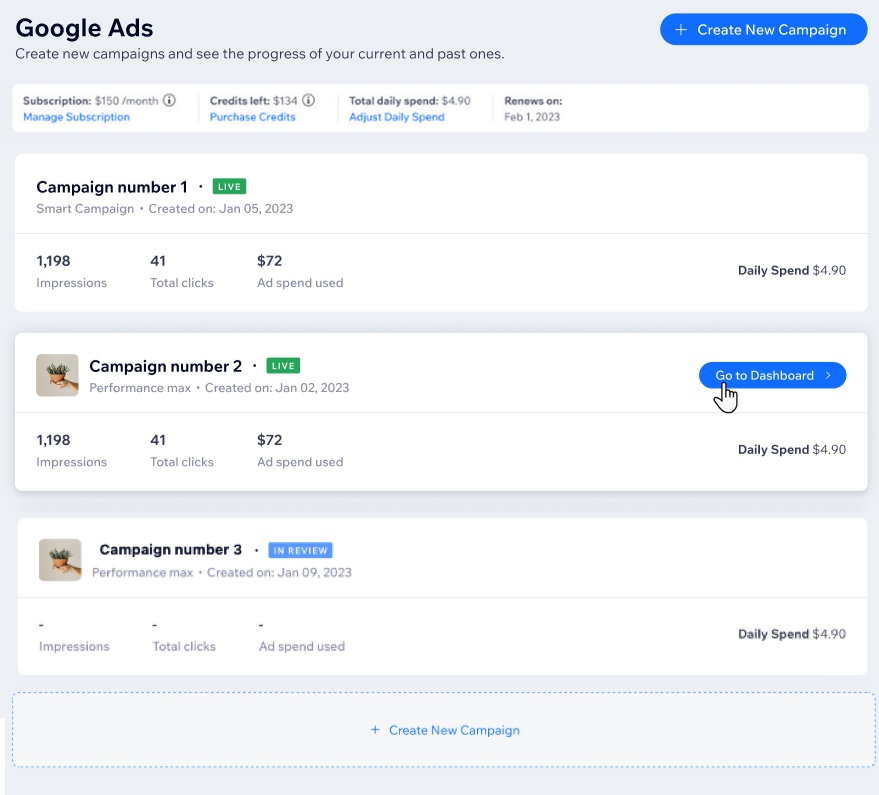
Manage your Google Ads campaigns directly from your site’s dashboard. You can edit, pause, or resume your campaigns at any time to match your marketing goals or respond to changing business needs.
To manage your campaign:
- Go to Google Ads in your site's dashboard.
- Hover over the relevant campaign and click Go to Dashboard.
- Choose what you want to do:
Edit campaign
Pause campaign
Resume campaign
FAQs
Learn more about creating and managing Google Ads campaigns with Wix.
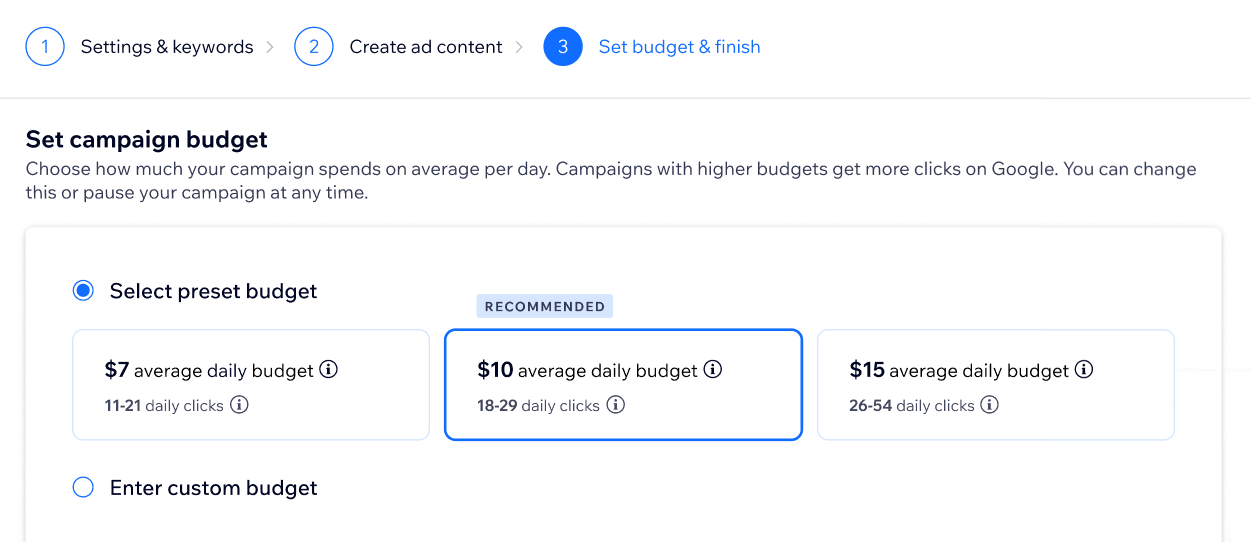
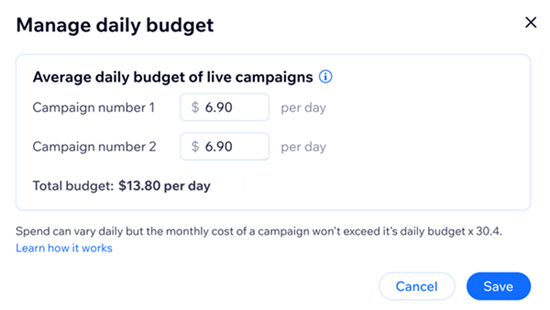
How do I change the daily spend of my campaign?
Why am I seeing USD as the currency on my campaign budget page?
How am I charged for my daily campaign budget?
Can I connect an existing Google Ads account to my Google Ads with Wix campaign?
What is the difference between Performance Max Sales campaigns and Performance Max Leads campaigns?
What are the benefits of creating multiple campaigns?
Is there a limit on the number of campaigns I can create?
What are the labels next to my campaigns on the dashboard?
How long should I keep multiple campaigns running if I am comparing them for performance?
