

Dine by Wix: Customizing Your Site on the App
4 min
In this article
- Adding ordering and reservation sections
- Adding an 'Order Now' button to the header
- Showcasing your dishes in a gallery
- Managing your restaurant's info and display settings
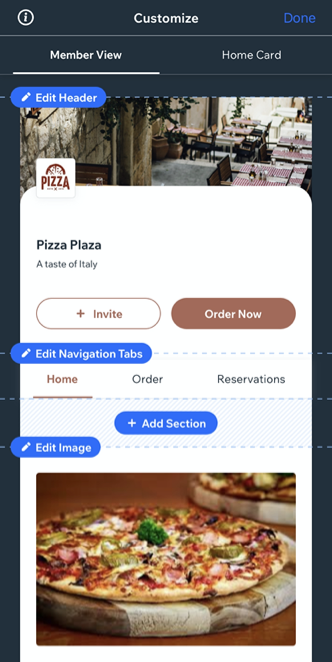
Customize how your restaurant looks and functions on the Dine by Wix app and prioritize the most relevant information for your customers. Add online ordering and reservation sections, a shortcut to 'Order Now' in the header, and a gallery of your dishes to encourage customers to place an order.
Where do I go in order to customize my site on the app?
 at the bottom.
Important:
This article explains how to customize restaurant elements on the Dine by Wix app. Learn how to customize general features (e.g. the header, navigation tabs and more).
In this article, learn how to:
Adding ordering and reservation sections
Add an ordering section to your site on the Dine by Wix app so that your customers can order your meals in just one click. You can also add a reservations section to allow people to book tables at your restaurant directly from the app on their mobile.
Important:
Before adding online ordering and reservations to the Dine by Wix app, you must first enable both features from your dashboard on a desktop. Learn how to add online ordering and reservations to your restaurant.
To add online ordering and reservation sections:
- Tap + Add Section.
- Scroll through the sections and tap Restaurants.
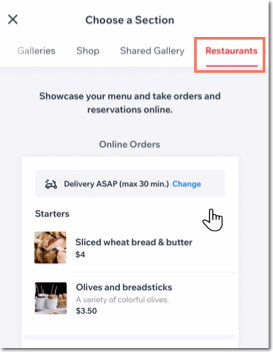
- Choose the section you want to include:
- Online Orders: Customers can view your menu and place orders from the Dine by Wix app.
- Reservations: Customers can book a table from the Dine by Wix app.
- Enter a title for the new section under Section Title.
Note: You can also disable the toggle if you want to hide the section title. - Tap Add.
Adding an 'Order Now' button to the header
Add an 'Order Now' button to your site's header in Dine by Wix to grab your customers' attention as soon as they enter your site.
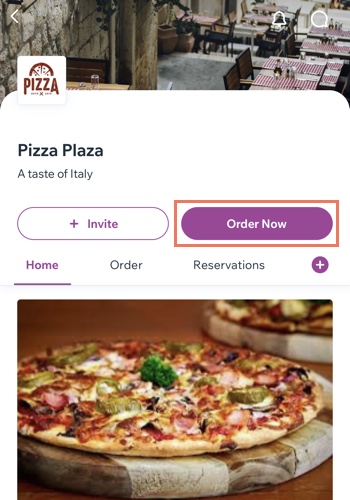
To add an 'Order Now' button to the header:
- Tap Edit Header at the top.
- Scroll down and enable the Show Custom Button toggle.
- Tap the Select Action drop-down and select Order from restaurant.

- Edit the text that appears inside the header button under Button Label.
- Tap Save at the top right.
Tip:
You can also add custom order buttons to a specific navigation tab.
Showcasing your dishes in a gallery
Add a gallery of your tasty dishes to encourage your customers to order. All photos from your dashboard are automatically pulled into the gallery. You can rearrange and update photos from the dashboard.
To add a gallery:
- Navigate to the tab where you want the gallery and tap +Add Section
- Tap the Elements tab.
- Tap Content.
- Edit the section title for your gallery e.g. 'Our Gallery'.
- Tap the Add icon at the bottom left.
- Tap Gallery.
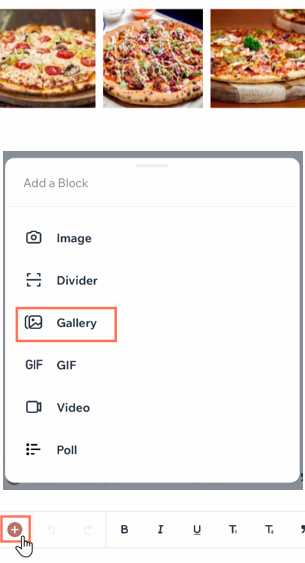
- Upload media from your device or the Media Manager.
- When you're done tap Publish at the top right.
- Tap Add.
Tip:
You can also add standalone images and videos in step 3.
Managing your restaurant's info and display settings
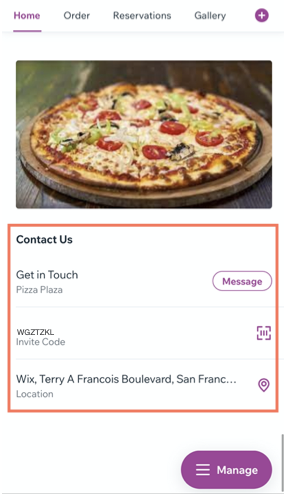
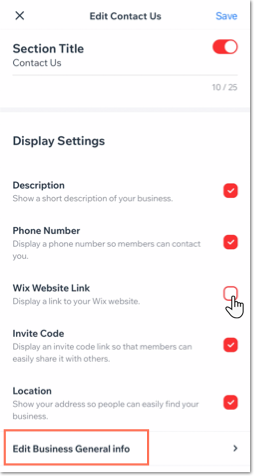
If you've added a 'Contact Us' section to your site, choose what info to display to customers who are viewing your restaurant from their mobile devices.
To manage your restaurant's info and display settings:
- Go to the 'Contact Us' section and tap Edit Contact Us above the section.
Note: If you don't have a contact section yet tap Add Section then Contact Us under General. - Tap Design Section.
- Under Display Settings select the checkboxes next to the information you want to be visible to potential customers:
- Description: A short description of your restaurant.
- Phone Number: Your business phone number.
- Wix Website Link: A link to your restaurant site.
- Invite Code: Your member app invite code for customers to share with others.
- Location: Your restaurant's location.
- (Optional) Tap Edit General Business Info to update your restaurant's main information including email, currency, phone number, and location. When you've finished updating tap Save.
What's next?
Now you're ready to invite your customers and potential customers to join your site on the Dine by Wix app. Learn How.
