

Desktop POS: Selling to Clients Using POS Checkout
5 min
In this article
- Setting up a card reader
- Setting up manual card entry
- Selling using POS Checkout
- FAQs
Use POS Checkout to sell in person using your computer dashboard. You can collect payment for Store products, appointments booked through Wix Bookings, Wix Restaurants (New) menu items, and custom charges.
You can accept cash payments or record a payment as Other without any setup, but in order to accept payments via card reader, or manually enter card details, you must first set these payment methods up by following the steps below.
Important:
You can currently only use POS Checkout to sell Wix Restaurants (New) menu items for your default restaurant location. Learn more about multiple restaurant locations.
Setting up a card reader
Important:
- Accepting payment using a card reader is currently available only for merchants in the US, UK and Canada.
- The Desktop Card reader is currently no longer for sale. Alternatively, you can purchase our Wix POS Go card reader from our Wix POS shop.
Before you can set up your card reader to start collecting payment in person from clients, you need to connect to Wix Payments, activate Wix Point of Sale as a payment method and purchase the reader. You can use both the Wix POS Go or the Desktop Card Reader with POS Checkout.
To set up payment using a card reader:
- Connect to Wix Payments.
- Purchase the Wix POS Go from our Wix POS shop.
- Enable Wix Point of Sale:
- Go to Accept Payments in your site's dashboard.
- Click Accept next to Wix Point of Sale.
- Pair your card reader with your account.
Setting up manual card entry
Before you can accept payment by manually entering your clients’ credit or debit card details, you need to connect to a payment provider that supports this option.
Learn more about accepting payment using manual card entry.
Selling using POS Checkout
After setting up your preferred payment methods (or without any additional setup, if you only wish to receive cash payments, or record payments as Other), you can start using POS Checkout to sell your store products, services, menu items or accepting payment for custom amounts from clients.
To sell using POS Checkout:
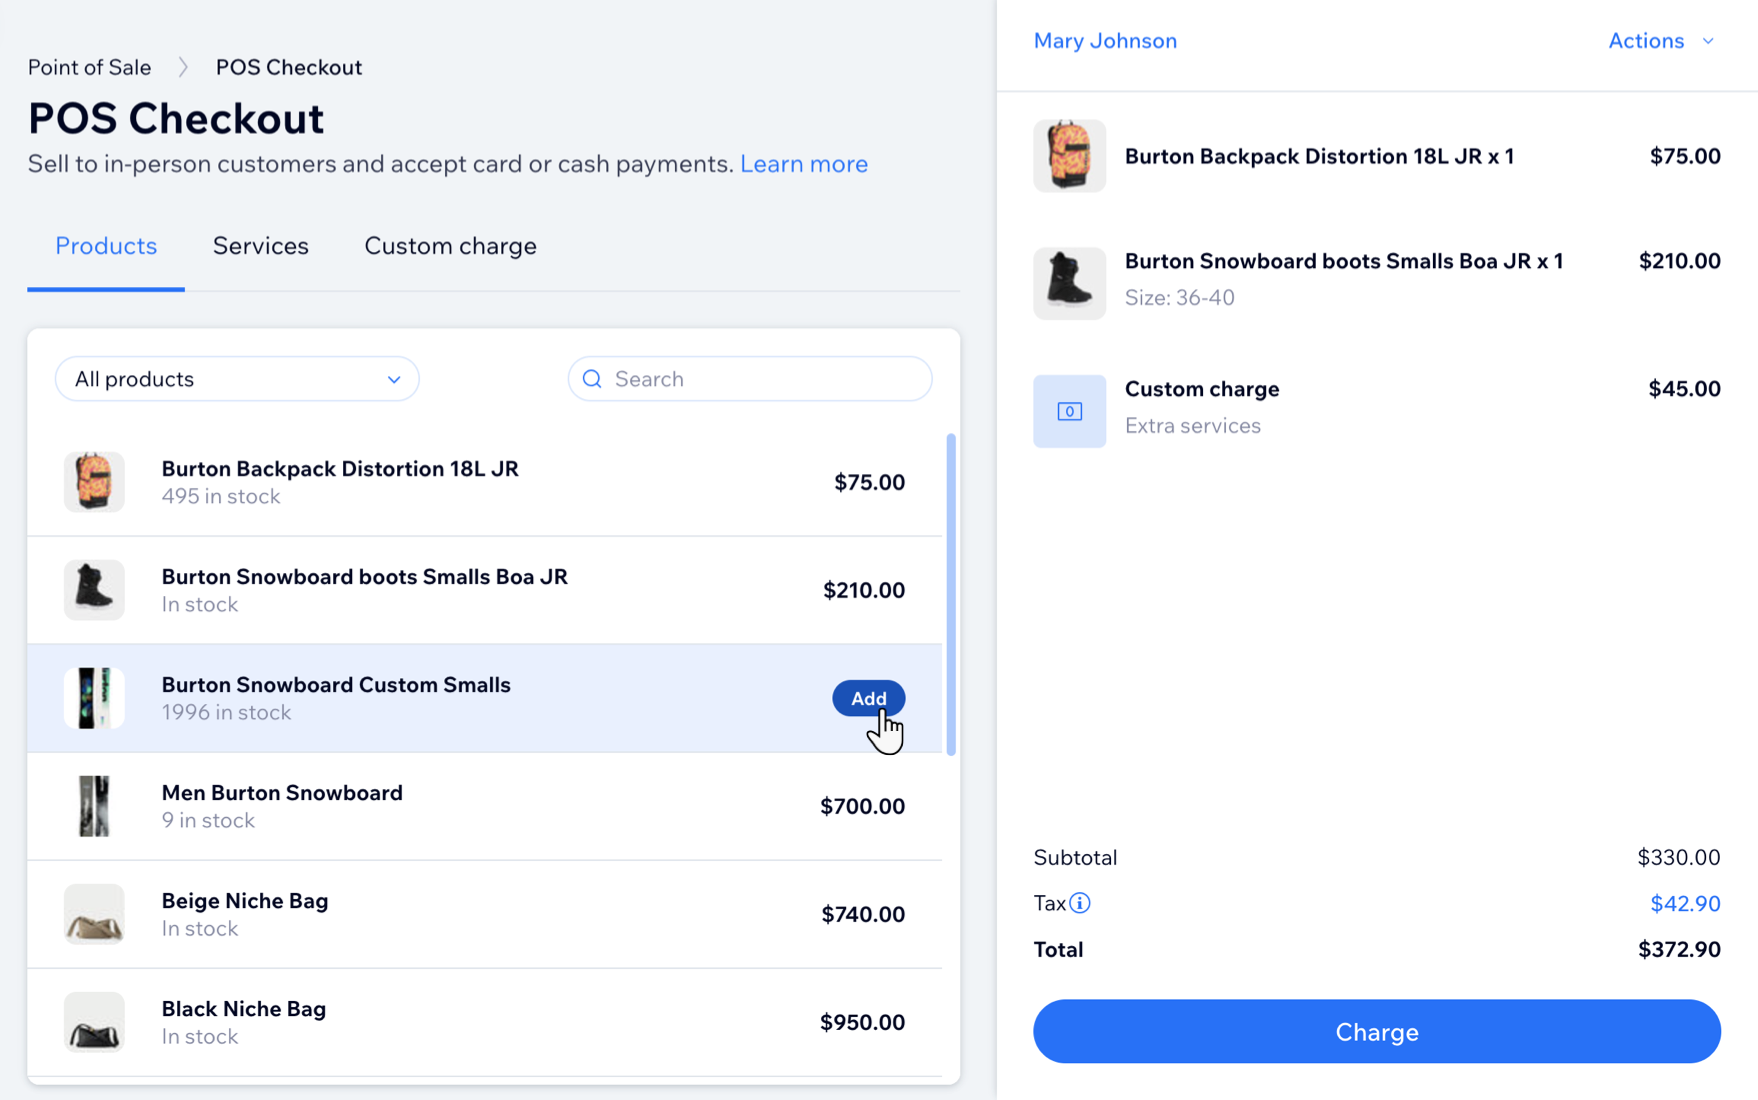
- Go to POS Checkout in your site's dashboard.
- Add items to the cart:
- Add store items:
- Click the Products tab.
- Click a product to add it to the cart.
- If the product has options, select them and click Add to Cart.
- Add an appointment:
- Click the Services tab.
- Click an appointment to add it to the cart.
- (Optional) If the appointment has options, add the location, staff, date and time, and price, then click Add to Cart.
- Add a menu item:
- Click the Menu items tab.
- Click an item to add it to the cart.
- If the item has options, select them and click Add to Cart.
- Add a custom charge:
- Click the Custom charge tab.
- Enter the amount you want to charge your client.
- Enter a short description of what the charge is for.
- Click + Add to Cart.
- Add store items:
- (Optional) Assign a customer to the sale:
Note: You must add a customer for your Wix Bookings appointments to complete checkout.- Click Select Customer.
- Select an option:
- Select a saved customer: Search for the client and select them.
- Create a new customer:
- Click +Add Contact.
- Enter the client's details.
- Click Save.
- (Optional) Add a discount:
- Click Actions and Add discount:
- Percentage discount: Enter the percentage and click the Percent icon
 .
. - Amount discount: Enter the discount and click the Amount icon
 .
.
- Percentage discount: Enter the percentage and click the Percent icon
- Click Add Discount.
- Click Actions and Add discount:
- (Optional) Redeem a coupon:
- Click Actions and Redeem a coupon.
- Select a coupon and click Apply.
- (Optional) Edit the tax:
- Click the tax amount.
- Click Don't charge tax for this sale / Charge tax for this sale to turn tax collection on or off.
- Click Charge.
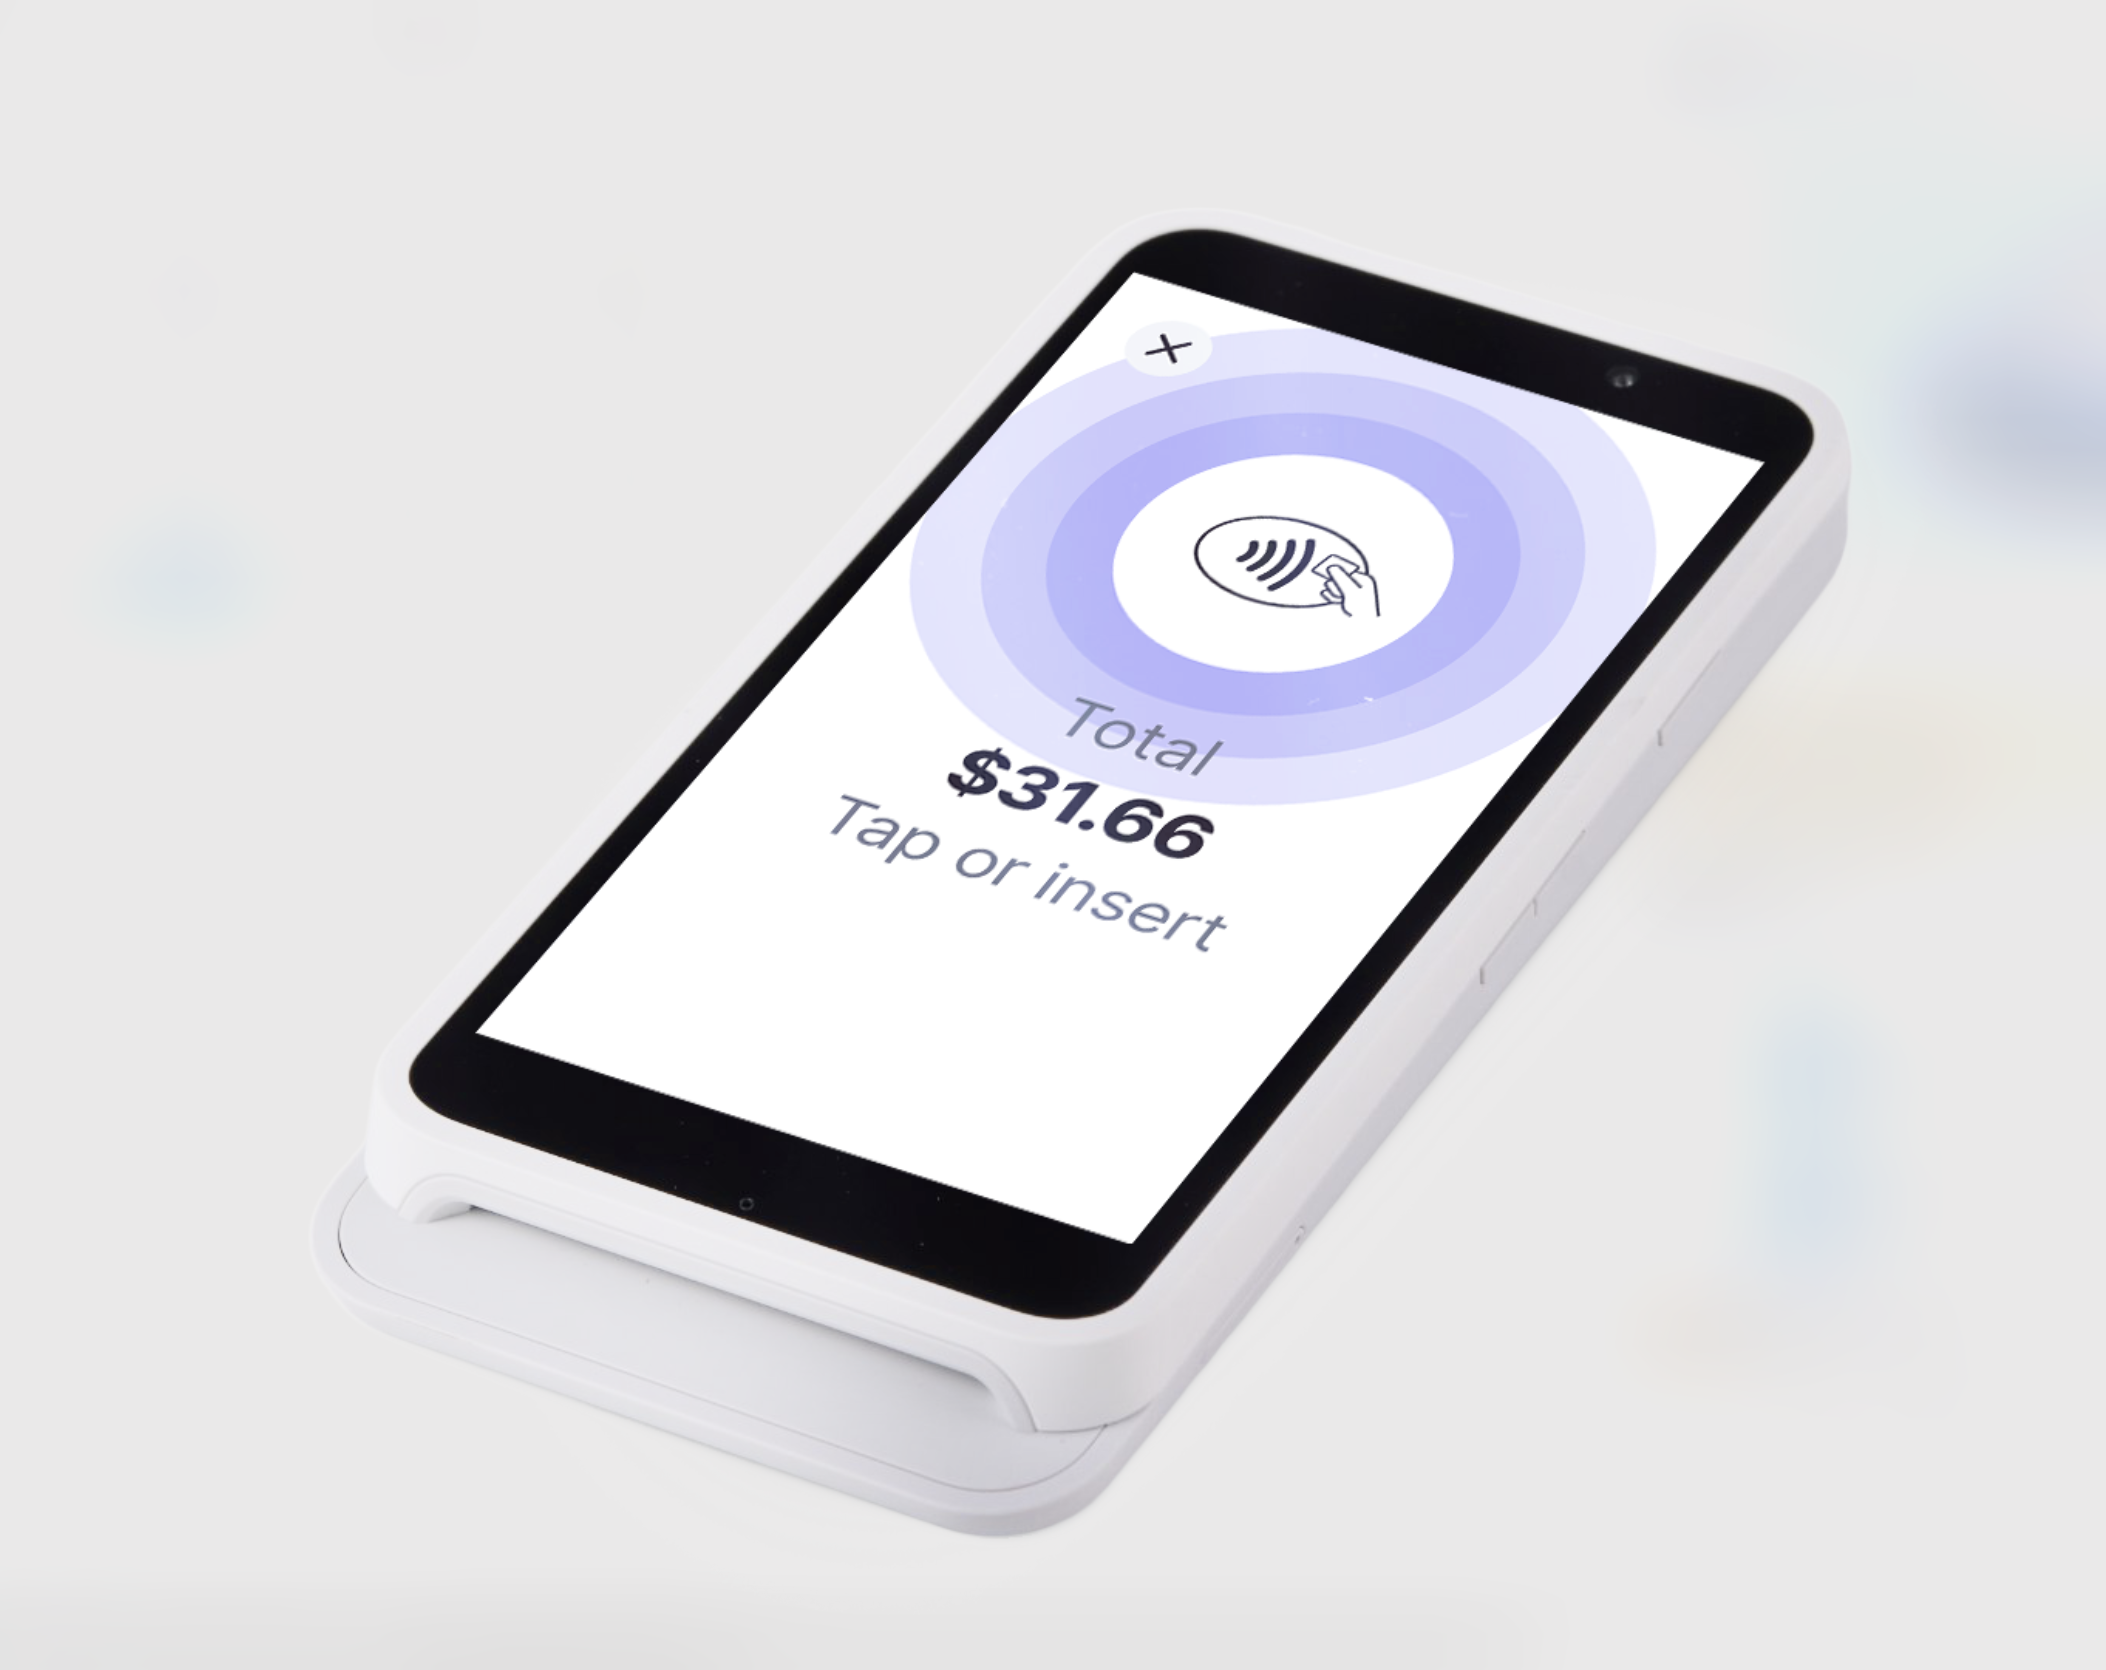
- Select how you want to receive payment.
Accept credit/debit card payment
Manually enter credit card details
Accept cash payment
Other payment types
FAQs
Click a question below to learn more.
Can I enable or disable tax collect for a specific sale?
Which Wix Bookings services can't I sell at POS Checkout?
