

CMS: Hiding, Sorting, and Filtering Fields in Your Collection View
8 min
In this article
- Hiding and reordering fields in your collection
- Sorting items in your collection
- Adding filters to fields in your collection views
- FAQs
Manage the fields in your CMS (Content Management System) collection to keep them organized. You can choose which fields appear in your collection view and reorder them as needed. Add filters to fields to only show items in your collection view that meet your criteria. You can automatically sort items based on conditions and apply the same item order to your live site's connected elements.
Before making adjustments to your collection, you can create a custom collection view that keeps the same filters and sorts for you and site collaborators to use later.
Important:
- Hiding and filtering fields in your collection view does not affect the content on your live site, which connects via datasets. You can, however, use Status fields to make items visible or hidden on your live site.
- Sorting items in your collection view only affects the order of items on your live site if you enable the 'Mirror on Site' feature. Sort conditions you add to datasets override the order of items in your collection whether or not you've enabled 'Mirror on Site'.
Hiding and reordering fields in your collection
Choose which fields you want to see while managing your collection and the order in which they appear.
To hide or reorder fields:
- Go to CMS in your site's dashboard. Alternatively, you can click CMS
 in your editor, then click Your Collections.
 - Click the relevant collection.
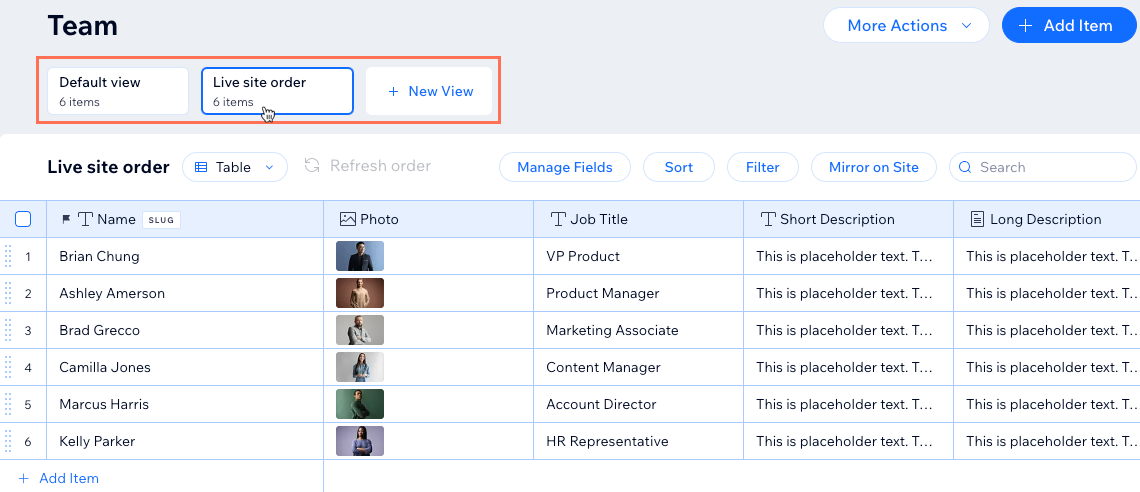
- (If you have multiple collection views) Select the relevant collection view at the top.
- Click Manage Fields.
- Choose what you want to do:
- Show or hide fields: Click the checkboxes next to the relevant fields to show or hide them.
- Reorder fields: Click and drag the Reorder icons
 next to the fields to change their order.
Tip:
Hover over a field and click the More Actions icon  to edit, duplicate, or delete it.
to edit, duplicate, or delete it. 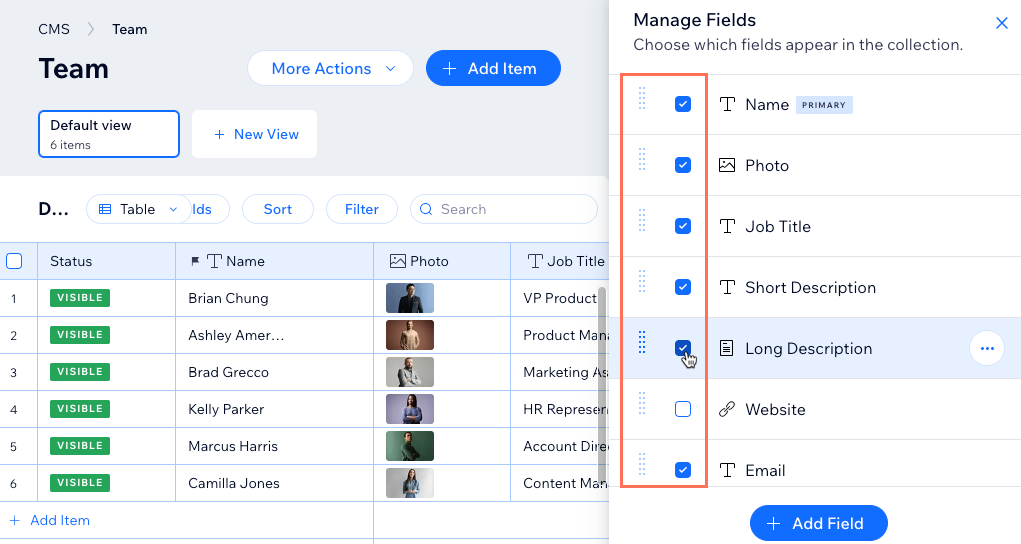
Sorting items in your collection
Apply your own sorting criteria to a field to sort its items in a certain order. By default, the items are sorted by the time and date in which they were added to the collection, with newer items at the top. You can use the same order in your collection as on your live site by enabling Mirror on Site. If enabled, any sorts you've added to datasets continue to affect the order of items on your live site and override the order of your mirrored collection view.
To sort items your collection:
- Go to CMS in your site's dashboard. Alternatively, you can click CMS in your editor, then click Your Collections.
- Click the relevant collection.
- (If you have multiple collection views) Select the view at the top that you want to sort items in.
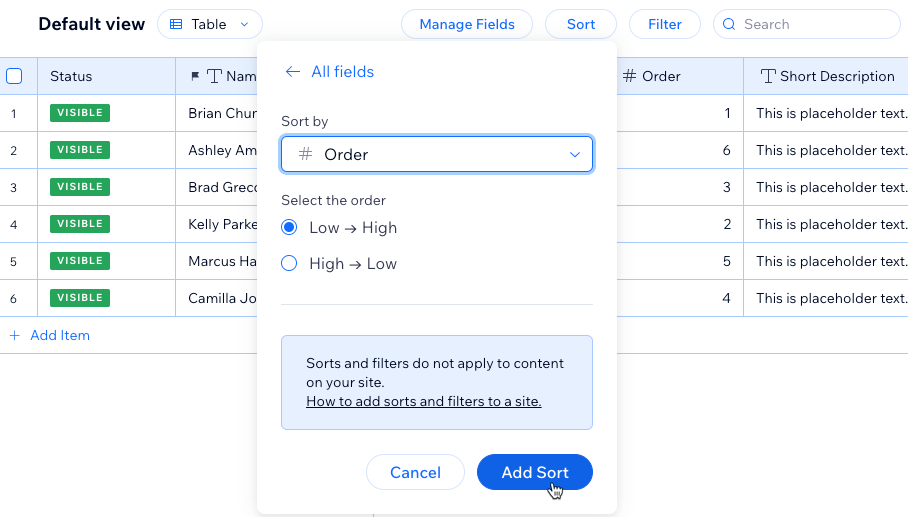
- Click Sort at the top of your collection.
- Click + Add a Sort.
- Click the Sort by drop-down and choose the field you want to sort.
- Select a sorting option under Select the order (e.g. A-Z, Low-High, Oldest-Newest). The options vary depending on the field type.
- Click Add Sort.
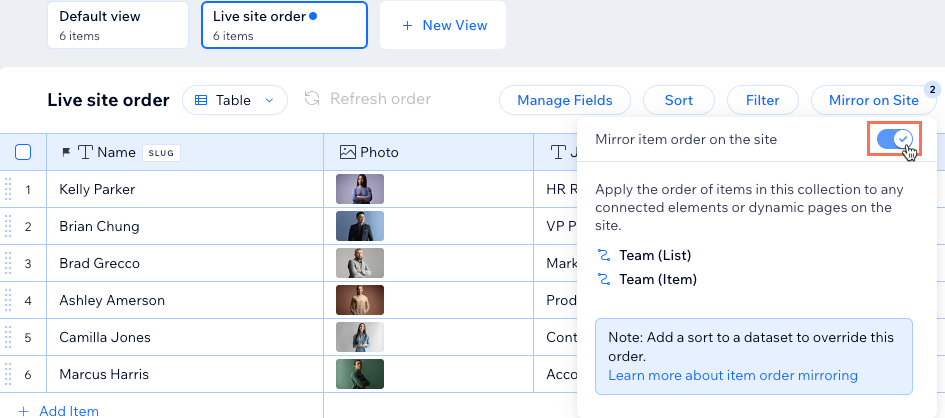
- (Optional) Mirror the item order to your live site's connected elements:
- Click Mirror on Site at the top of the collection.
- Enable the toggle next to Mirror item order on the site.
Tips:
- From the Table layout, you can manually sort the items too. Click and drag the Reorder icon
 next to the relevant items to change their order. This feature is not yet released in all Wix accounts.
 - To edit an existing sort, click Sort, then click the Edit icon
 or click the Delete icon
  to remove it.
Adding filters to fields in your collection views
Add filters to fields to only see items in your collection that match the conditions you define. For example, you could add a filter that only shows items that do or do not contain a specific value. Or you could clean up the collection view by filtering for items where the cell is not empty.
Tips:
- These collection view filters do not filter items from your live site. Add filters to datasets or use the control item visibility feature to include or exclude items in your live site's connected elements.
- You cannot add filters to a collection view if it has the 'Mirror on Site' feature enabled. Likewise, you cannot mirror the collection view’s order if the view contains a filter.
To filter items by field values:
- Go to CMS in your site's dashboard. Alternatively, you can click CMS in your editor, then click Your Collections.
- Click the relevant collection.
- (If you have multiple collection views) Select the relevant collection view at the top.
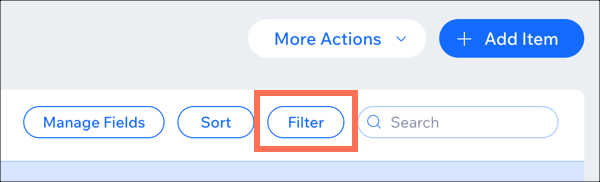
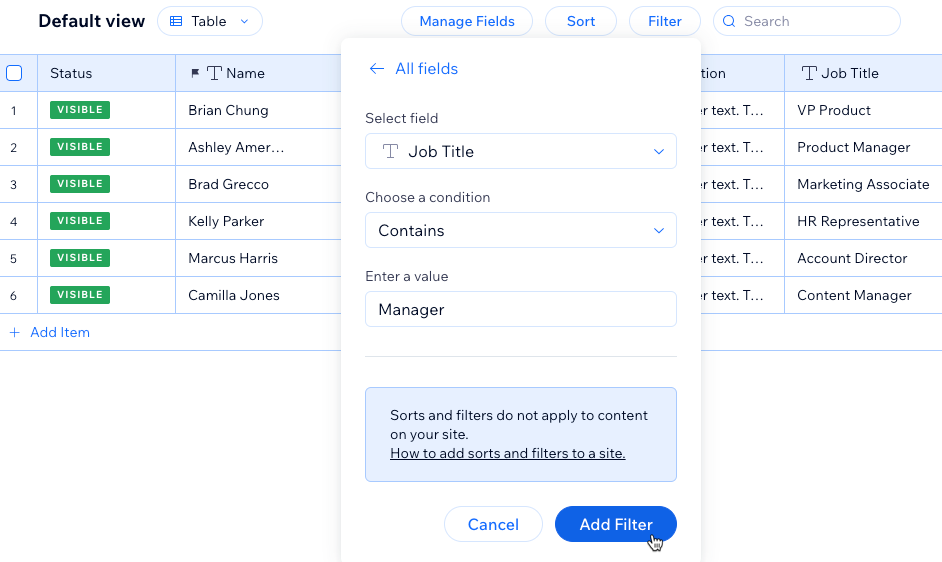
- Click Filter at the top right.
- Click + New Filter.
- Click the Select Field drop-down and choose the field you want to filter.
- Click the Choose a Condition drop-down and select the criteria for your filter. The options vary depending on the field type.
- (If necessary) Click the Enter a value field and enter the value you want to use for the condition.
- Click Add Filter.
Tip:
To edit an existing filter, click Filter, then click the Edit icon or click the Delete icon to remove it.
or click the Delete icon to remove it. FAQs
Click below for answers to common questions about your collection view.
Can I hide items in my collection to prevent them from appearing on the page?
Can I control the order in which the items display on my live site from my collection?
Can I add a filter to my collection view if it has 'Mirror on Site' enabled?
How can I sort my items in a more logical way when using a mixture of letters and numbers in a 'Text' field type?
