

CMS: Adding a Field to a Collection
5 min
In this article
- Adding new fields to your CMS collection
- FAQs
Add more fields to your CMS (Content Management System) collection to store additional information about the collection items. Choose from a wide range of field types, then give the field a name and a helpful tooltip that appears only in your collection.
Adding new fields to your CMS collection
When adding a new field to your collection, choose the field that best fits the type of content you want to store (e.g. text, image, date, address). Learn more about the various types of content you can store in each field type.
To add a field to your CMS collection:
- Go to CMS in your site's dashboard. Alternatively, you can click CMS
 in your editor, then click Your Collections.
 - Click the relevant collection.
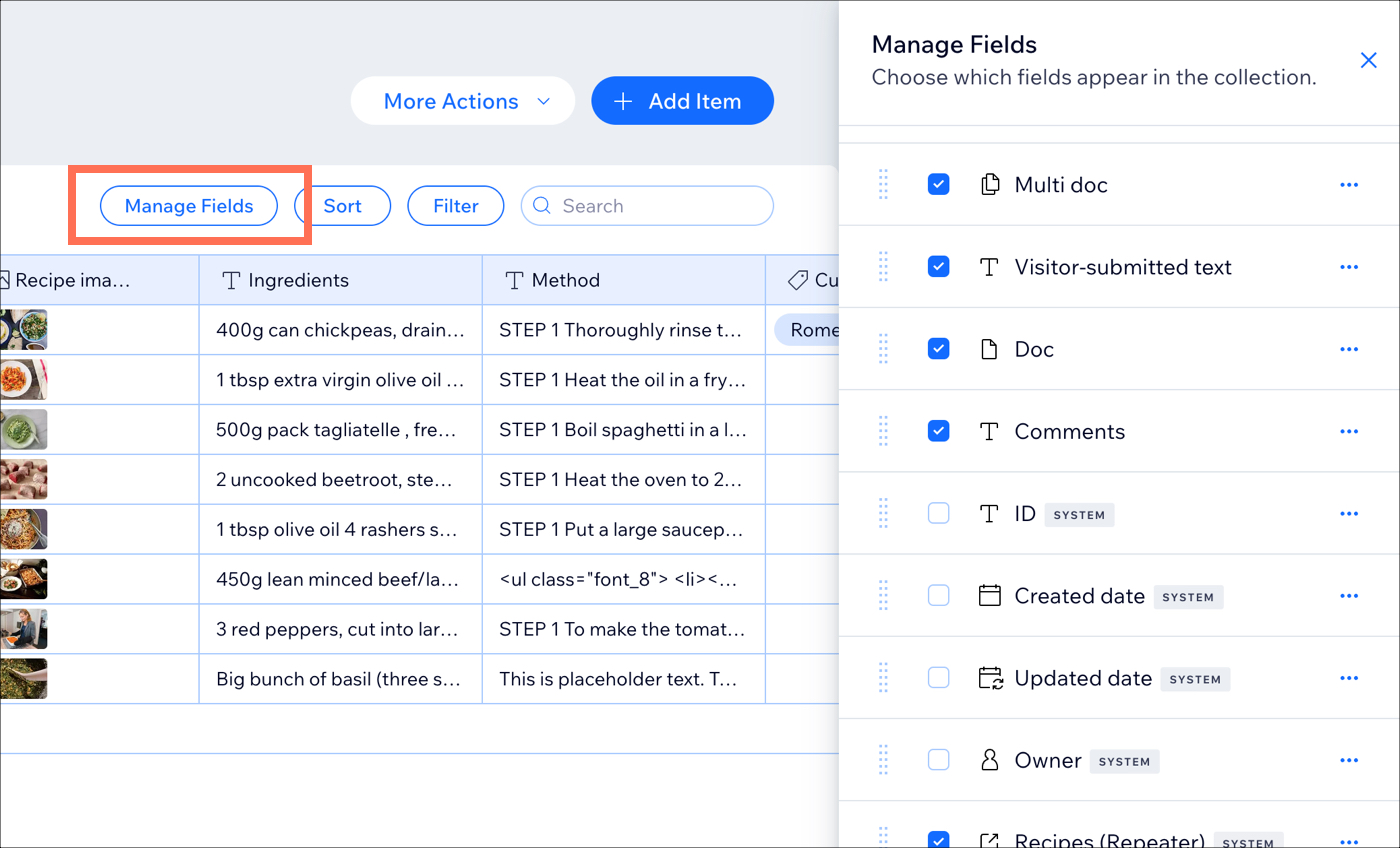
- Click Manage Fields.
- Click + Add Field.
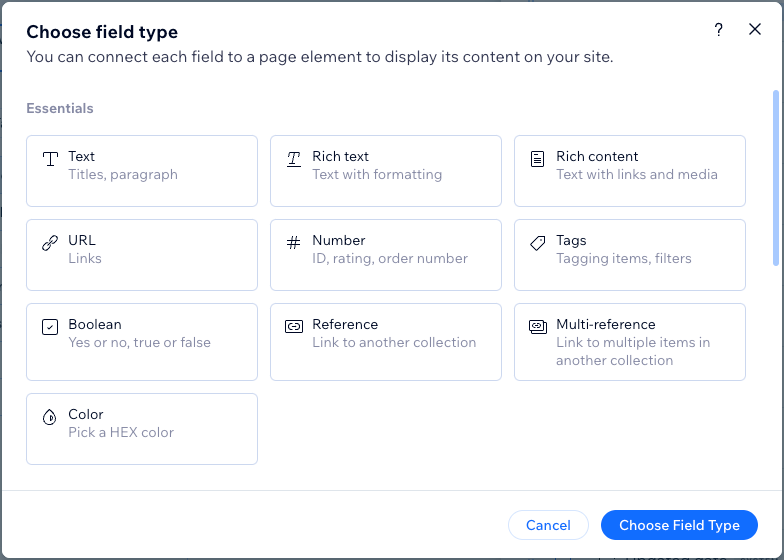
- Choose the type of field you want to add and click Choose Field Type.
- Enter the Field name.
- (Velo only) If necessary, update the Field ID, which is used in the site's code. You cannot update this ID later.
- (Optional) Enter help text to include a tooltip in your collection next to the field name.
- (Text and Address field types only) Click the Personally Identifiable Information toggle to encrypt sensitive information like social security and passport numbers.
- Click Save.
Next, learn how to:
- Add field validations to make the field a mandatory 'required' field.
- Add default values that get added to the field automatically when you add a new item. You can replace the default values with your own content when needed.
FAQs
Click below for answers to our most frequently asked questions about adding fields.
What content can I store in each field type?
Can I make mandatory 'required' fields?
Can I add default values that automatically populate when new items are added?
