


CMS: Adding and Setting Up a Ratings Display Element
In this article
- Step 1 | Add and set up the ratings display element
- Step 2 | Connect the ratings display to the CMS
- FAQs
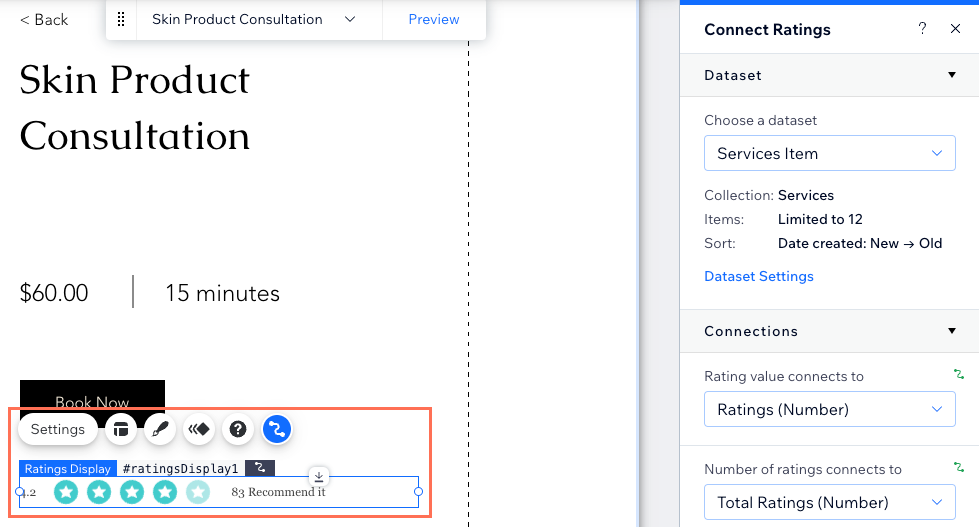
Add a ratings display element to your site to showcase user feedback and build trust with your audience. After adding and customizing the ratings display element, you connect it to your
CMS (Content Management System) collection and choose which Number fields to use for the rating values and total ratings.
Need to collect ratings from visitors?
Add and set up the ratings input element, which allows visitors to click to rate your products, features, services and more.
Before you begin:
- Make sure to add the CMS to your site or enable coding if you haven't already.
- Make sure you have a CMS collection that stores your ratings.
Step 1 | Add and set up the ratings display element
Add the ratings display element to your page and customize its settings, layout, and design.
Wix Editor
Studio Editor
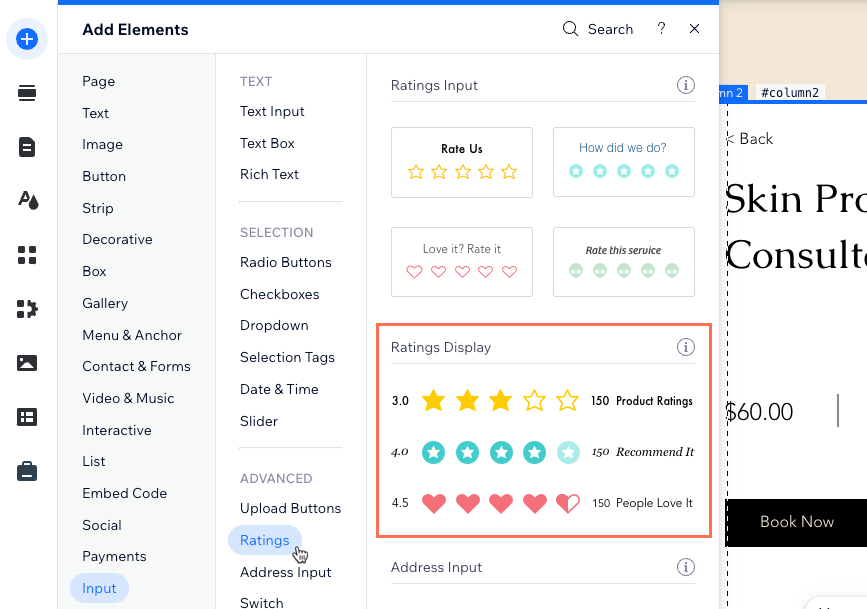
- Click Add Elements
 on the left side of the editor.
 - Click Input.
- Click Ratings.
- Click and drag the Ratings Input element of your choice onto the page.
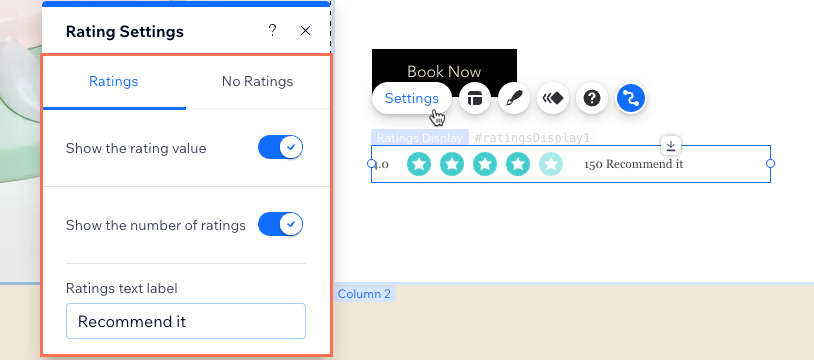
- Click Settings on the ratings display element and click the relevant tab to choose what is shown when there are ratings and when there are no ratings:
- Ratings: Choose what you want to show when there are ratings:
- Show the rating value: Enable the toggle to show the rating value as a number in addition to the rating icons.
- Show the number of ratings: Enable the toggle to show the total number of rankings.
- Ratings text label: Enter the text that appears next to the ratings (e.g. "Recommend it").
- No Ratings: Click the No Ratings tab and choose what displays when the element loads and there are no ratings: Nothing, Icons, or Placeholder text
- Ratings: Choose what you want to show when there are ratings:
- Click the Layout icon
 to adjust the size, spacing, value placement, alignment and text direction.
 - Click the Design icon
 to choose a preset design. Then click Customize Design to adjust the design further.
Step 2 | Connect the ratings display to the CMS
Connect the ratings display element to a dataset that binds to your CMS collection that stores the rankings. You can connect the rating values and the number of ratings to a Number field type or a
Reference field.
Wix Editor
Studio Editor
- In your editor, click the ratings display element.
- Click the Connect to CMS icon
 .
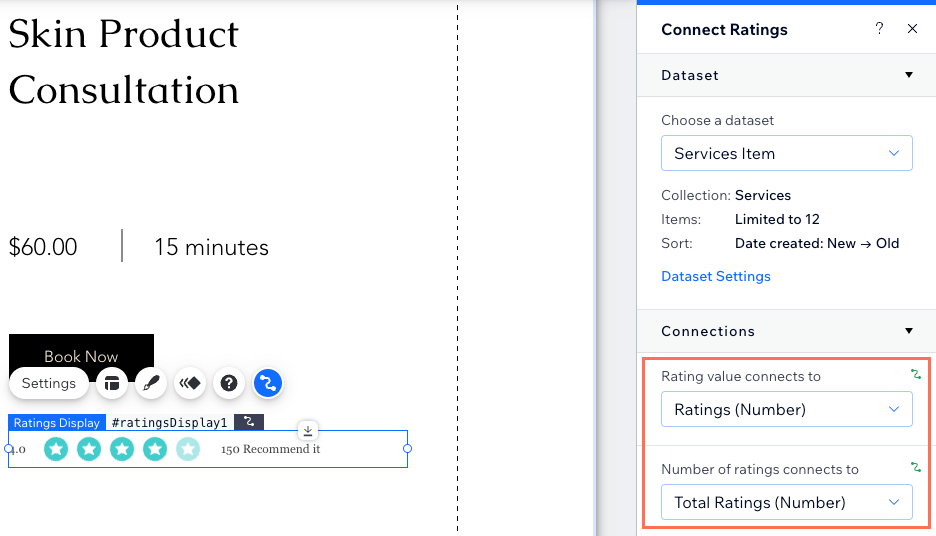
. - Click the Choose a dataset drop-down and select an existing dataset that connects to your collection. Alternatively, select Add a Dataset, then choose the collection you want to connect, give the dataset a name and click Create.
- Click the Rating value connects to drop-down and select the Number field that contains the rating values you want to display.
Tip: Select + Add to add a Number field to your collection that will store the rating values. - Click the Number of ratings connects to drop-down and select a Number field that contains the total number of ratings.
Tip: Select + Add to add a Number field to your collection that will store the number of ratings.
- Set the dataset mode and collection permissions:
- Click Dataset Settings in the panel on the right.
- (Optional) Click the permission type next to Permissions to determine who can view, add, update, or delete collection content.
- Click the Dataset mode drop-down and select Read or Read & Write.
FAQs
Click below for answers to common questions about displaying ratings on your site.
Can I use Velo to capture and display ratings?
What type of field can I connect the ratings display element to?
How can I let visitors rate my features, products and services?
What are the dataset modes I can use with the ratings display element?
Are there any 3rd party apps I can add to handle ratings and reviews?
