Your online invitation and its RSVP page are designed and managed entirely in Wixel. Customize the look of your invitation, add interactive features, fine-tune your RSVP settings, publish and share it, and stay on top of guest responses — all in one place.
Customizing the RSVP button
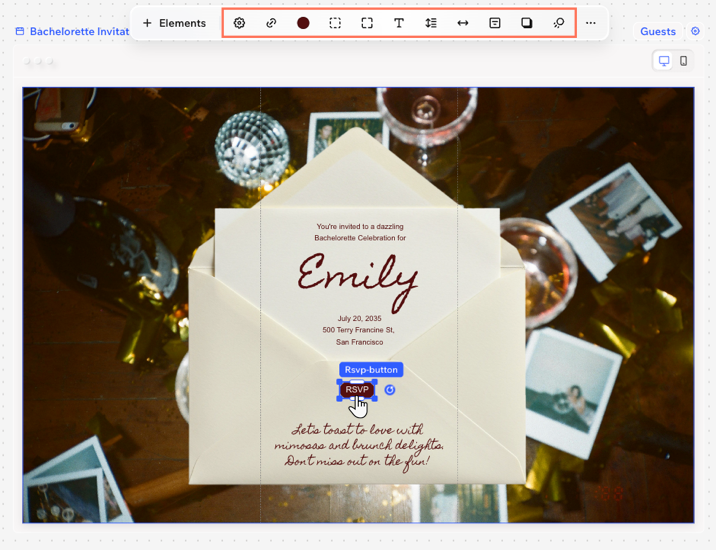
To turn your invitation into an online RSVP page, it must have an RSVP button. This button connects your invitation to a live RSVP page where your guests can send their response. Customize the button to match the look and feel of the invitation.
To customize the RSVP button:
- Select the RSVP button in the invitation.
- Customize the RSVP button:
Use the design options on the action bar to personalize the RSVP button:
- Borders
 : Define the borders of the button so that it stands out. Change the color, opacity, size, and border style.
 - Corners
 : Drag the slider to make the corners of your element more square or round.
Tip: Click the Settings icon  to design each corner separately.
 - Text
 : Customize the button text's font, size, color, and style.
 - Line height
 : Drag the slider to add or remove space above and below the text.
 - Letter spacing
 : Drag the slider to add or remove space between the letters.
 - Alignment
 : Change the placement of the text in the button.
 - Shadows
 : Add a shadow to give the element a 3D effect. When selecting a shadow, customize the color & opacity, distance, blur, and angle.
Choose where the button links to
- Click the Link button
 on the action bar.
 - Click the Links to drop-down and choose where to send visitors when they click on the RSVP button:
- Invite registration form: They are directed to the registration form in Wixel.
- External link: They are directed to an external URL.
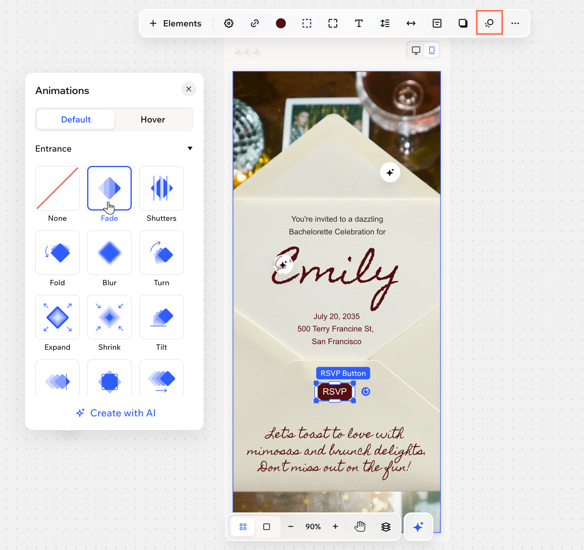
Add an animation to make the button interactive. Animated RSVP buttons help guide your invited guests through the invitation and increase response rates.
- Click the Animations icon
 on the action bar.
 - Select which state to add an animation for (Default or Hover):
- Default: How your animation appears as soon as someone lands on the page.
- Hover: The animation starts moving when the visitor's cursor hovers over the button.
- Select an animation from the available options.
- Entrance: The animation introduces an element to the screen - it only plays once, when the element first appears.
- Loop: The animation plays in a continuous loop.
- Create with AI: Create a custom animation for your button by describing what you want to see happen. For example, "Make the button burst into gold sparkles when hovered over".
Can't find an animation that speaks to you? Click Create with AI to generate a unique animation that makes the button move as you envision. For example: "Make the button sparkle when hovered over".
- Click the Settings icon
 on the action bar.
 - Set up your button using these options:
- Button text: Enter the text you want to display on your button, such as "RSVP" or "Sign up now".
- Choose what to show: Select what appears on your button:
- Text: Show only the button text.
- Text and icon: Show both text and an icon on the button.
- Icon position: Choose if the icon appears to the left or right of the text.
- Icon image: Choose the icon that appears on your button. Click the icon preview to select an image from your media manager.
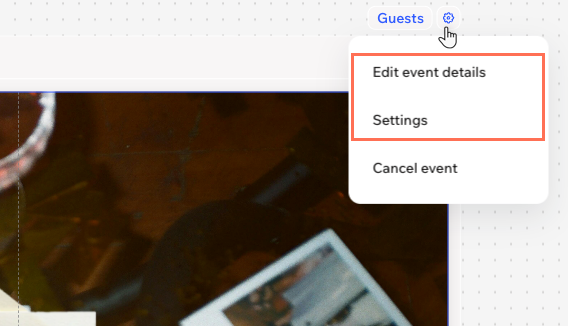
Customizing your RSVP settings
Fine-tune your event’s registration process and notifications to match your needs. Decide when guests can RSVP and set a clear guest limit so you do not overbook.
To customize your RSVP settings:
- Click the Settings icon
 next to Guests.
 - Choose what to customize:
Keep your event details up to date. The information you set here appears in the RSVP form and calendar invites for your guests, and helps you manage everything behind the scenes.
Editing these settings doesn’t affect the text on your invitation, so you can make the invitation exciting and memorable while keeping the event details clear and organized. For example, on a birthday invitation you could write "Come for the cake, stay for the fun", while the event details show "Linda's Birthday".
- Select Edit event details.
- Click Edit Details.
- Update the following details:
- Event title: Enter a clear name for your event (e.g. “Linda’s Birthday"). This is the title guests will see in emails and calendar invites.
- Date and time: Enable the Date and time is TBD toggle if you haven't finalized your event date or time. If it's disabled, add a start date and start time. To include when it ends, click + Add end date and time.
- Location: Enable the Location is TBD if your event location hasn't been decided yet. If disabled, enter the venue or address for the event.
- Click Save.
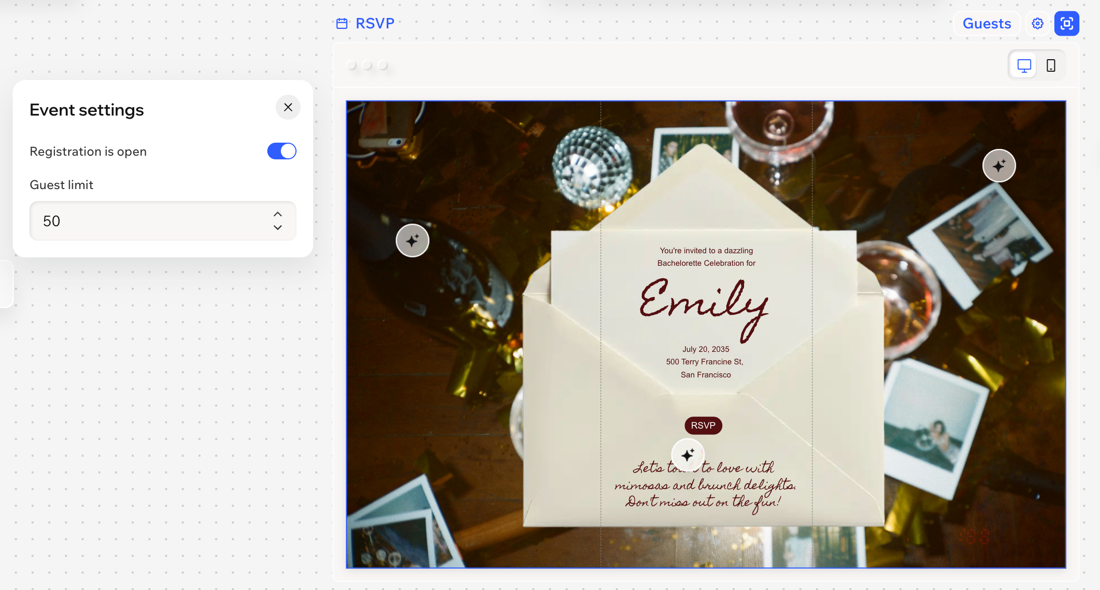
- Select Settings.
- Choose what to customize:
- Registration is open: Enable or disable the toggle to open or close registration.
- Enabled: Guests can continue to RSVP.
- Disabled: New submissions are no longer accepted.
- Guest limit: Set the maximum number of guests allowed for your event.
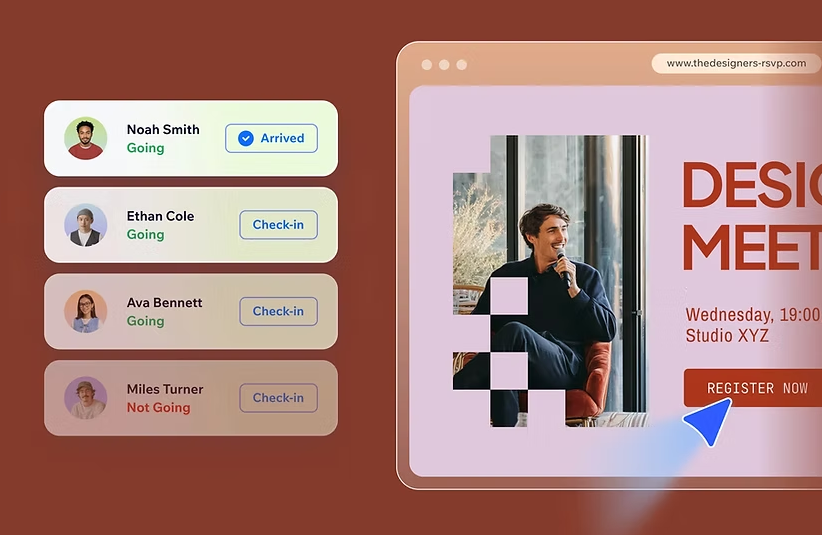
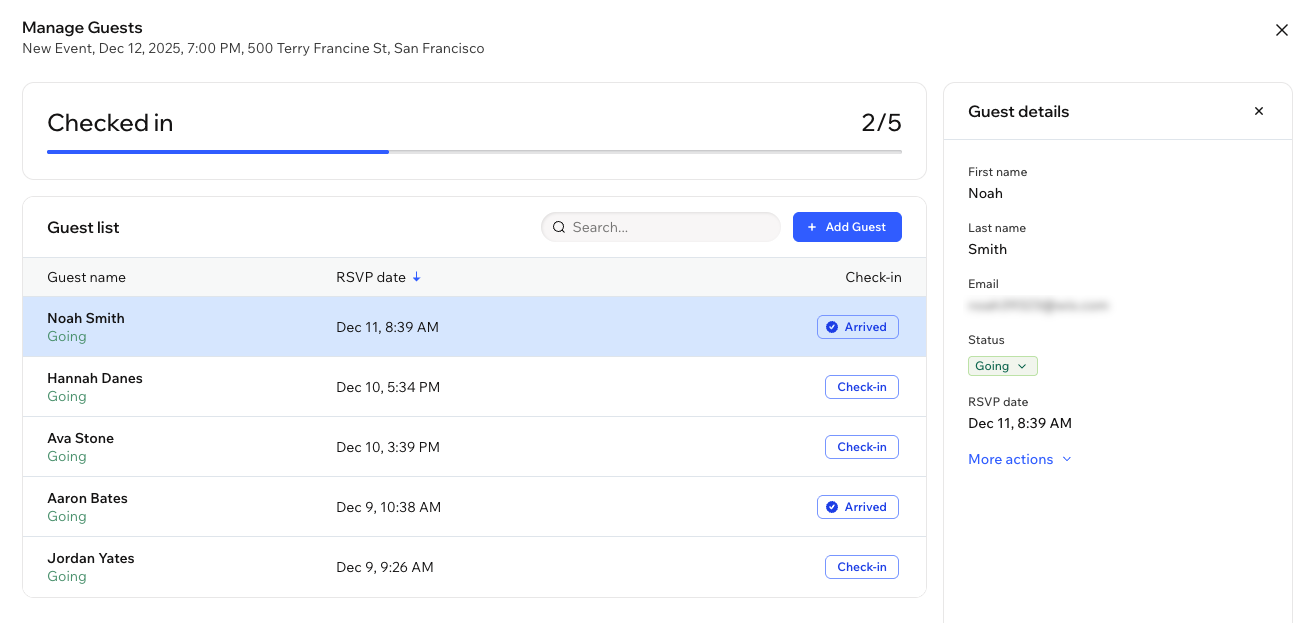
Managing your guest list
The guest list allows you to view all individuals attending your event. Review the information guests provided when they RSVP'd, add or remove guests, resend confirmation emails, and track attendance.
To manage your guest list:
- Go to your project in Wixel.
- Click Guests above the relevant invitation.
- Choose what to do:
Check guests in as they arrive at your event. Click Check-in next to the guest's name to mark them when arrived.
Edit guest details and RSVP status
Update a guest's information, including contact details and RSVP status.
- Click the relevant guest.
- Click the More actions drop-down on the right and select Edit guest details.
- Edit the first name, last name, email or guest's status (i.e. Going, Not Going).
If a guest is attending and they don't register through your RSVP link, you can add them yourself.
- Click + Add Guest.
- Enter the guest's details.
Tip: Add more guests to the event in bulk by clicking + Guest. - Click Add Guest(s).
You can remove any guests who have indicated they will not be attending your event, helping you keep your guest list up to date.
Note: If you have set a limited guest list, removing a guest clears their spot for other people to take it.
- Click the relevant guest.
- Click the More actions drop-down on the right and select Delete guest.
- Click Delete guest to confirm.
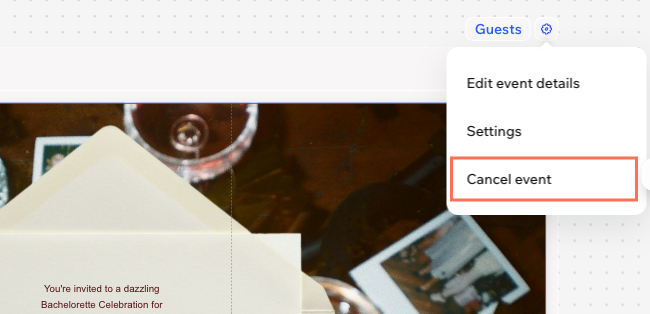
Cancelling an event
If you need to cancel a shared event, you can do so from the event's invitation in your project. When you cancel an event, the invite will show that registration is closed.
To cancel an event:
FAQs
Click a question below to learn more about this.
What’s the difference between an RSVP invitation and a regular invitation?
A regular invitation is a digital asset you can design and send out or download, but it doesn’t include a way for guests to respond. An invitation with an RSVP page, that includes an RSVP button, attaches an online page that collects responses and lets you manage guest information online.
How can I change the invitation's layout?
Change the layout of your invitation page to control how it looks on mobile and desktop.
Tip: The dotted line on the invitation marks the mobile cutout, showing the part of the page guests will see on their phones, while the full page displays on desktop.
- Click the frame of the RSVP page.
- Click Layout on the action bar.
- Select a layout option (e.g. Left, Center, Right) or drag the slider to move the mobile cutout.
When my invitation is ready, how can I share it?
You can share the invitation by generating a unique URL and sharing the link anywhere you like - by email, social, or messaging apps. Any changes you make to your invitation will automatically update on the live page, so guests always see the most up-to-date information.
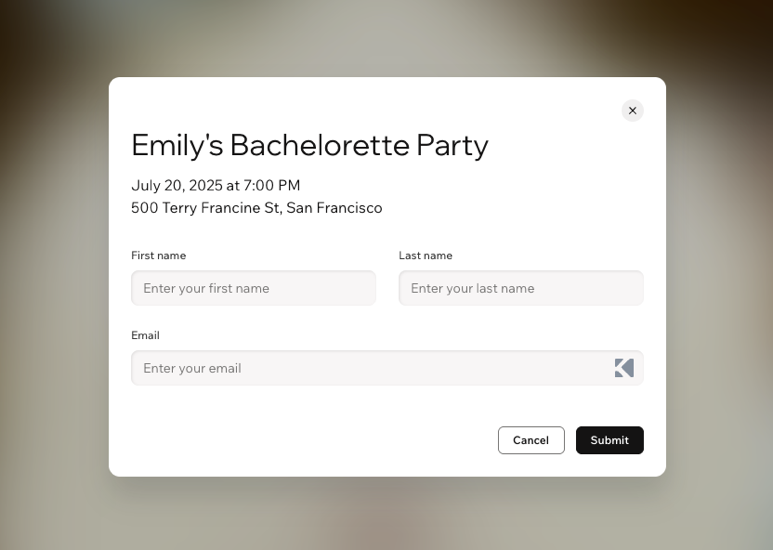
Can I change the questions or add fields to the RSVP page?
Not at the moment. The RSVP page currently includes three standard fields: First name, Last name, and Email.
Can I use Aria for all parts of the invitation and RSVP page?
Yes, Aria can help you regenerate the invitation, change a template, add button animations, and change event details.


 above the relevant invitation.