Wix Restaurants: Setting SEO for Wix Menus (New)
5 min
In this article
- Step 1 | Customize the SEO settings for all menu pages
- Step 2 | Optimize the menu page's URL slug
- (Optional) Step 3 | Add a URL query param to a specific menu
- (Optional) Step 4 | Override the SEO settings of a specific menu
Adjust your site's Search Engine Optimization (SEO) settings so your restaurant ranks higher in search results. Customize the default settings for all your menu pages, then optimize the URL slug of each menu page.
Got a site with multiple menus? You can tweak every menu individually, overriding the menu pages' default SEO settings.
Are there existing SEO settings in place?
Step 1 | Customize the SEO settings for all menu pages
Apply the same SEO logic to all pages related to your restaurant's menus, instead of adjusting them one-by-one. By creating this systematic strategy, you can save time while ensuring your pages look professional on search results and social media.
To customize the SEO settings for all menu pages:
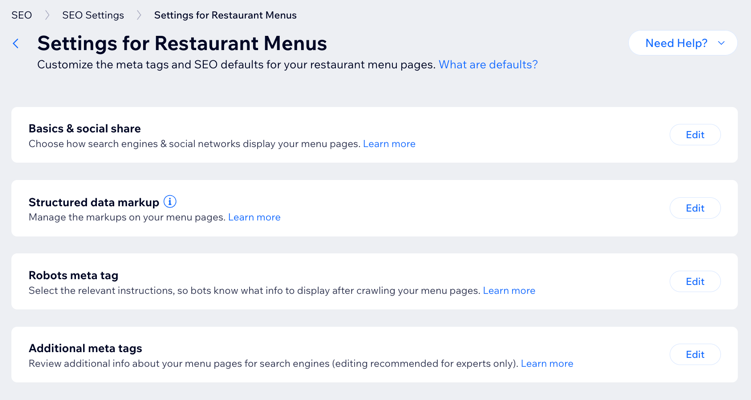
- Go to SEO Settings in your site's dashboard.
- Click Restaurants Menus.
- Customize the meta tags and SEO defaults for your restaurant menu pages:
- Basics & social share: Decide how your menu pages look on search results, or when someone shares them on social media.
- Structured data markup: Give search engines detailed information about your page.
- Robots meta tag: Add code that instructs search engines on how to display your restaurant menu pages after crawling them.
- Additional meta tags: Add code that further describes your restaurant menu pages to search engines and social networks.

Want to update SEO for the rest of your site?
Learn how to optimize your site's content for SEO.
Step 2 | Optimize the menu page's URL slug
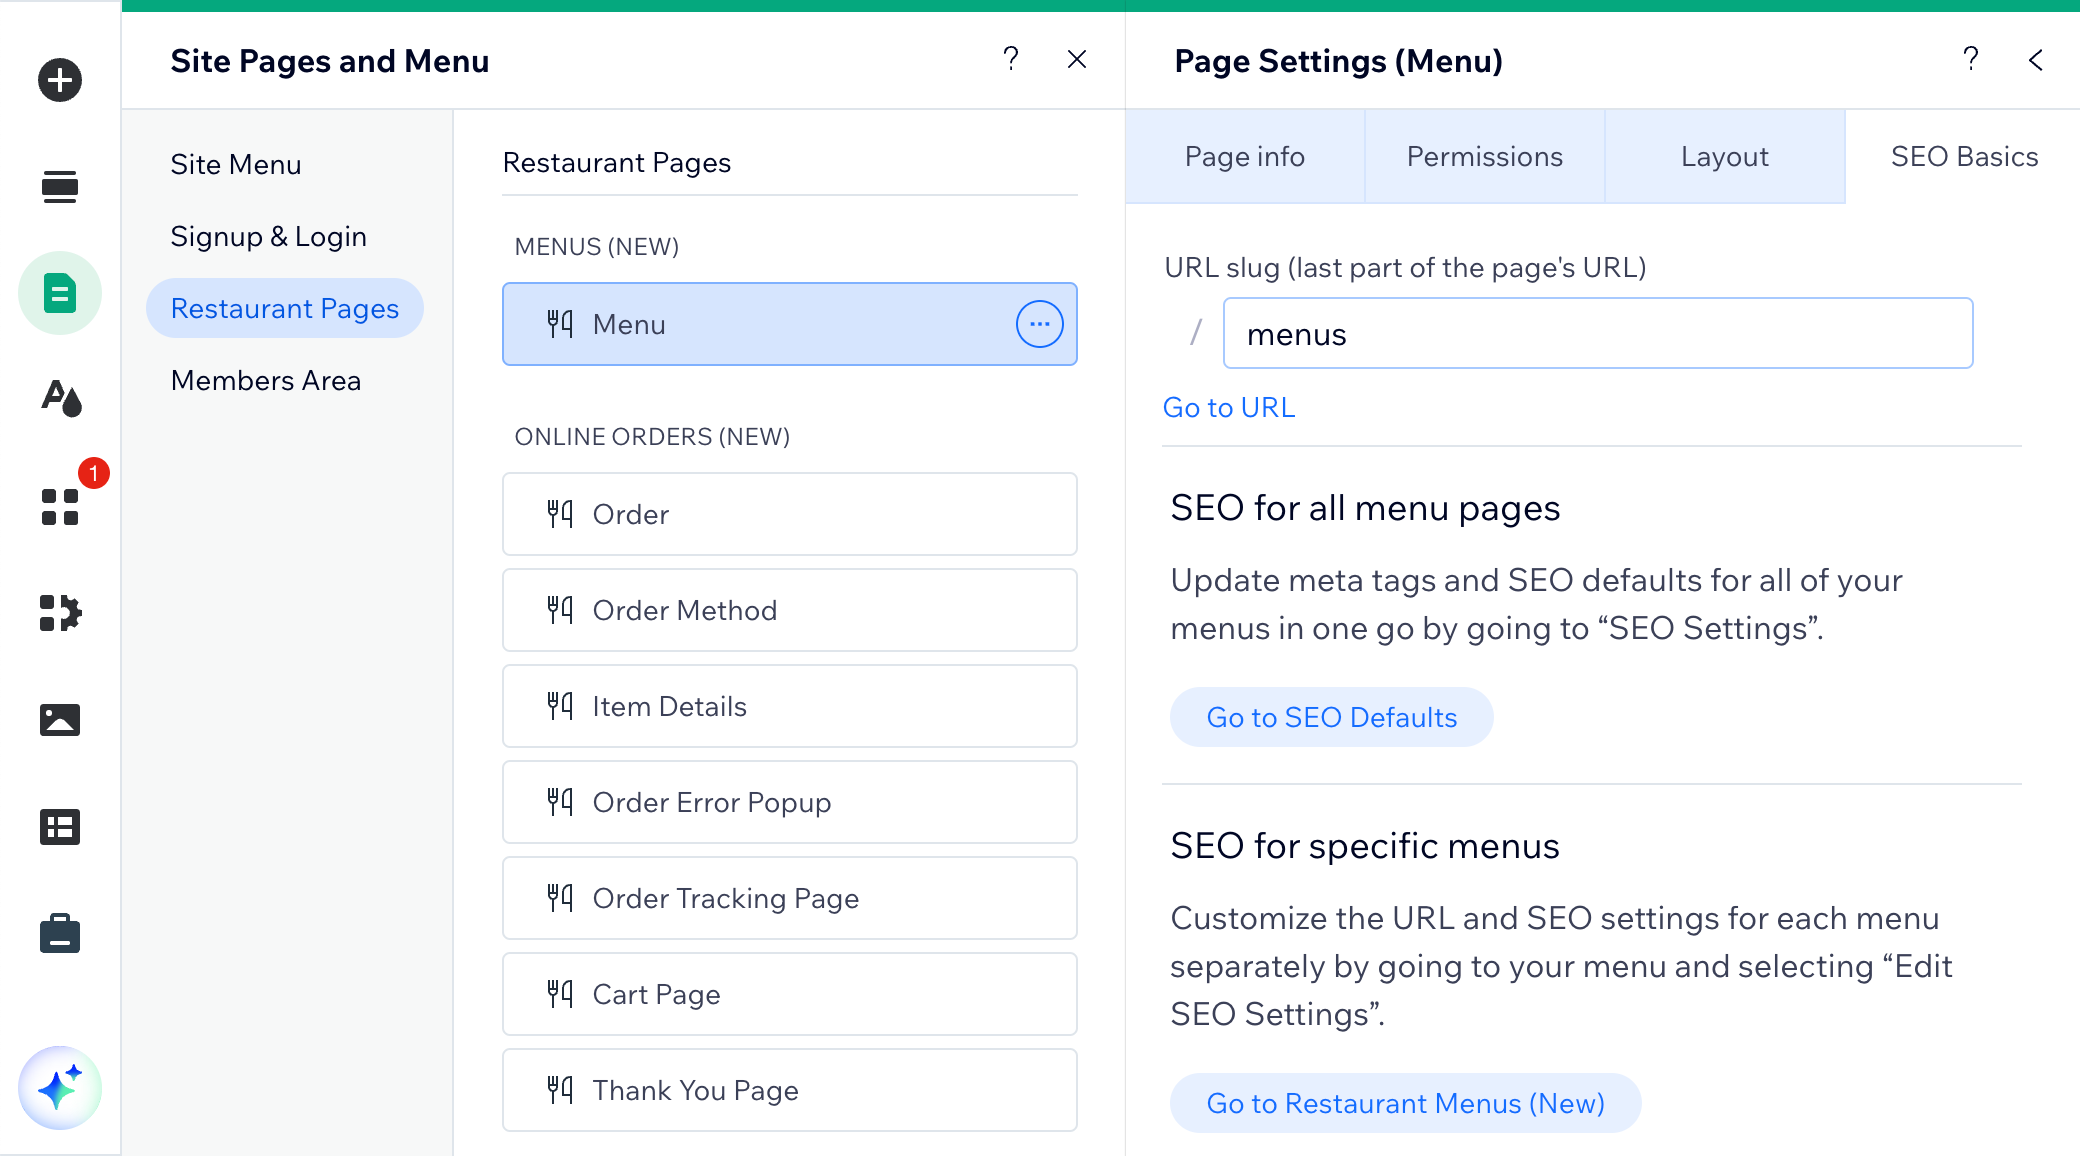
Update your menu pages' URL slugs directly from your editor. The slug is the last part of the URL (e.g. "www.example.com/slug"). Keep it short and clear, based on your page or menu title, to help both site visitors and search engines understand your pages' content.
Wix Editor
Studio Editor
- Go to your editor.
- Click Pages & Menu
 on the left side of the editor.
 - Click the More Actions icon
 next to the relevant menu page.
 - Click SEO basics.
- Update the menu page's URL slug in the text box.

(Optional) Step 3 | Add a URL query param to a specific menu
Only have one menu?
You can skip this step, as the query param won't appear in the menu page's URL.
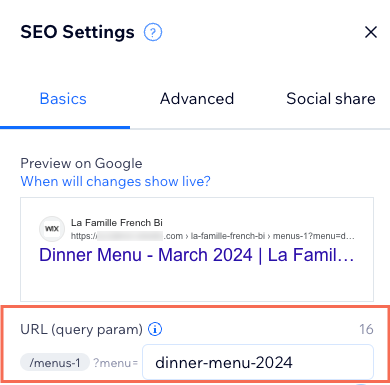
If you're showing multiple menus on the same page, you can set a direct link for each menu by adding a query param to the end of the page's URL (for instance, www.example.com/slug?menu=dinner-menu).
To add a URL query param to a menu:
- Go to Restaurant Menus (New) in your site's dashboard.
- Select the relevant menu from the drop-down next to Show menu.
- Click the More Actions icon
 on the right.
 - Click Edit SEO Settings.
- Enter the desired query param under URL (query param).
- Click Save.

Tip:
Learn how to display your menu on different site pages.
(Optional) Step 4 | Override the SEO settings of a specific menu
Only have one menu?
You can skip this step.
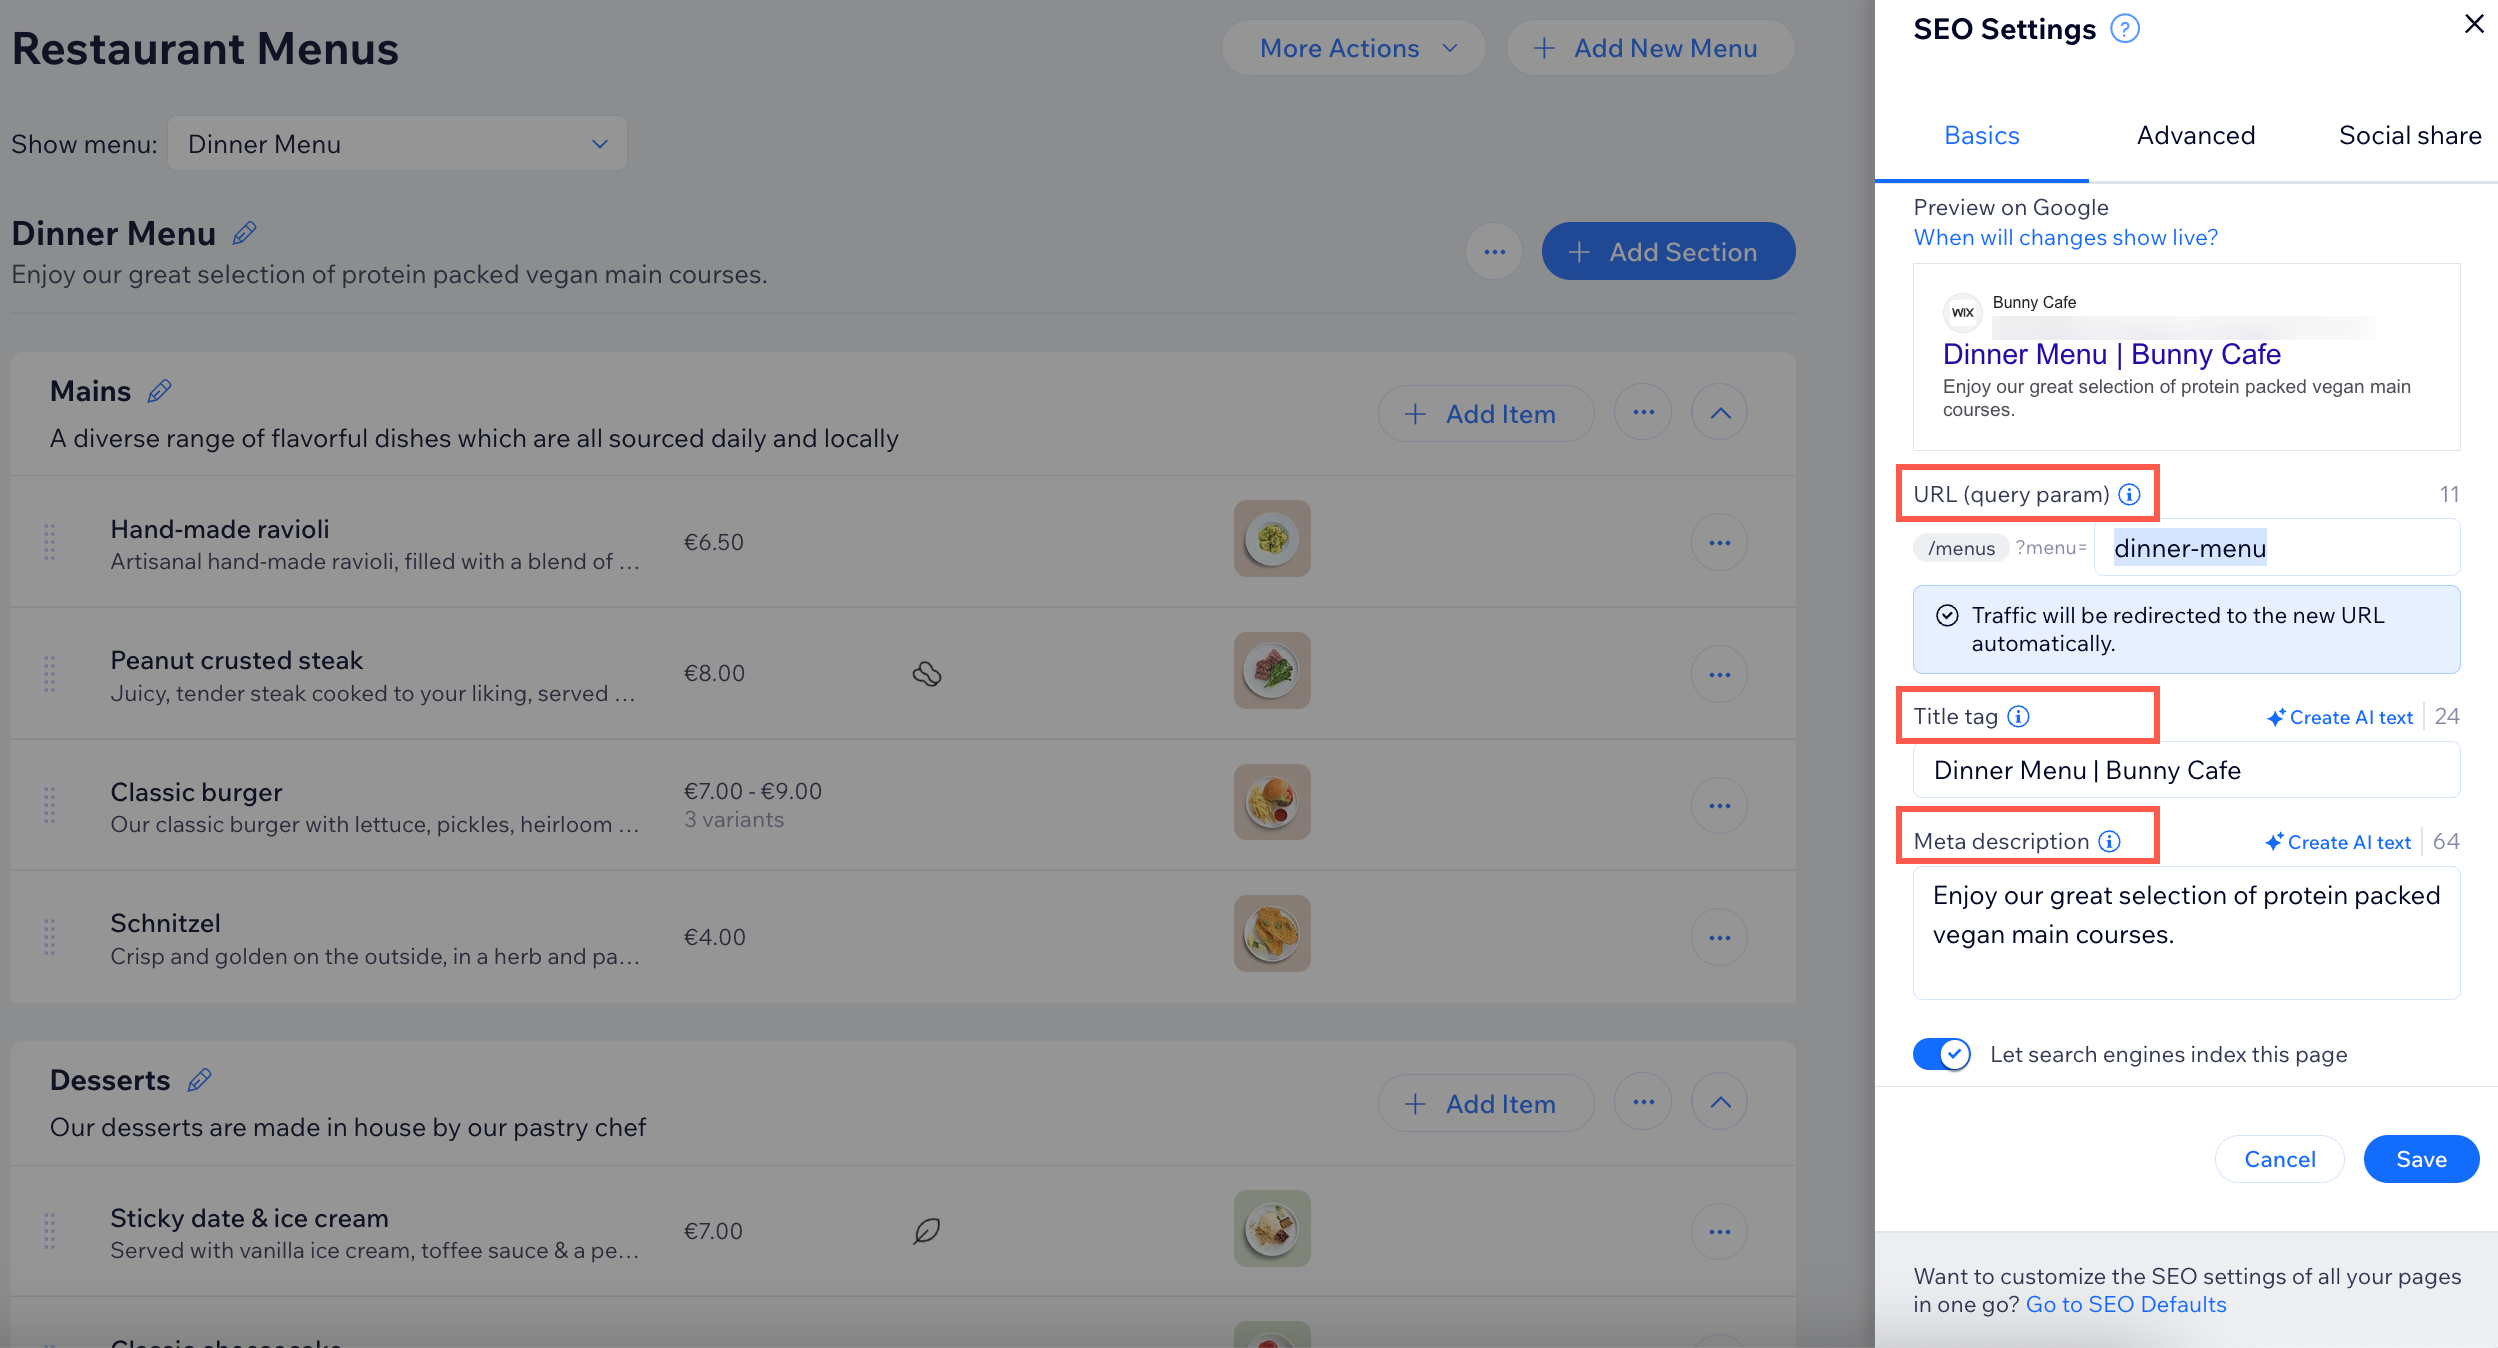
If you offer multiple menus on your site (e.g. breakfast, lunch and dinner menus), you have the option of updating their SEO settings individually. For example, add a unique title tag for your specials menu. This gives you the flexibility to override the default settings you've adjusted in step 1.
To update the SEO settings of a specific menu:
- Go to Restaurant Menus (New) in your site's dashboard.
- Select the relevant menu from the drop-down next to Show menu.
- Click the More Actions icon
 on the right.
 - Click Edit SEO Settings.
- Select what you want to do:
- Add a URL (query param) if you're showing multiple menus on the same page (see step 3 above for more information).
- Update the Title tag and Meta description.
- Check the Advanced and Social share settings.
- Click Save.


