Add Custom Fields to Your Reservation Form
2 min
In this article
- Adding Custom Fields to Your Reservation Form
- Viewing Responses to Your Custom Fields
Create additional fields as part of your reservation form. Ask customers for information such as food and dining preferences, potential allergens, and more. You can add as many custom fields as you want to ensure the restaurant staff has all the info you need.

In this article learn how to:
Adding Custom Fields to Your Reservation Form
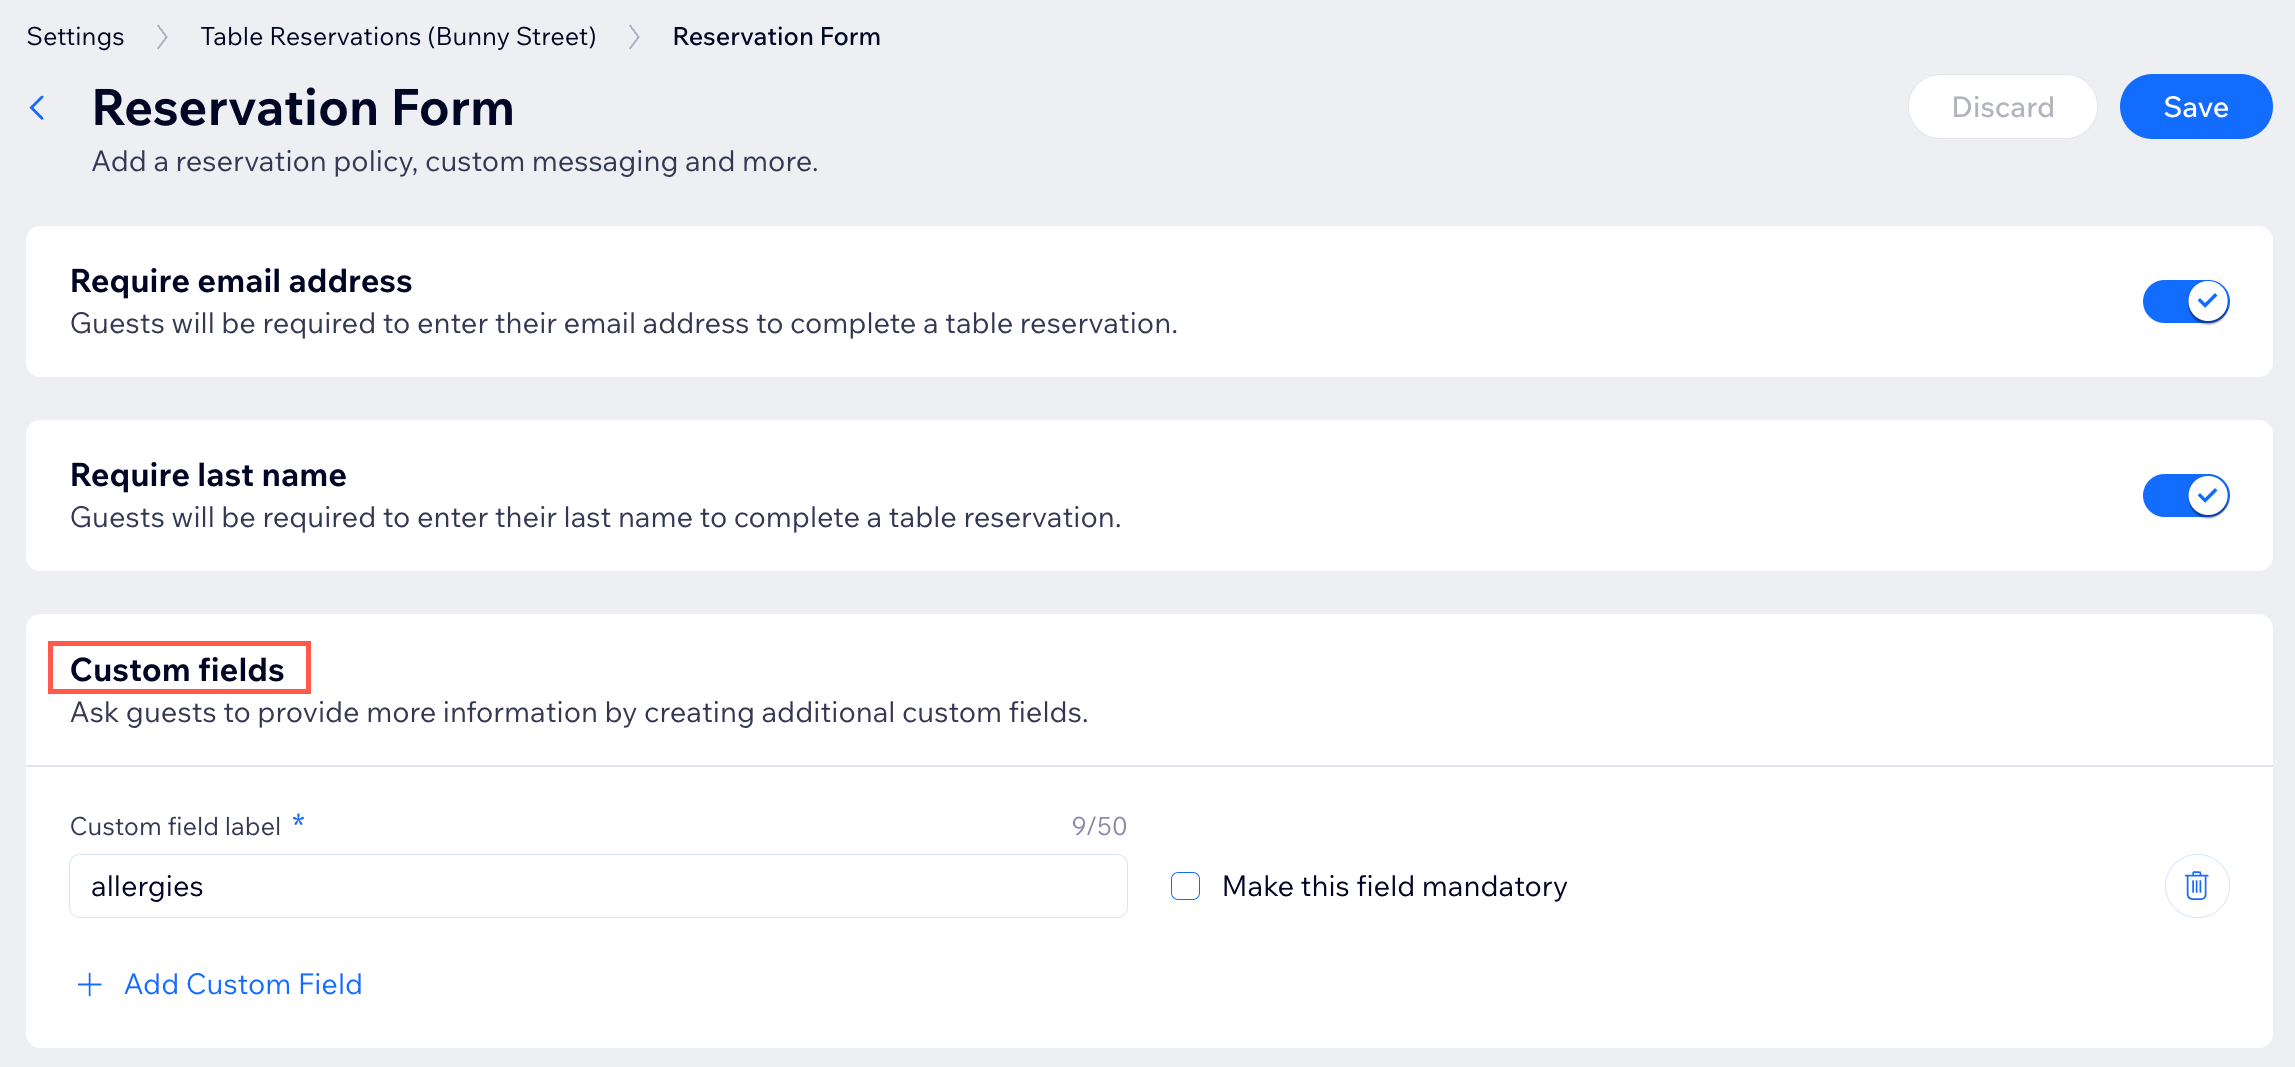
Customize your reservation form by adding custom fields for your customers to fill out. You can also make any custom field required so customers cannot complete their reservation without submitting an answer.
To add custom fields to your reservation form:
- Go to Table Reservations in your site's dashboard.
- Click Settings at the top right.
- Click Reservation Form.
- Click +Add Custom Field under Custom Fields.
- Add your custom field text. You can ask about dining preferences, possible allergens, or any other information your restaurant staff might need to know.
- (Optional) Manage your custom field:
- To create additional fields: Click +Add Custom Field.
- To delete a field: Click the Trash icon
 next to the field you want to delete.
 - Select Make this field mandatory so customers cannot complete their reservation until they have added information in the field.
- Click Save.
- Make a test reservation to view how the custom field appears to customers.
Viewing Responses to Your Custom Fields
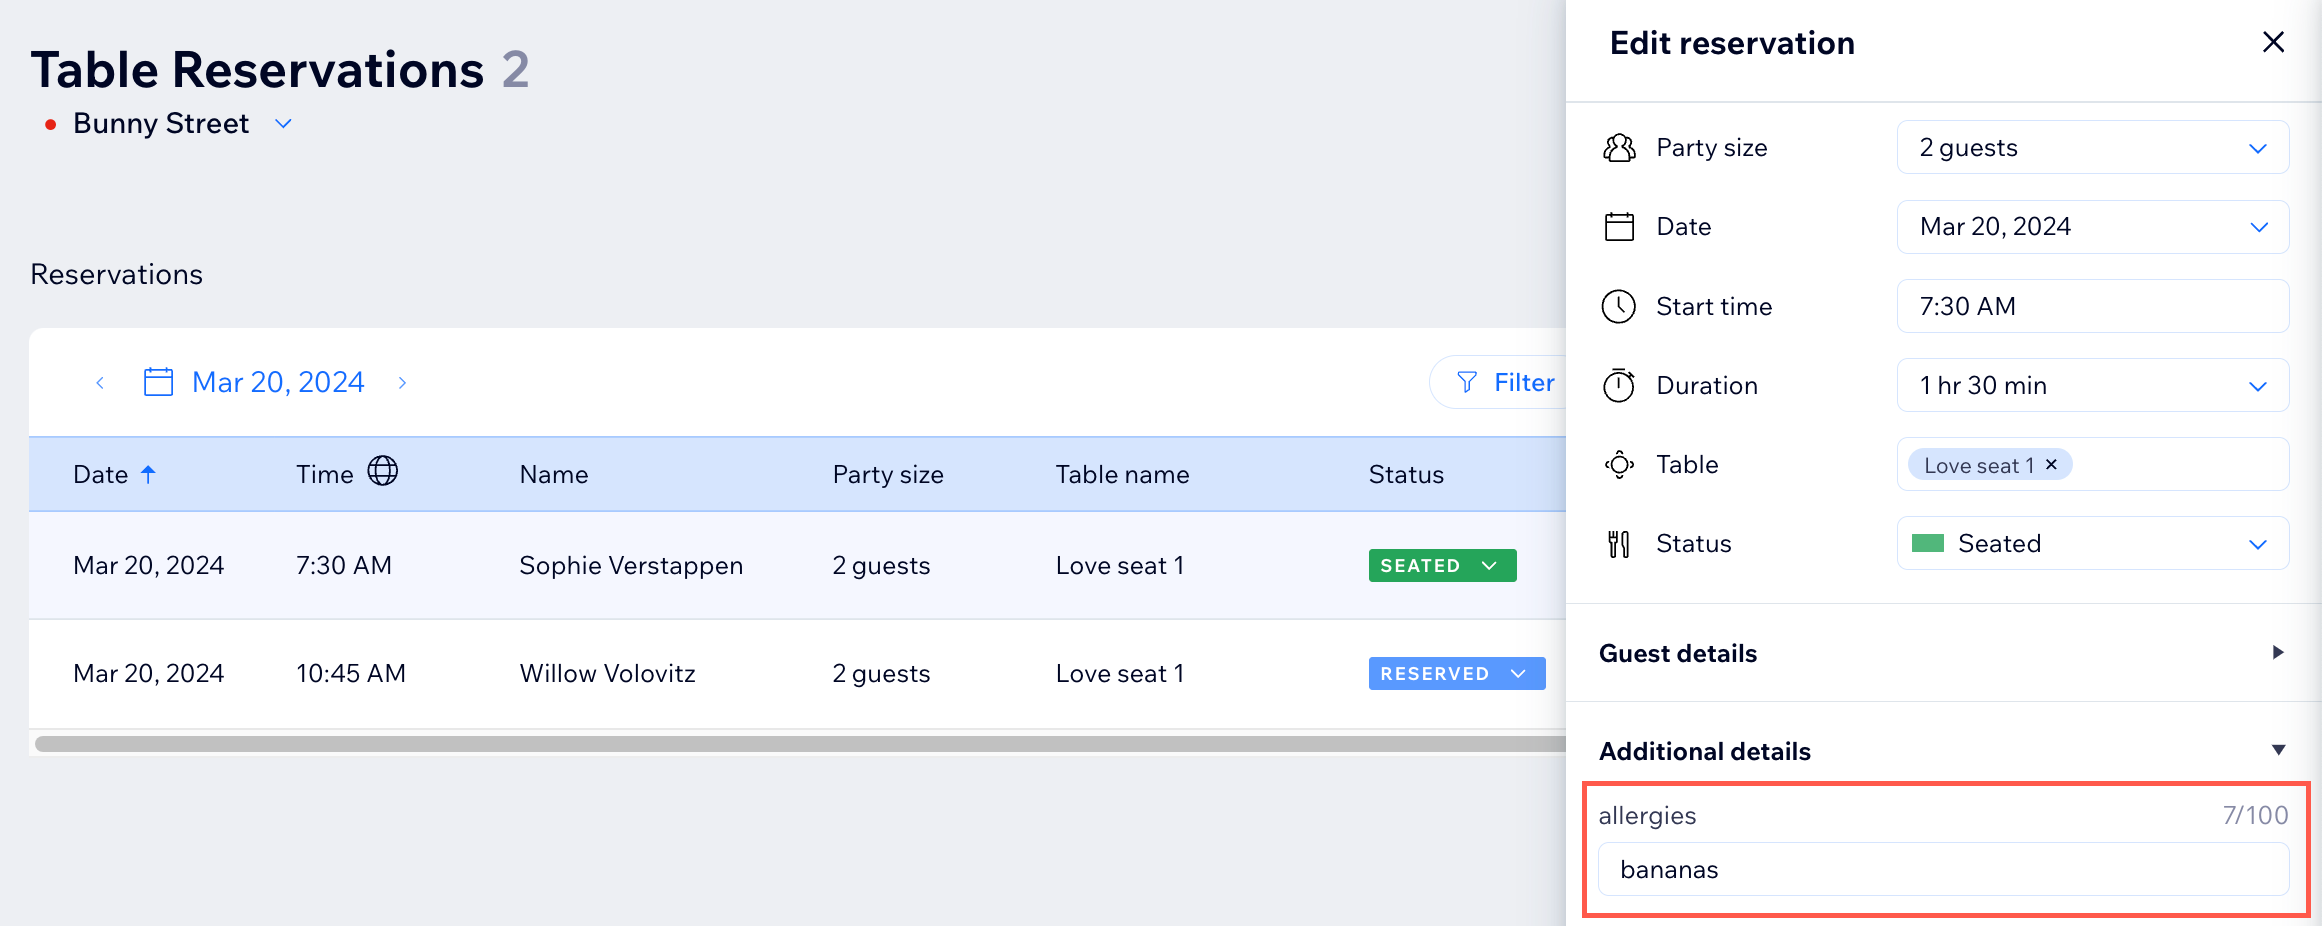
After customers fill out your custom fields, you can see their answers along with the rest of the reservation info in your site's dashboard. If you are exporting your reservations to a .csv file, the custom fields column will be formatted differently.
To view responses to your custom fields:
- Go to Table Reservations in your site's dashboard.
- Select the relevant reservation.


