

Wix Studio: Creating and Managing Your Automations
4 min
In this article
- Structure of an automation
- Creating an automation
- Managing your automations
- Viewing email automation statistics
Use automations in Wix Studio to simplify workflows and save time by automating repetitive tasks. The new automations builder lets you create and manage automations at the workspace level enhancing collaboration and efficiency throughout your agency.
Examples of workspace-level automations:
- Automatically send your clients an email reminder about an upcoming or overdue invoice.
- Assign tasks to your team based on specific events, like a new lead.
Create automations for your clients:
Set up site-level automations in your client’s site dashboard, like emailing their customers about abandoned carts or sending thank-you messages for placed orders. Learn more about creating a site-level automation and check out our Wix Studio Academy's tutorial.
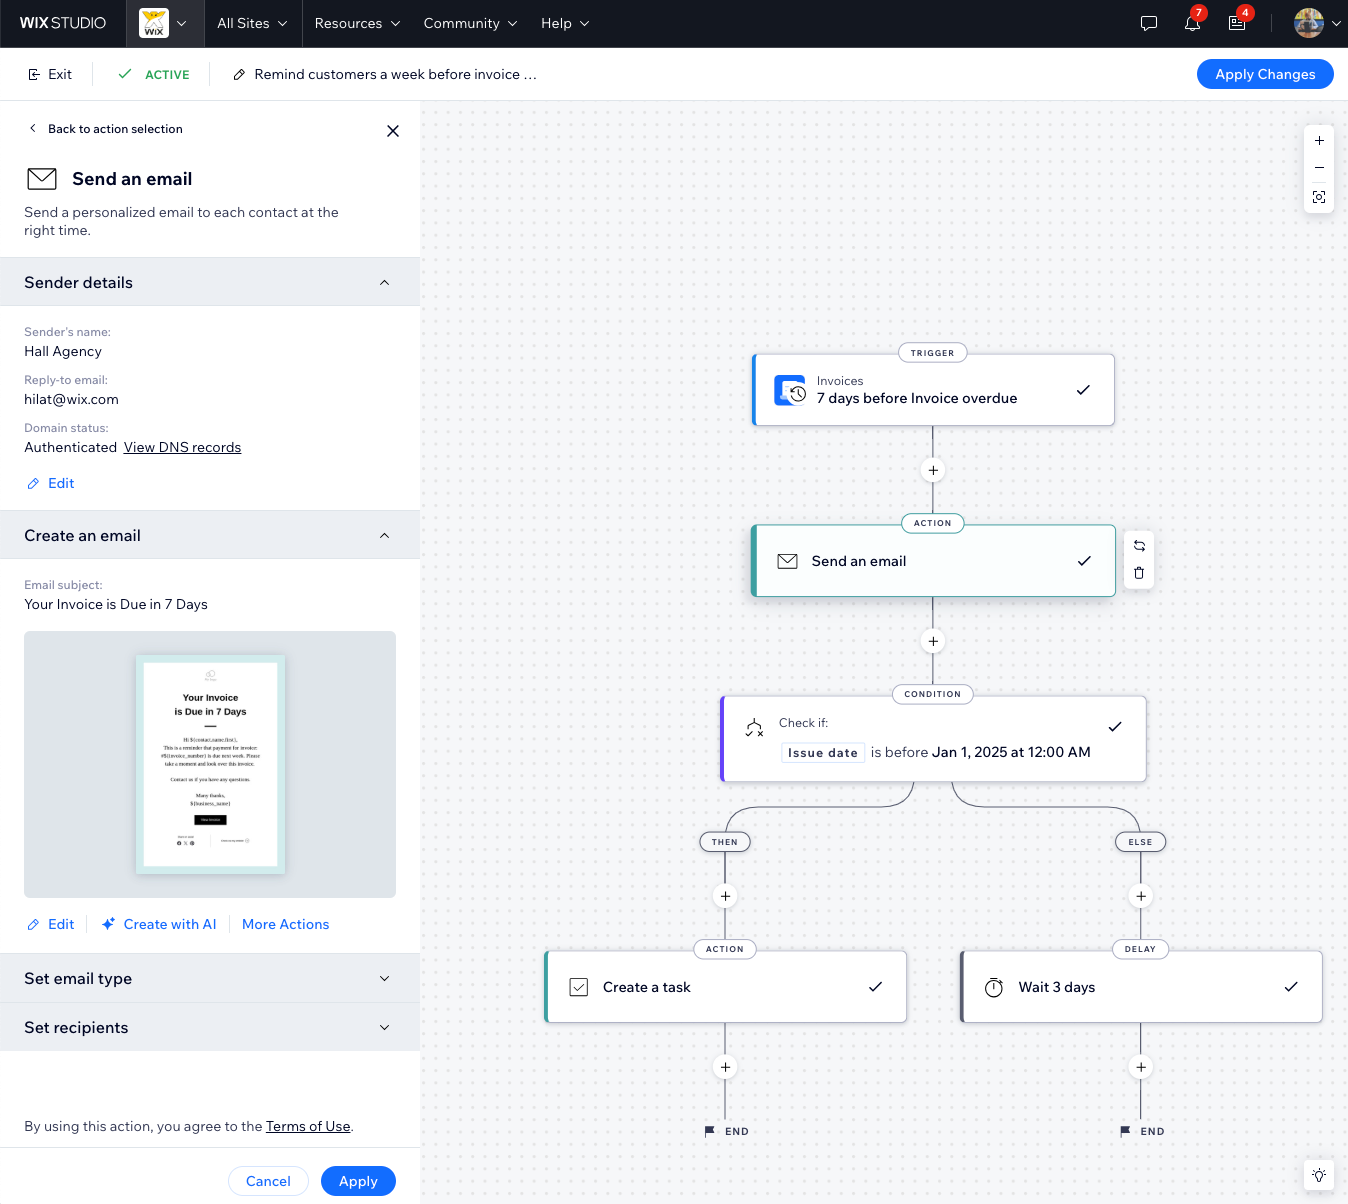
Structure of an automation
All automations are structured around a trigger and an action. The trigger is the event that initiates the action, prompting a response such as sending an email, creating a task, moving a workflow card, and more. The action can occur immediately following the trigger, or you can add delays or conditions to refine the workflow.
Creating an automation
Create an automation from scratch or choose one of our suggested automations. Use automations to send client 'thank you' emails after payments or accepting a price quote, notify clients of an upcoming or overdue invoice, assign tasks to your team based on events, and more.
To create an automation:
- Go to CRM & Client Billing in your Wix Studio workspace.
- Click the Automations tab.
- Click + Create Automation at the top right.
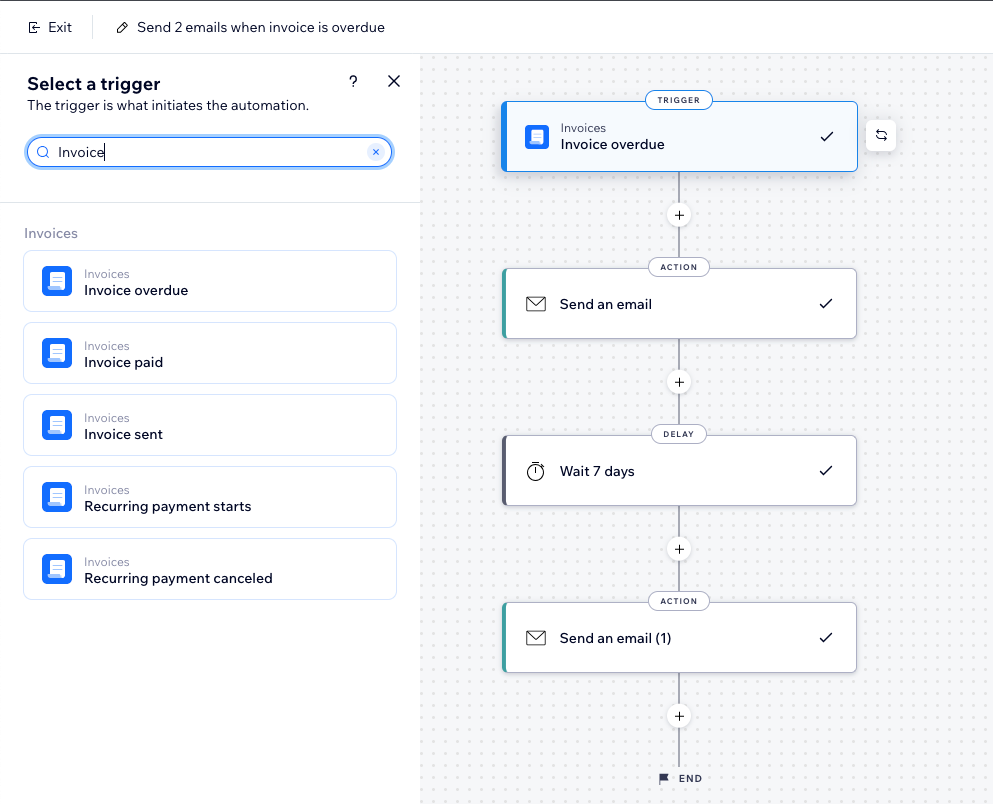
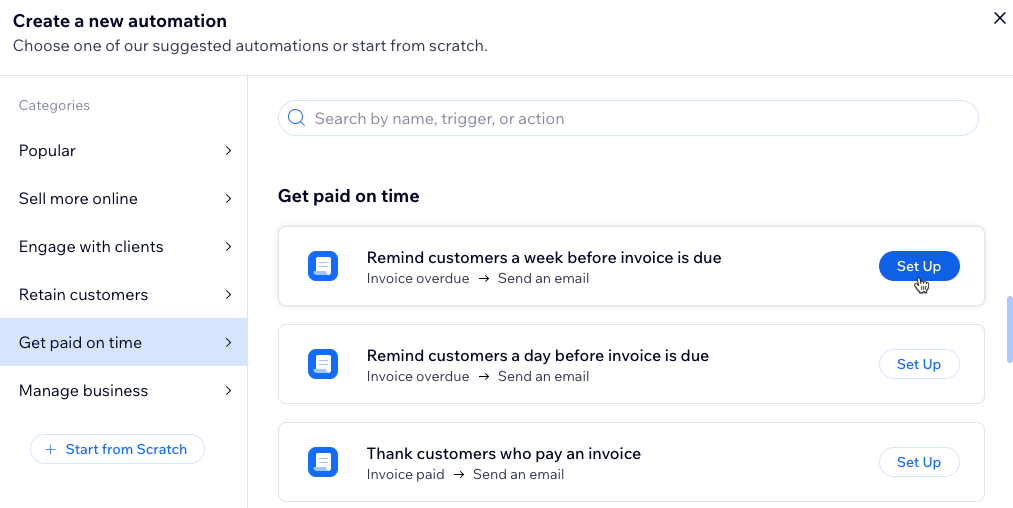
- Choose how to start creating your automation:
- From scratch: Click Start from Scratch to begin from a blank automation template.
- Suggested automation: Use the categories or search bar to find the suggested automation you want to edit. Then click Set Up next to the automation.
- Add a title to your automation.
- Set the trigger and action.
Note: Settings differ based on the trigger you select. - (Optional) Click + to add a step:
- Action: Add another action to the automation.
- Delay: Add a time buffer between steps.
- Condition: Create complex flows by defining criteria for continuing the flow.
- In the THEN path, the automation flow continues only if the condition is met.
- You can set an ELSE path to define what happens if it isn’t.
- Click Activate at the top right.
Managing your automations
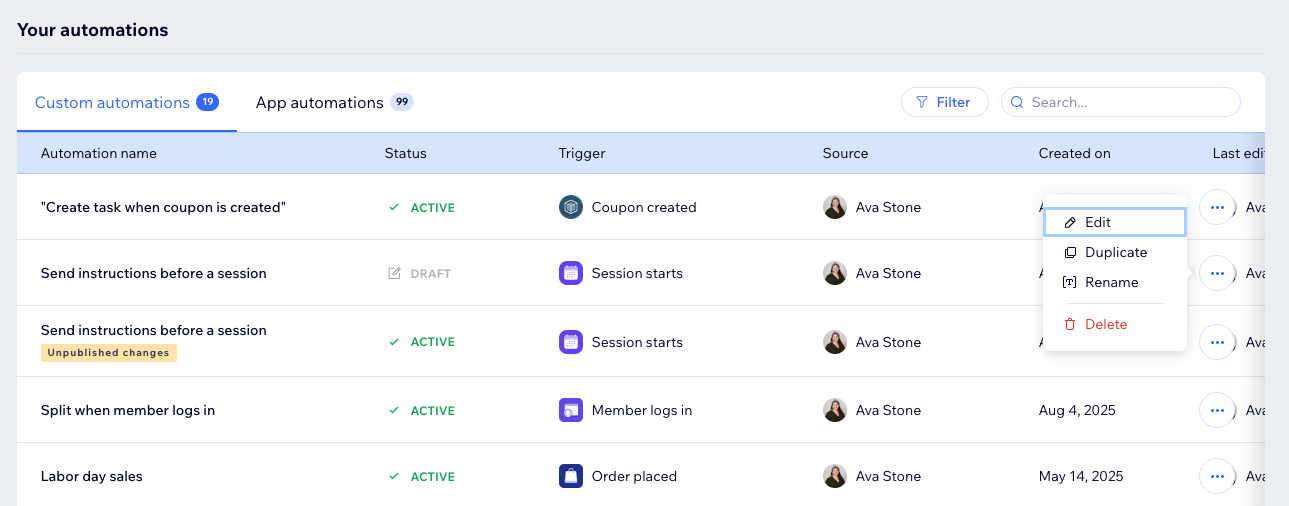
View and manage all your automations in the Automations tab of your Wix Studio workspace. Automations are displayed in two tabs: Custom automations, for automations you've built or customized, and App automations, for automations automatically added through installed apps. You can edit, duplicate, rename, or deactivate automations as needed to keep your workflows optimized.
To manage your automations:
- Go to CRM & Client Billing in your Wix Studio workspace.
- Click the Automations tab.
- Scroll down to the Your automations section to view all of your automations across 2 tabs:
- Custom automations: Active and inactive automations you've created here or directly through an app.
- App automations: Active and inactive automations created automatically when you've installed apps.
- (Optional) Click an automation to view its automation summary, the last trigger date and the total times triggered.
Tip:
Click Filter to display only active or inactive automations, or filter by specific actions or triggers.
Viewing email automation statistics
View detailed stats for automations with "Send an email" as the action, including delivery rates, opens, clicks, bounces, and spam reports.
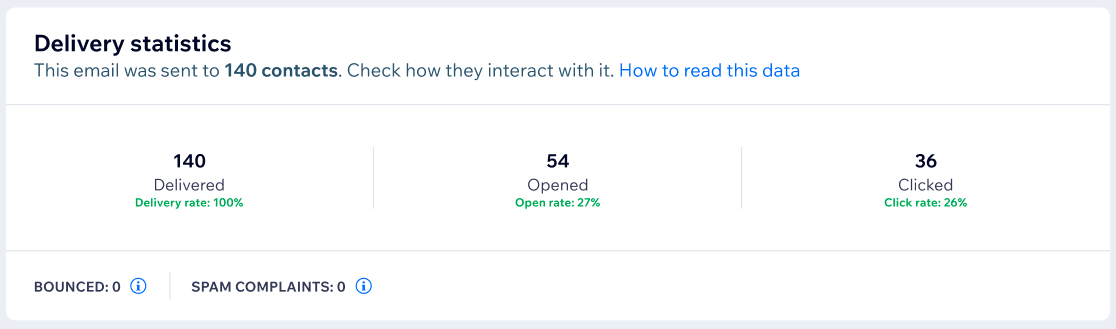
To view statistics for automations that send emails:
- Go to CRM & Client Billing in your Wix Studio workspace.
- Click the Automations tab.
- Scroll down to the Your automations section.
- Hover over the relevant automation and click the More Actions icon
 .
. - Click View email stats to view your email marketing statistics.
