

Wix Multilingual: Exporting and Importing Site Content for Manual Translation
4 min
In this article
- Exporting your site content
- Importing your translated content
- FAQs
Export and import your site content for manual translation. By downloading a CSV file, you can send your content to a professional translator. Once the translations are ready, import the translated content back to your site.
Before you begin:
- Add Wix Multilingual to your site.
- Add a secondary language.
Exporting your site content
Begin by exporting your website's content into a CSV file. You can then send the file to a professional translator to have them translate the text.
To export your site content:
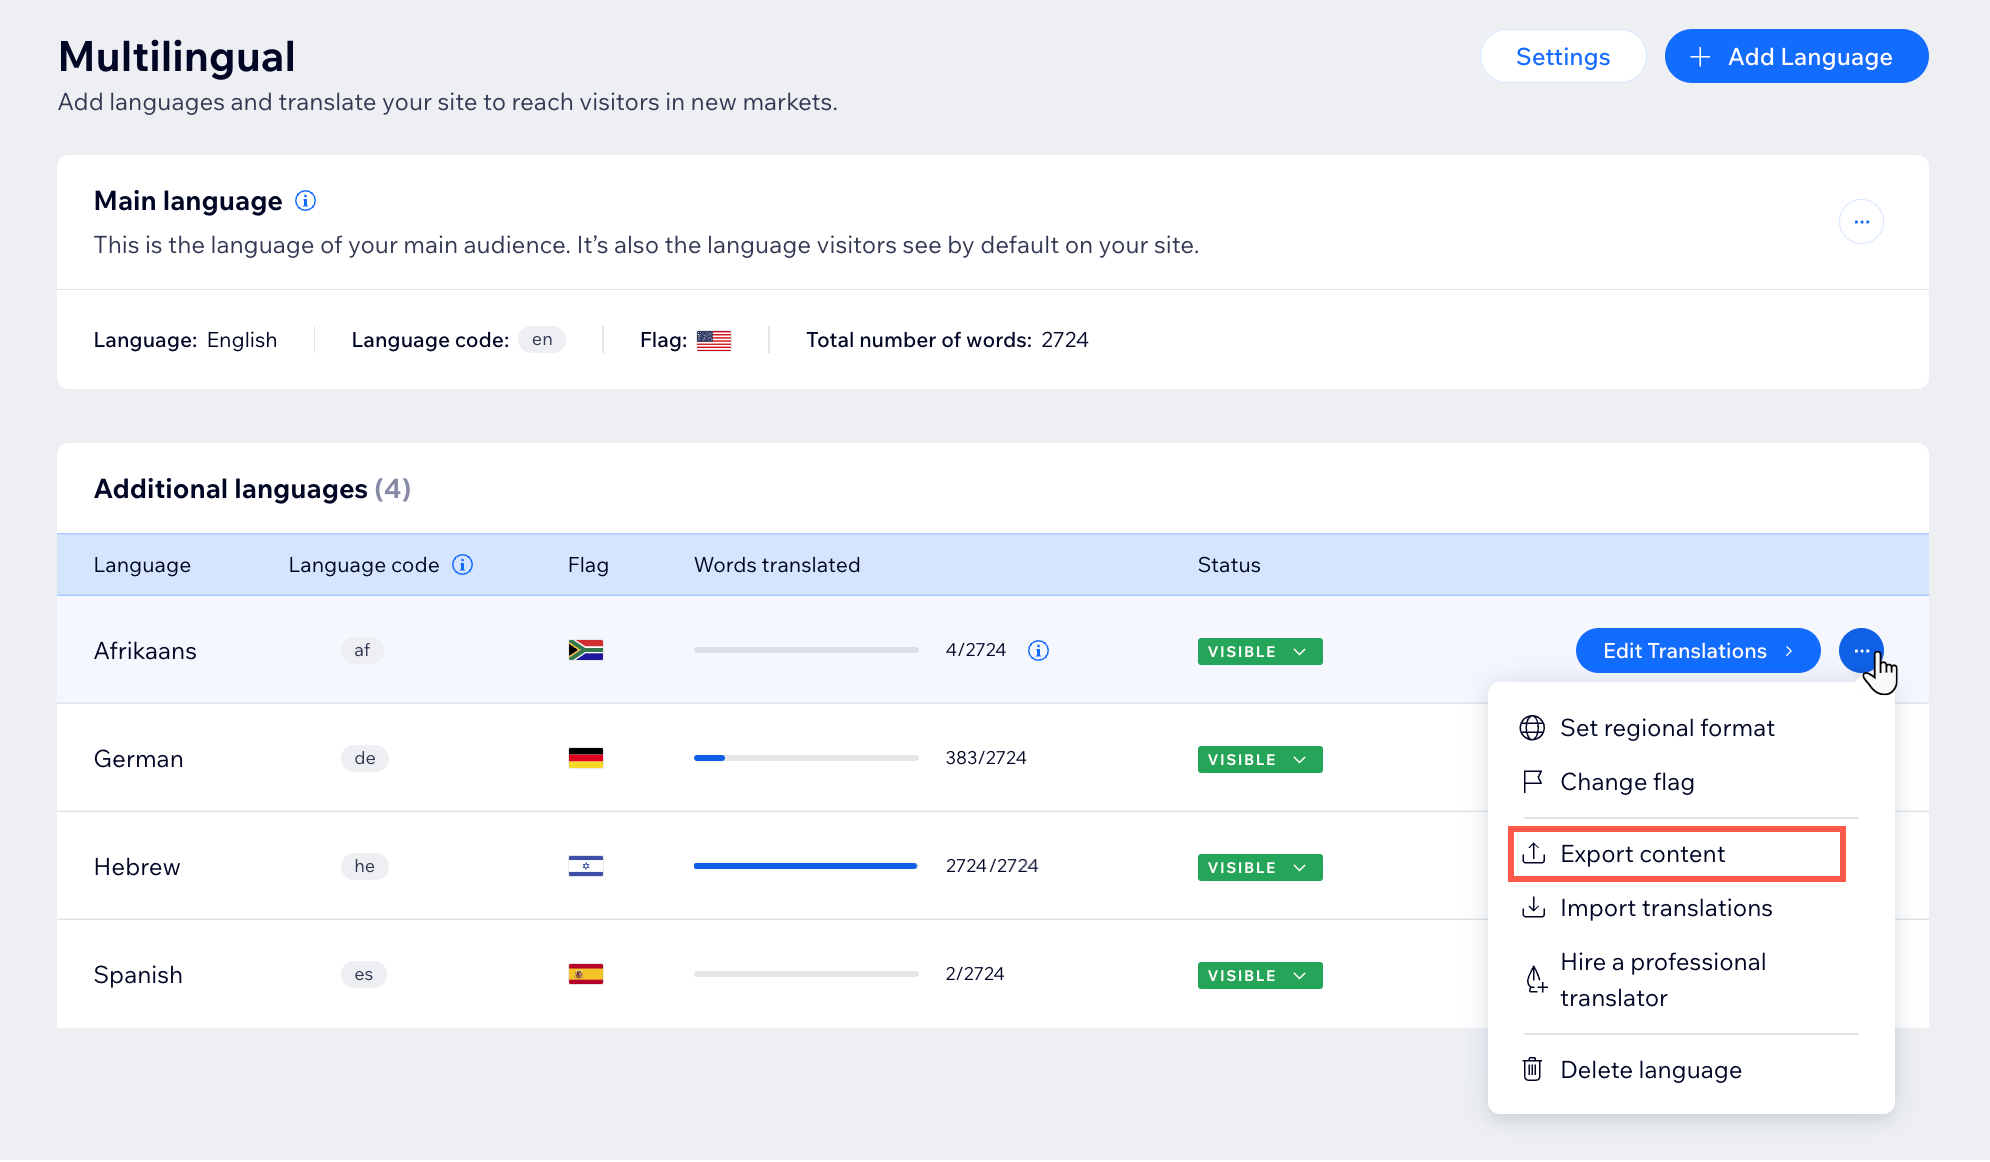
- Go to Multilingual in your site's dashboard.
- Click the More Actions icon
 next to the relevant language.
 - Click Export Content.
- Click Export Content again to download the CSV file.
Importing your translated content
Once you've completed the translation you can import it to your site. This process involves uploading your saved CSV file to the relevant language in your site languages. For example, if you are translating content from English to French, you need to upload the French content to your site's French language.
To import your translated content:
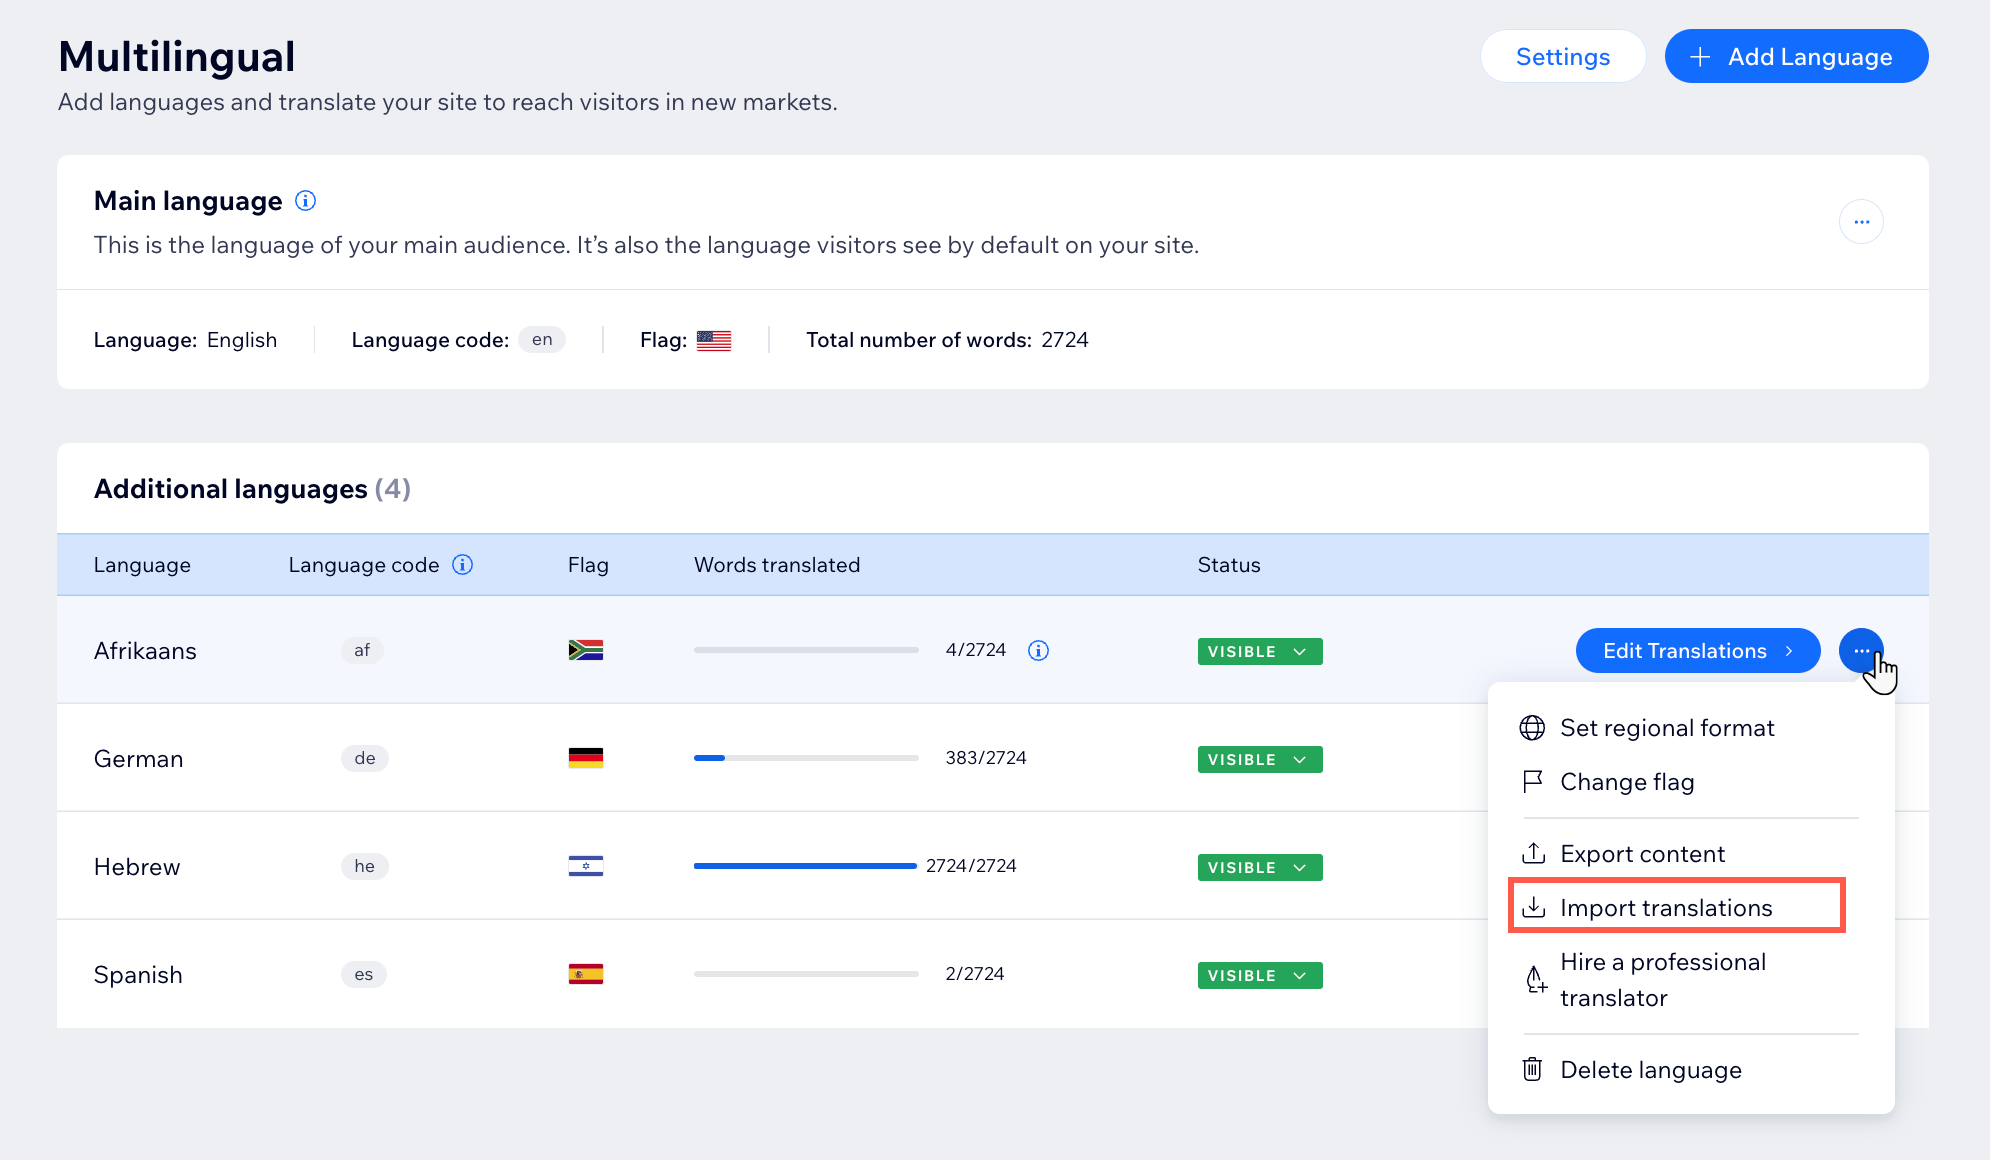
- Go to Multilingual in your site's dashboard.
- Click the More Actions icon next to the relevant language.
- Click Import translations.
- Click Start Now.
- Click Upload CSV File.
- Select the relevant CSV file.
- Click Import Translations.
- (Optional) Click Review Translations.
- Review each page and check the status of the translation.
Note: The status should say "Translated". - Click Save when you are finished reviewing.
- Publish your site to view the changes live.
FAQs
Click a question below to learn more:
What are the benefits of the import/export process?
Why do I get an error when importing a CSV file with fields that contain code or special formatting?
What can cause the import process to fail?
Why do I see more than one language in the exported file?
I do not see any new translations, what is the reason?
What can I do if my file does not download?

Is it possible to override content?
Is there any site content that cannot be exported?
Can you export/import more than one target language at a time?
What happens if I have existing translations in my target language?
