Wix Logo: Creating Social Media Covers
4 min
In this article
- Creating social media covers with Just Logo plans
- Creating social media covers with Logo and Online Presence plans
- Available file sizes
Boost your brand's consistency and credibility with social media covers for your social presence. With the Wix Logo Maker, you can create covers for LinkedIn, Facebook, Etsy, Twitter and YouTube directly from the Brand Studio. In order to create social media covers, you'll first need to create a logo.
Social media covers in the Brand Kit:
Our new Brand Kit offers additional features for your logo. With the Brand Kit, you get the ability to make post-download edits and get access to additional file types (including social media cover files). You can access the kit with the Social, Brand Plus, Unlimited, or Business Logo plans.
Creating social media covers with Just Logo plans
Create social media covers for your social networks directly from the Brand Studio. You can use the standalone logo maker if you don't have a Wix site, or use the Logo & Brands page within your site's dashboard if you have a Wix site.
To create a social media cover from the Brand Studio:
- Go to the Logo & Brand Studio.
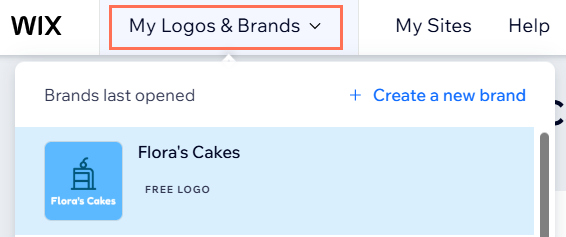
- Click the My Logos & Brands drop-down at the top.

- Select the relevant brand.
- Click Brand Actions and select Create social covers from the drop-down.
- Select Create social covers.

- Choose the social cover you want to create: Twitter Header, YouTube Banner, Facebook Cover, LinkedIn Personal, LinkedIn Business or Etsy Banner.
- Hover over your desired template and click Select.
- Click the tabs on the left to customize your social cover (you can also click the element itself to open its tab):
- Templates: Select a new template for your cover that suits your brand.
- Palette: Select a new color palette for your cover. Color palettes come in presets of 4 colors. You can change the individual colors in the other tabs.
- Text: Customize the text on your cover. There is a 50-character limit for each text box.
- Symbols: Click Add Symbol to add a symbol or your logo to your cover. Note: To add your logo to your post, click My Logos at the top of the Manage Symbols tab. Then, click your logo design and customize it to your liking.
- Shapes: Click Add Shape to add a shape to your cover.
- Images: Click Add Image to upload your own image, or choose an image from the Wix Library. Note: Currently, you can upload .JPEG and .PNG images with a maximum size of 25MB.
- Background: Choose a color for your cover's background.
9. Click Download to download your file.
10. Extract your social cover files and upload them to your social media of choice.
Creating social media covers with Logo and Online Presence plans
Create social media covers for your social networks directly from Logo & Brands in your dashboard.
Before you begin:
To download a social cover from your site's dashboard, you need to purchase a yearly plan from Wix:
- Wix Premium plans: Core, Business, Business Elite and Enterprise. Unclaimed logos can also be redeemed for the Pro, VIP, Business Unlimited and Business VIP plans.
- Wix Studio plans: Basic, Standard, Plus, Elite and Enterprise.
To create a social media cover from your site's dashboard:
- Go to Logo & Brands in your site's dashboard.
- Click Create New and select Social cover from the drop-down.
- Select the social cover you want to create: Twitter Header, YouTube Banner, Facebook Cover, LinkedIn Personal, LinkedIn Business or Etsy Banner.

- Hover over your desired template and click Select.
- Click the tabs on the left to customize your social cover (you can also click the element itself to open its tab):
- Templates: Select a new template for your cover that suits your brand.
- Palette: Select a new color palette for your cover. Color palettes come in presets of 4 colors. You can change the individual colors in the other tabs.
- Text: Customize the text on your cover. There is a 50-character limit for each text box.
- Symbols: Click Add Symbol to add a symbol or your logo to your cover. Note: To add your logo to your post, click My Logos at the top of the Manage Symbols tab. Then, click your logo design and customize it to your liking.
- Shapes: Click Add Shape to add a shape to your cover.
- Images: Click Add Image to upload your own image, or choose an image from the Wix Library. Note: Currently, you can upload .JPEG and .PNG images with a maximum size of 25MB.
- Background: Choose a color for your cover's background.
- Click Download to download your file.
- Extract your social cover files and upload them to your social media of choice.
Available file sizes
Each social cover file type is pre-designed to perfectly fit its destination. View the exact dimensions of a file below:
File type | Size |
|---|---|
Facebook Cover | 851 x 315 px |
YouTube Banner | 2560 x 1440 px |
Etsy Shop Banner | 1600 x 400 px |
Twitter Header | 1500 x 500 px |
LinkedIn Business | 1128 x 191 px |
LinkedIn Personal | 1128 x 191 px |


