

Wix Harmony Editor: Adding and Customizing a Slideshow
10 min
In this article
- Adding a slideshow
- Customizing your slideshow's design
- Adjusting the slideshow settings
- Customizing the slideshow's navigation
- Managing the slides
- FAQs
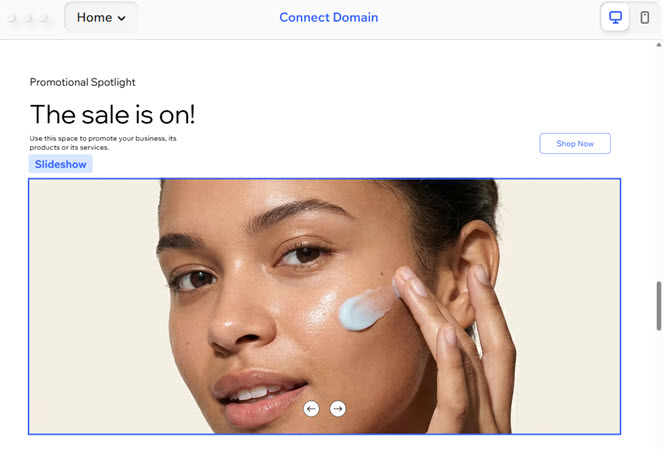
Think of a slideshow as a way to spotlight content on your site. It's perfect for showcasing products, highlighting key messages, or simply adding energy and movement to your pages. Get started with easy-to-use presets, or dive into advanced design options and create a unique look for each slide.
Add features like customizable navigation arrows, slide indicators and smooth horizontal or vertical transitions. Built-in mobile support gives your visitors a seamless swipe experience, plus the option to hide navigation arrows on smaller screens.
Adding a slideshow
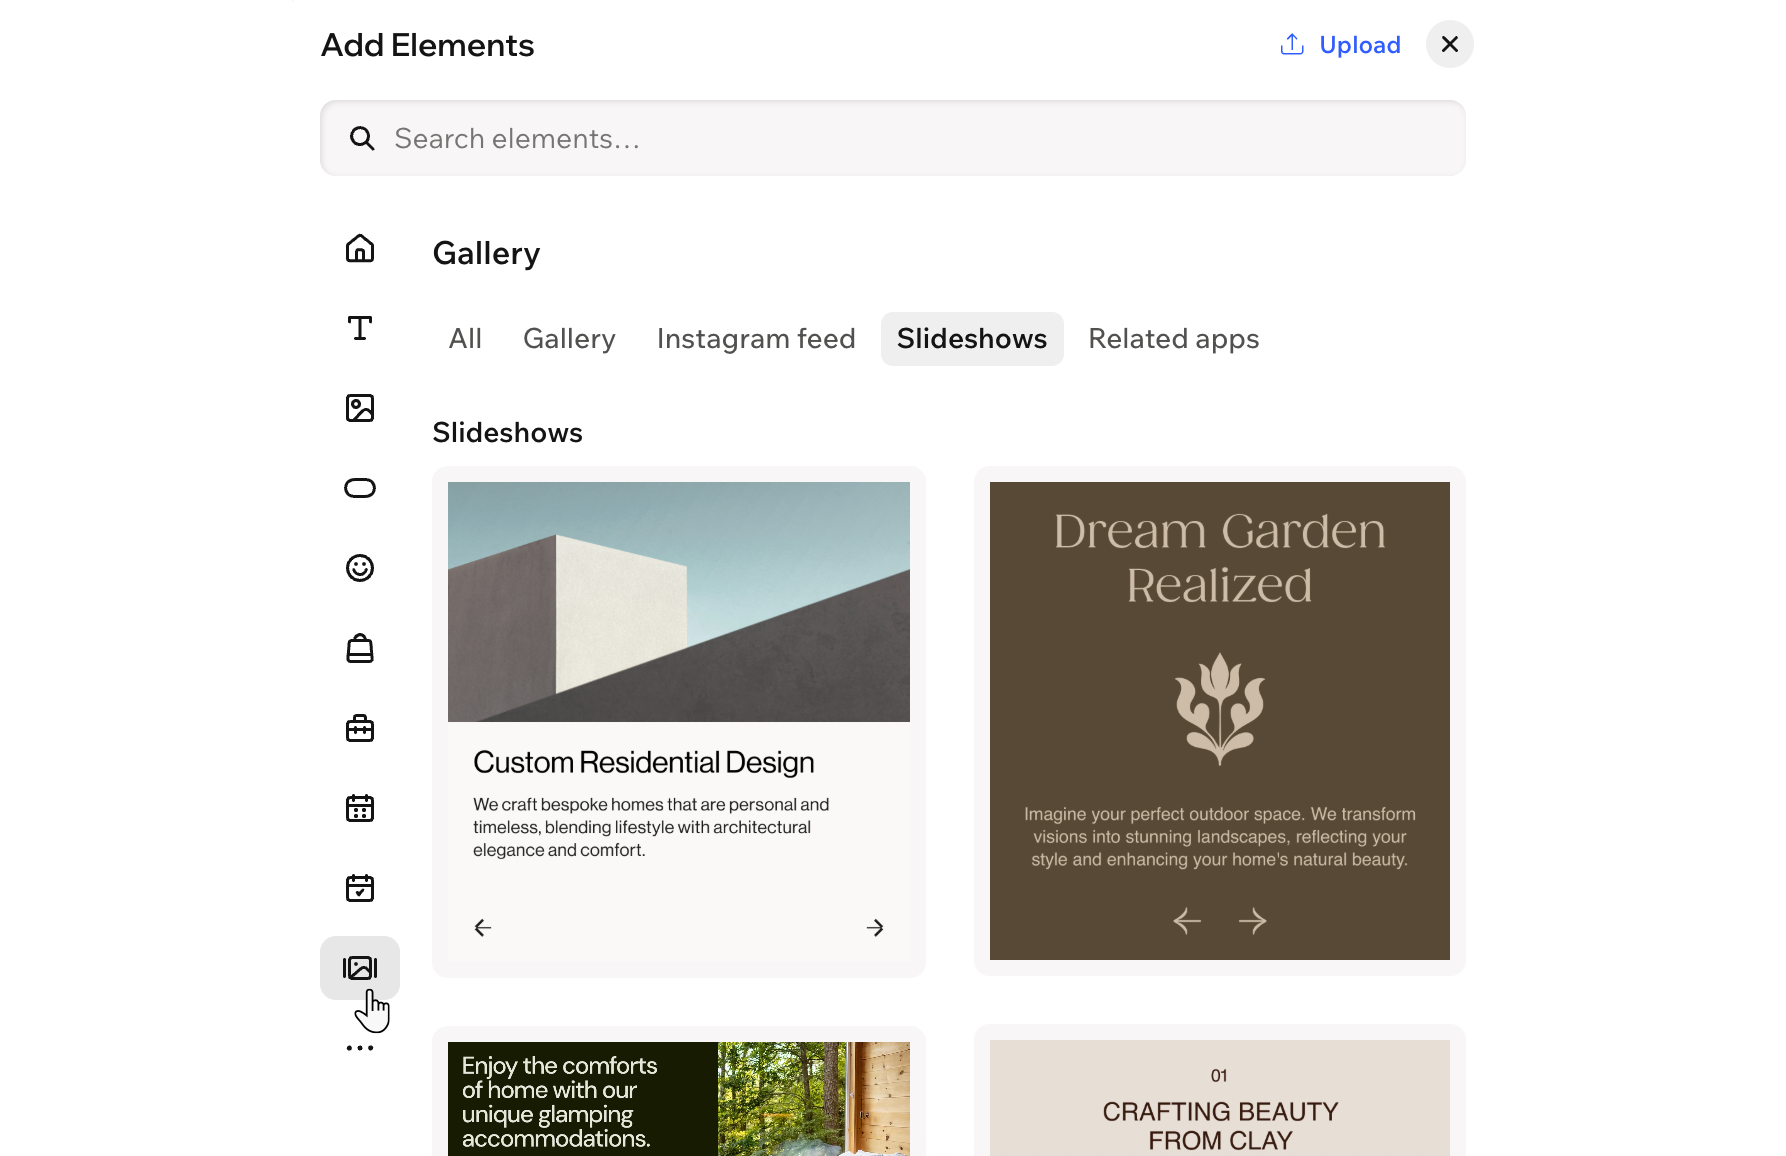
Begin by adding a slideshow from the Add Elements panel. Choose a look you love from a range of professionally designed presets, ready to match your site’s style.
To add and set up a slideshow:
- Go to your editor.
- Click + Add at the top left of the editor.
- Select Elements.
- Hover over the More Options icon
 , then scroll down and click Gallery
  .
. - Select the Slideshows tab.
- Drag a slideshow onto your page.
Customizing your slideshow's design
Your slideshow can be as dynamic as you want - add images or videos, write a message, or include buttons. The more variety you add to each slide, the more you’ll invite your visitors to click through and explore.
To customize your slideshow:
- Go to your editor.
- Click the slideshow element on the page.
- Choose what you want to do:
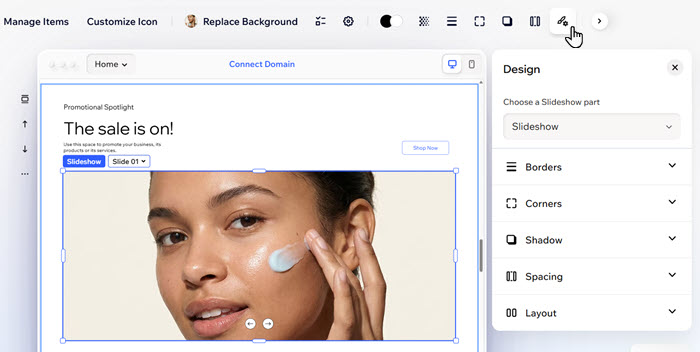
Customize the slideshow's design
 on the action bar.
 : Change the color of your element, choosing one of your brand colors or a custom color.
 : Define the borders of your element so it stands out, choosing a color, width and style. Click the Edit individual borders icon
  to design each side of the border separately.
 : Make the corners of your element squarer or rounder by dragging the slider under Radius. Click the Edit individual corners icon
  to design each corner separately.
 : Apply inner and outer shadow to give the element an interesting 3D effect, setting the position, blurriness, color and more.
 : Add breathing room to your content by adding padding around the element (or the selected area).
 : Customize the positions of your navigation buttons and slide indicators, adjust the site direction of parts of the slideshow and more.
 Add elements to the slideshow
Adjusting the slideshow settings
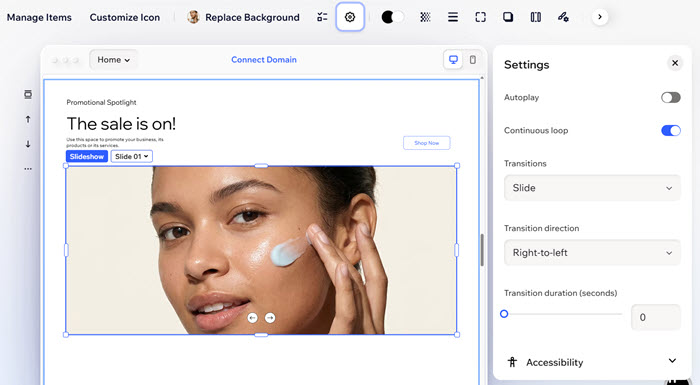
Customize your slideshow’s rhythm. Decide whether you want slides to loop, play on their own, or display with dramatic transitions.
To adjust the settings:
- Go to your editor.
- Click the slideshow element on the page.
- Click the Settings icon
 on the action bar.
 - Choose what to customize:
- Continuous loop: Enable the toggle to make the slides loop infinitely.
- Autoplay: Enable the toggle to have the slideshow play automatically once the site loads.
- Time on each slide: Drag the slider to adjust how long in seconds each slide remains on the screen.
- Pause on hover: Enable the toggle to pause the slideshow when visitors scroll over it.
- Show pause & play button: Enable the toggle to display a 'pause & play' button.
- Transitions: Click the drop-down to select how slides change: None, Slide, Cross-fade or In-and-out.
- Transition direction: Choose how the slides move: Left-to-right, Right-to-left, Top-to-bottom or Bottom-to-top.
- Transition duration: Drag the slider to adjust how quickly slides move (in seconds).
- Accessibility: Click Accessibility and add a description in the Accessible name field to make your slideshow accessible for visitors using assistive technology.
Customizing the slideshow's navigation
Guide your audience through every slide with custom navigation. You can decide whether to display just navigation arrows or slide indicators, or both.
Choose the navigation icons, and customize the buttons' and indicators' design and layout so every detail works with your vision.
To customize the navigation:
- Go to your editor.
- Click the slideshow element on the page.
- Choose what you want to do:
Choose what navigation elements to display
 on the action bar.
Adjust the navigation button icons
 .
. under Start icon.
Edit the navigation button text
Customize the navigation buttons and slide indicators layout
 on the action bar.
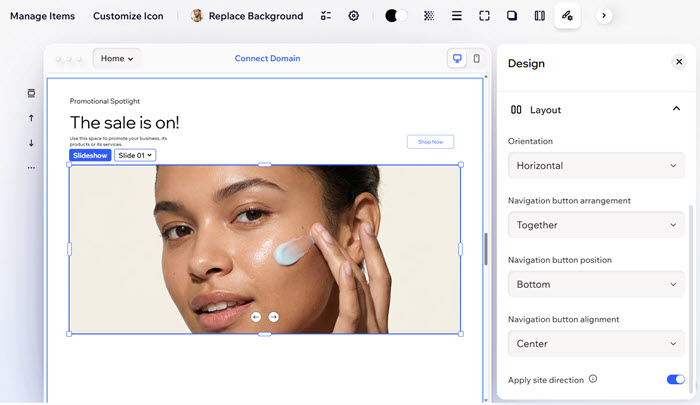
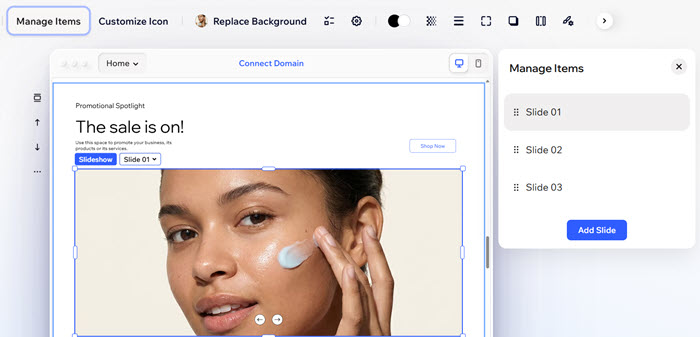
Managing the slides
Keep things organized by renaming or deleting slides as you go. That way, your slideshow always shows exactly what you want.
To manage the slides:
- Go to your editor.
- Click the slideshow element on the page.
- Click Manage Items on the action bar.
- Hover over the relevant slide and click the More Actions icon
 .
. - Choose what to do next:
- Edit: Enter a new name for this slide that reflects its content.
- Duplicate: Create a copy of this slide to add new content to the slideshow while keeping the design consistent.
- Delete: Remove the slide if you no longer need it.
FAQs
Click a question below to learn more about adding and customizing a slideshow:
How can I reorder slides?
How can I switch between slides?
How do I show or hide navigation buttons?
