

Wix Groups: Designing Your Group
22 min
In this article
- Customizing your Group page
- Customizing your Groups page
- Adding and customizing your Groups Cards add-on
- Adding and customizing your Groups List add-on
- Adding and customizing your Groups Feed add-on
- Customizing your Group page tabs
- FAQs
The Wix Groups app adds two group-related pages to your site. The Groups page shows all your groups and posts together. The Group page is for each separate group.
You can change how these pages look by editing the layout, text, pictures, tab names and more.
You can also design add-ons like the Groups Cards, the Groups List, and the Groups Feed and place them on any of your site's pages.

Notes:
- The group page is a dynamic element. Changes you make to it apply to the group page for every group on your site. This does not apply to content tabs, which are unique to each group.
- Make sure to add and set up Wix Groups so you can follow the steps in this article.
- Publish your site after creating your group so the group page appears in your editor.
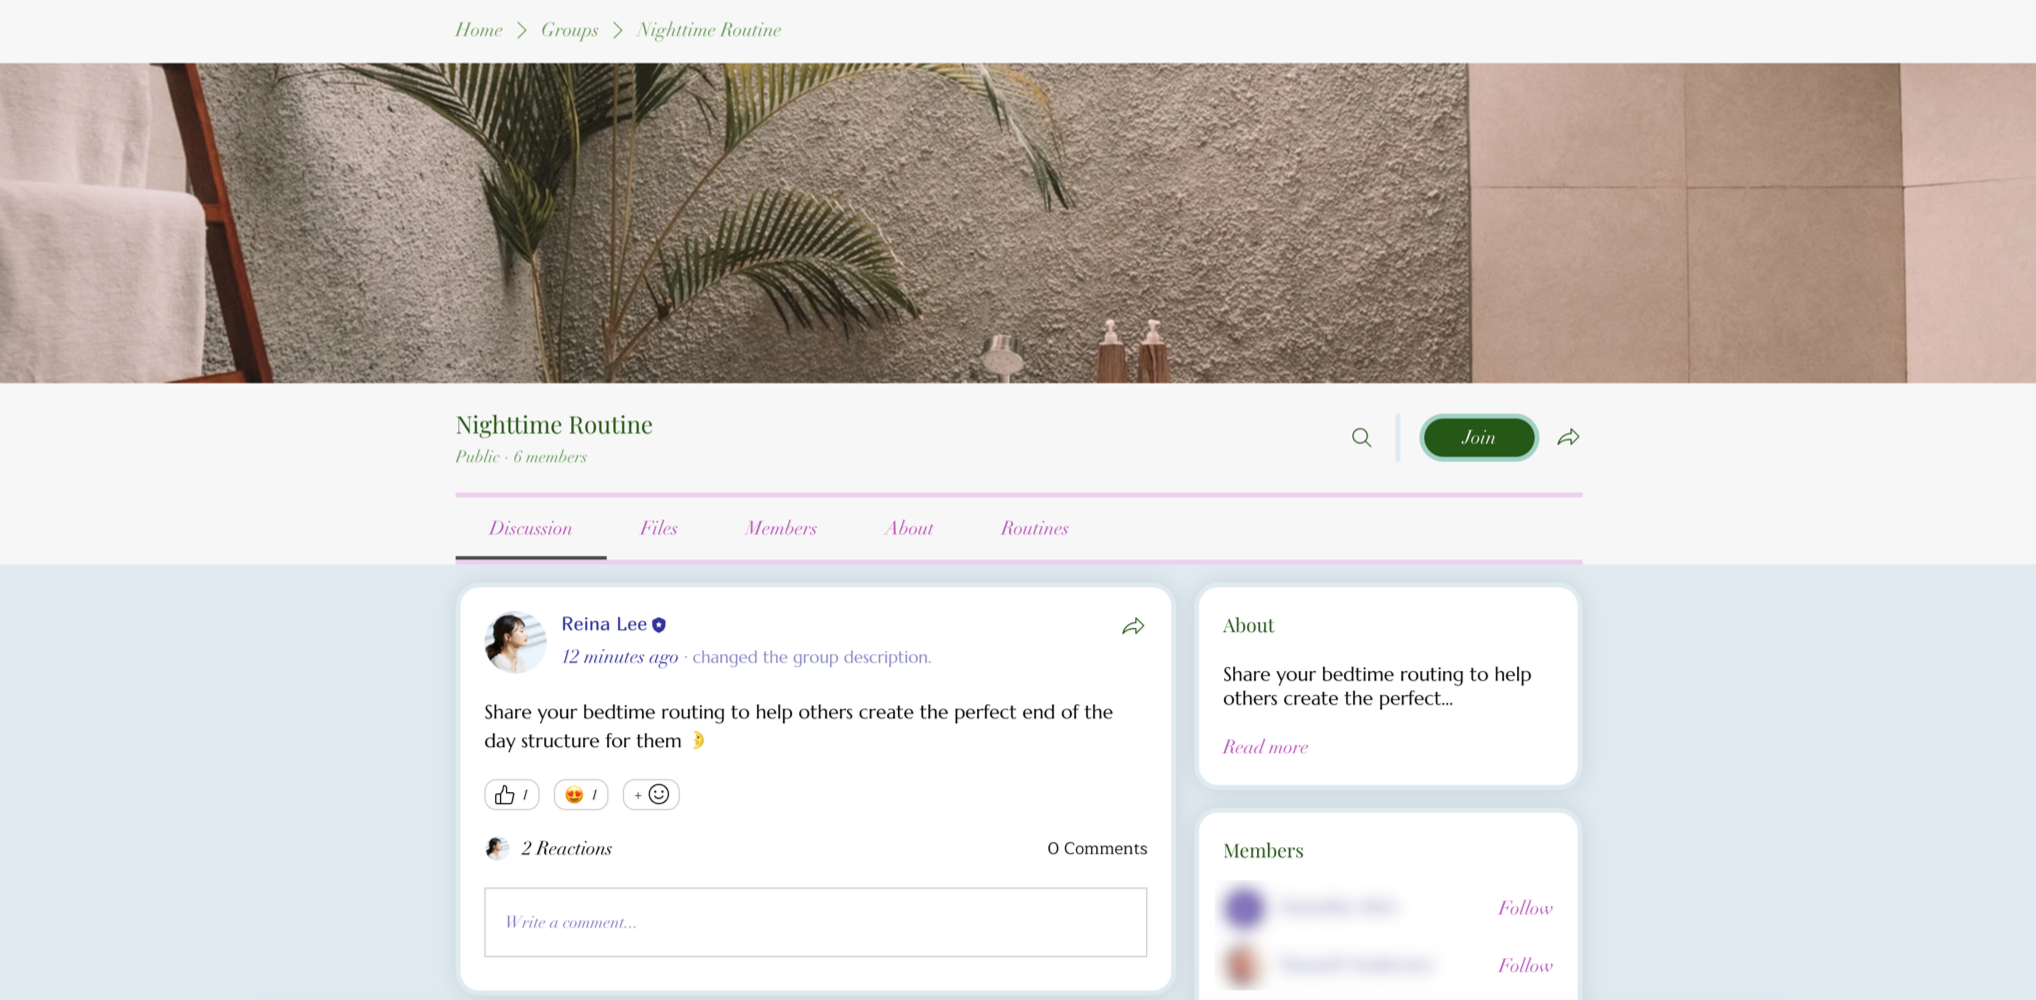
Customizing your Group page
Your Group page uses the same layout and design for each individual group. Customize the design that's used by each group on this page. You can customize the group page from your editor, the Wix app, or while logged in as an admin on the live site.
Wix Editor
Studio Editor
Wix App
Harmony Editor
- Go to your editor.
- Go to your Group page:
- Click Pages & Menu
 on the left side of the editor.
 - Click Groups pages.
- Click Group page.
- Click Pages & Menu
- Click the Group element on your page.
- Click Settings.
- Click the relevant tabs to customize your page:
- Layout: Click General to choose the cover image layout, height, and spacing. Click Media to choose the image gallery layout and the images per row.
- Display: Choose the tab you want to edit: Discussions, Media or About. Then select the checkbox next to each element you want to show.
- Text: Enter the placeholder text that appears in the field where members can write a post.
- Design: Customize the colors and fonts used in your header, text, buttons, links, background and borders. Click Reset to original design at the bottom if you need to revert your changes.

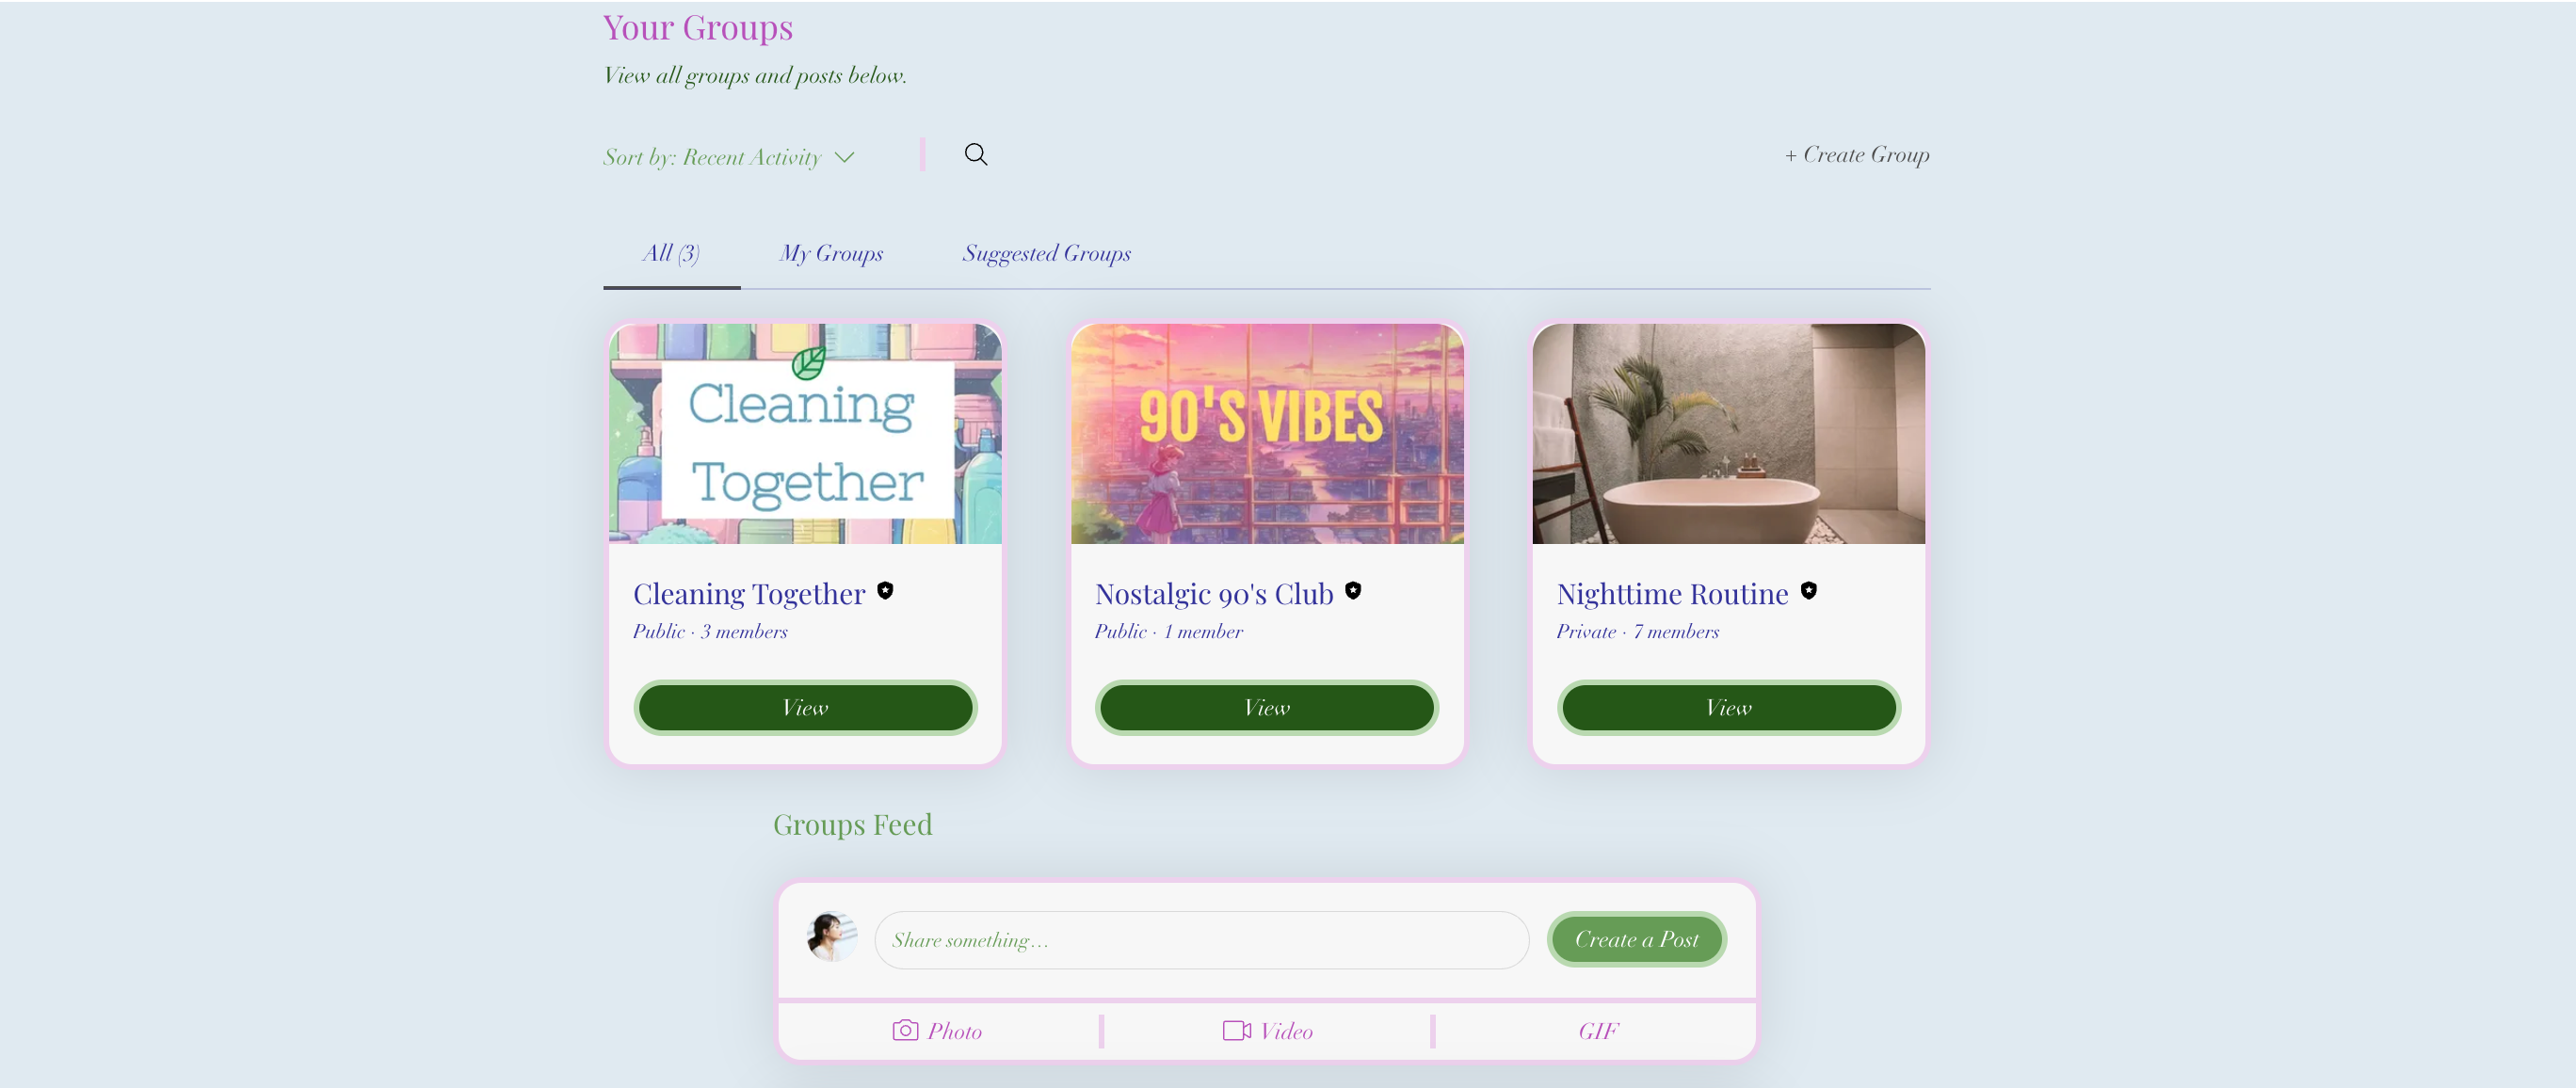
Customizing your Groups page
Your Groups page displays all of your visible groups on one page. Choose what you want to include in the feed that shows posts from all your groups. You can hide the group list that displays all your visible groups or choose what shows in the list.
Wix Editor
Studio Editor
Wix Harmony Editor
- Go to your editor.
- Go to your Groups page:
- Click Pages & Menu on the left side of the editor.
- Click Groups pages.
- Click Groups.
- Click Pages & Menu
- Click the Groups element on your page.
- Click Settings.
- Click the relevant tabs to customize your page:
- Layout: Set a layout for the groups feed. Sidebar, List or Grid. Select the group cards layout and the number of cards per row.
- Settings: Decide how to sort your groups. Select the relevant option between: Recent activity, A-Z, or Member count.
- Display: Select the elements to display on the groups list and the feed's alignment.
- Text: Enter a custom text for the titles of your groups feed and groups list.
- Design: Click Text Style to change the colors and fonts for each element according to your site's design. Click Buttons & Icons to design your buttons and links for the regular and hover states. and click Background & Borders to customize the app background, cards and text fields.

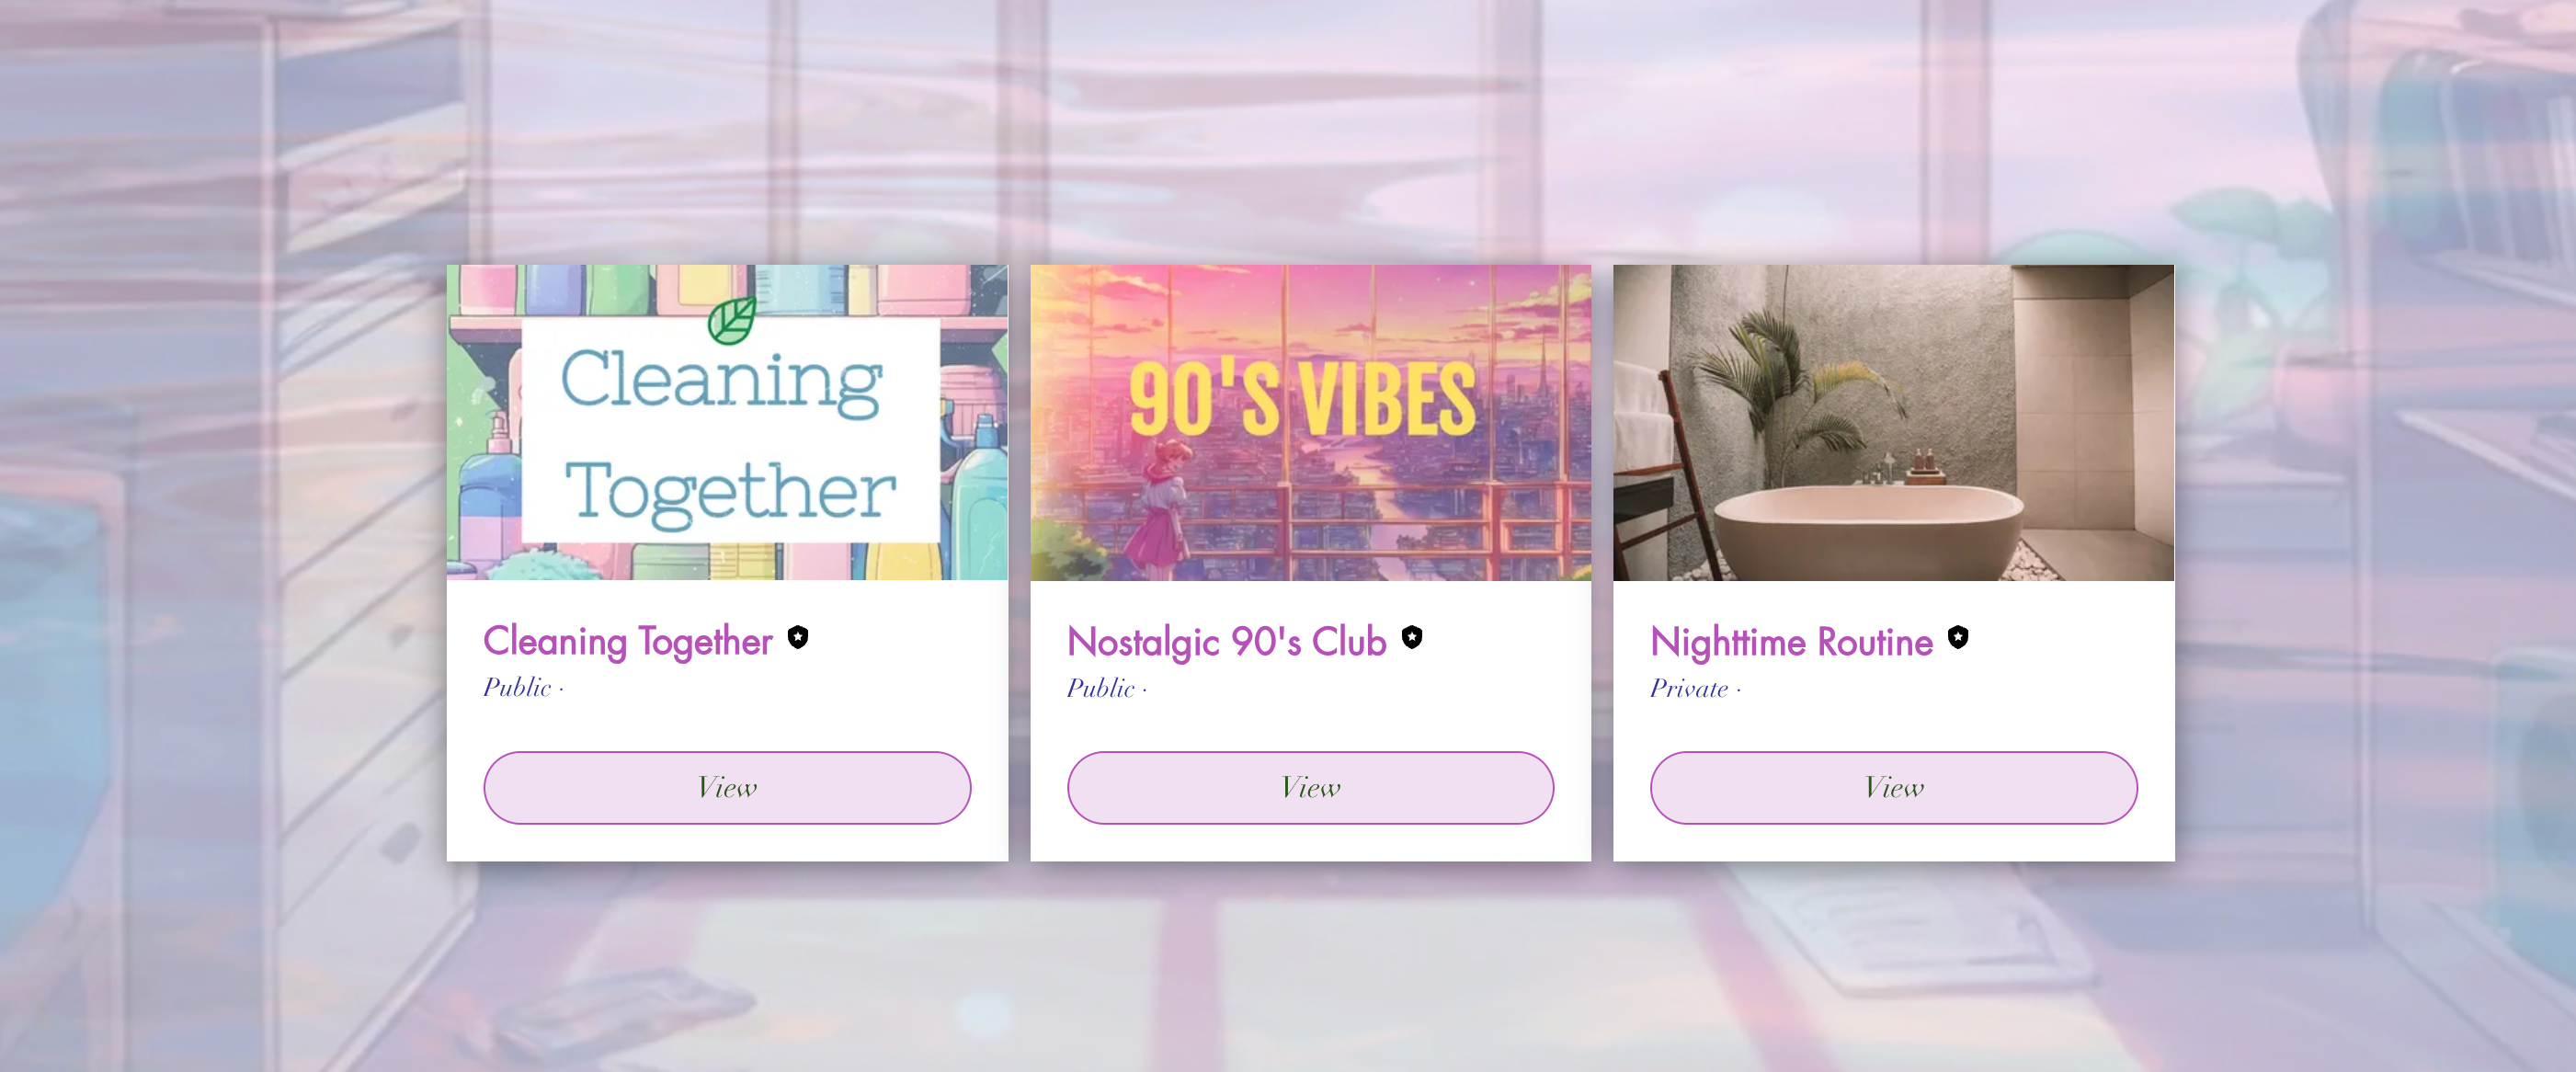
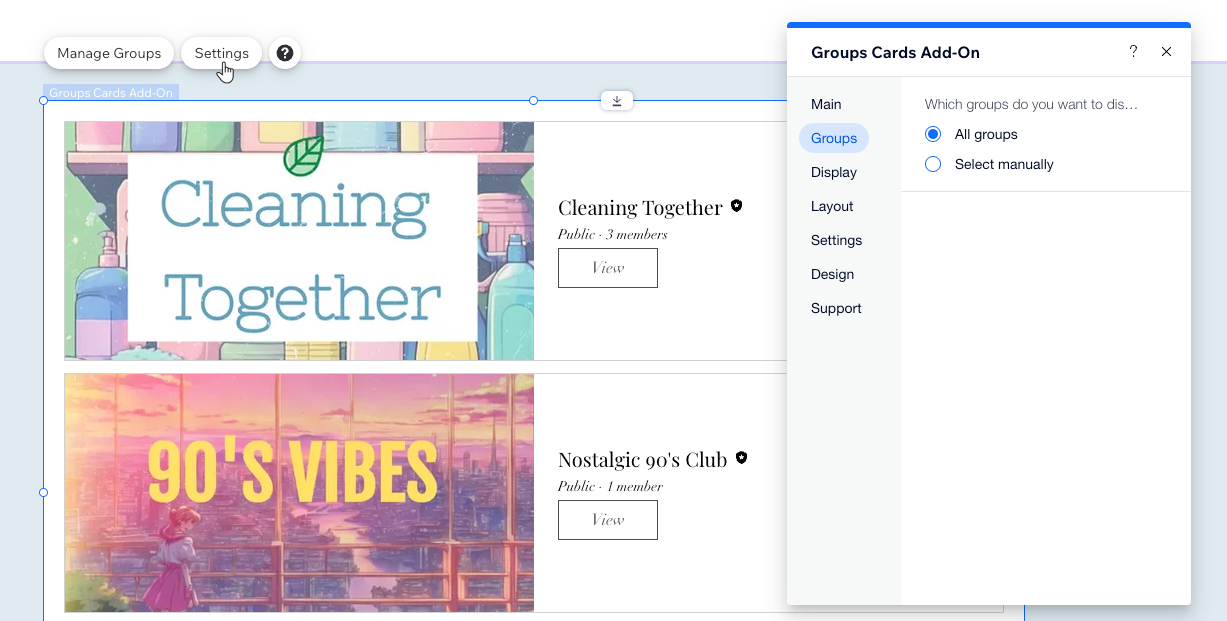
Adding and customizing your Groups Cards add-on
You can customize your Cards add-on and design it in a unique way, unlike the design you chose for your group. This way you can match it to the design of the page you added it to. Only public groups appear in the add-on.
Wix Editor
Studio Editor
Wix Harmony Editor
- Go to your editor.
- Go to the Groups page in your site.
- Click the Groups element on your page.
- Click Settings.
- Click Add-Ons.
- Select the Cards add-on.
- Select the relevant page in your site.
- Click Add to Page.
- Click the Groups Cards Add-On element on your page.
- Click Settings.
- Click the relevant tabs to customize your add-on:
- Groups: Set the groups you want to display. Select all groups or specific ones.
- Display: Select the checkboxes next to the elements you want to show on your group list.
- Layout: Change the group, image, and text layout.
- Settings: Select the relevant option between: Recent activity, A-Z, or Member count.
- Design: Click Text to change the colors and fonts for each element according to your site's design. Click Buttons to design your buttons and links for the regular and hover states. and click Background to customize the app background and cards.
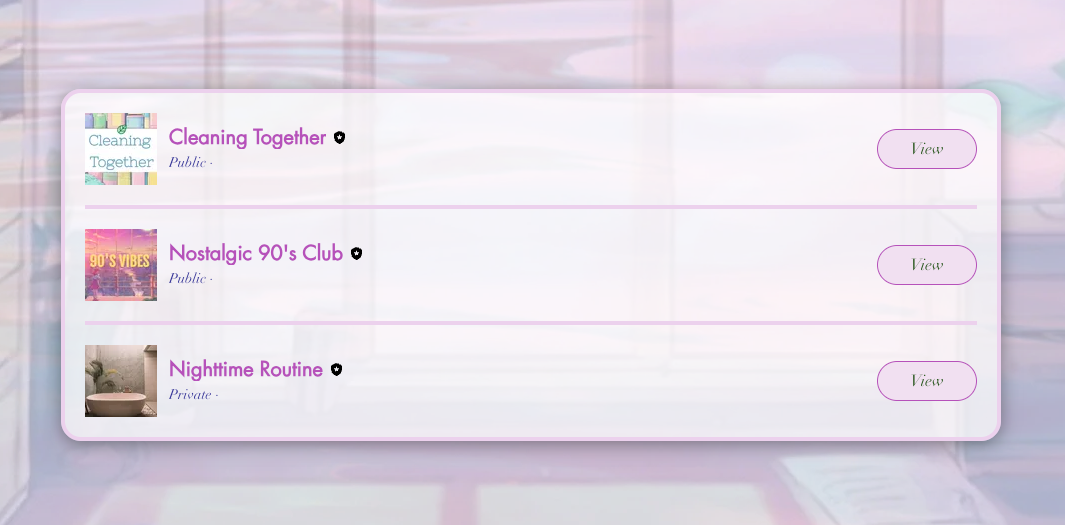
Adding and customizing your Groups List add-on
You can customize your Groups List add on and design it in a unique way, unlike the design you chose for your group. This way you can match it to the design of the page you added it to. Only public groups appear in the add-on.
Wix Editor
Studio Editor
Wix Harmony Editor
- Go to your editor.
- Go to the Groups page in your site.
- Click the Groups element on your page.
- Click Settings.
- Click Add-Ons.
- Select the List add-on.
- Select the relevant page in your site.
- Click Add to Page.
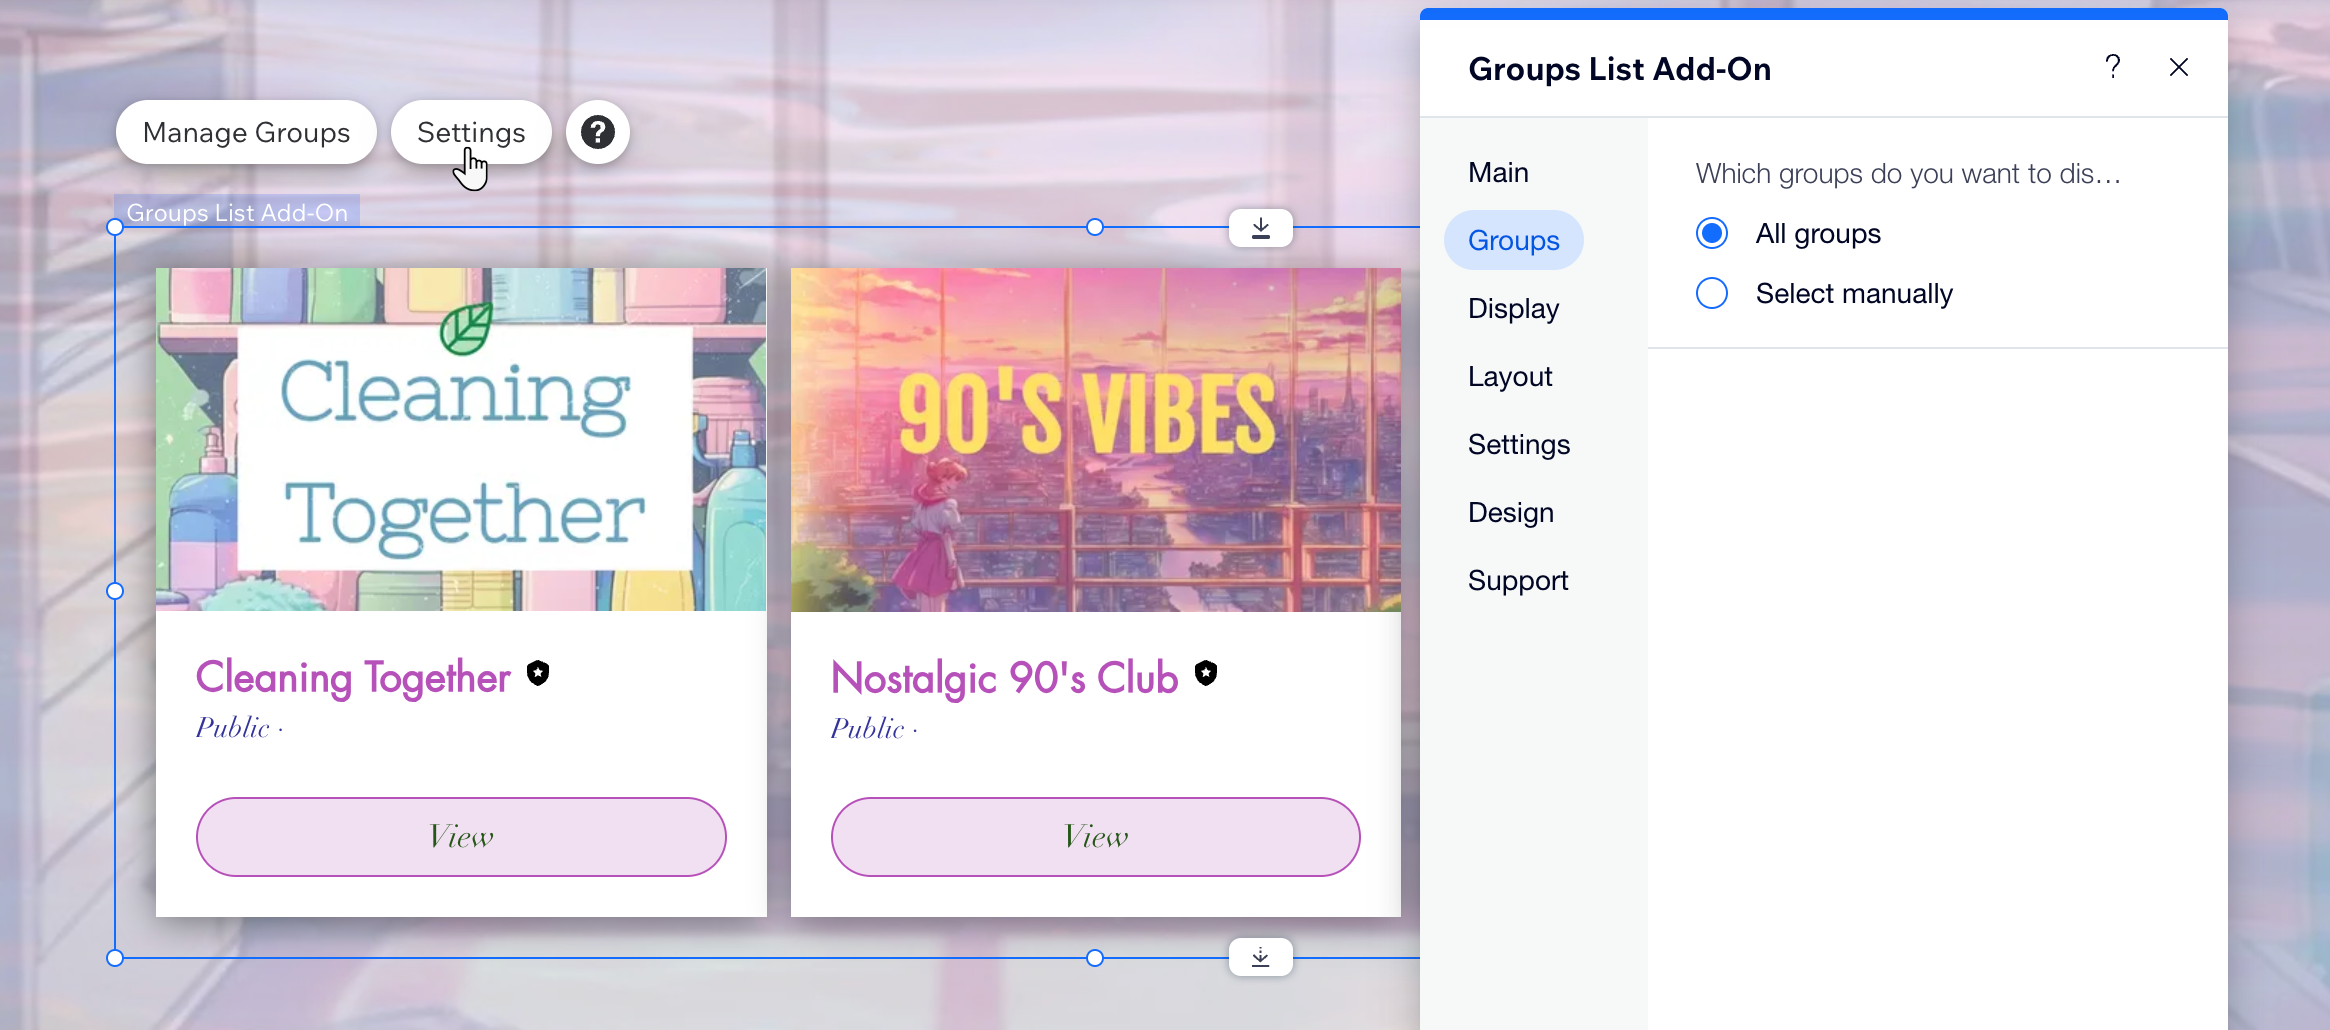
- Click the Groups List Add-On element on your page.
- Click Settings.
- Click the relevant tabs to customize your add-on:
- Groups: Set the groups you want to display. Select all groups or specific ones.
- Display: Select the checkboxes next to the elements you want to show.
- Layout: Change the group, image, and text layout.
- Settings: Select the relevant option between: Recent activity, A-Z, or Member count.
- Design: Click Text to change the colors and fonts for each element according to your site's design. Click Buttons to design your buttons and links for the regular and hover states. and click Background to customize the app background and cards.
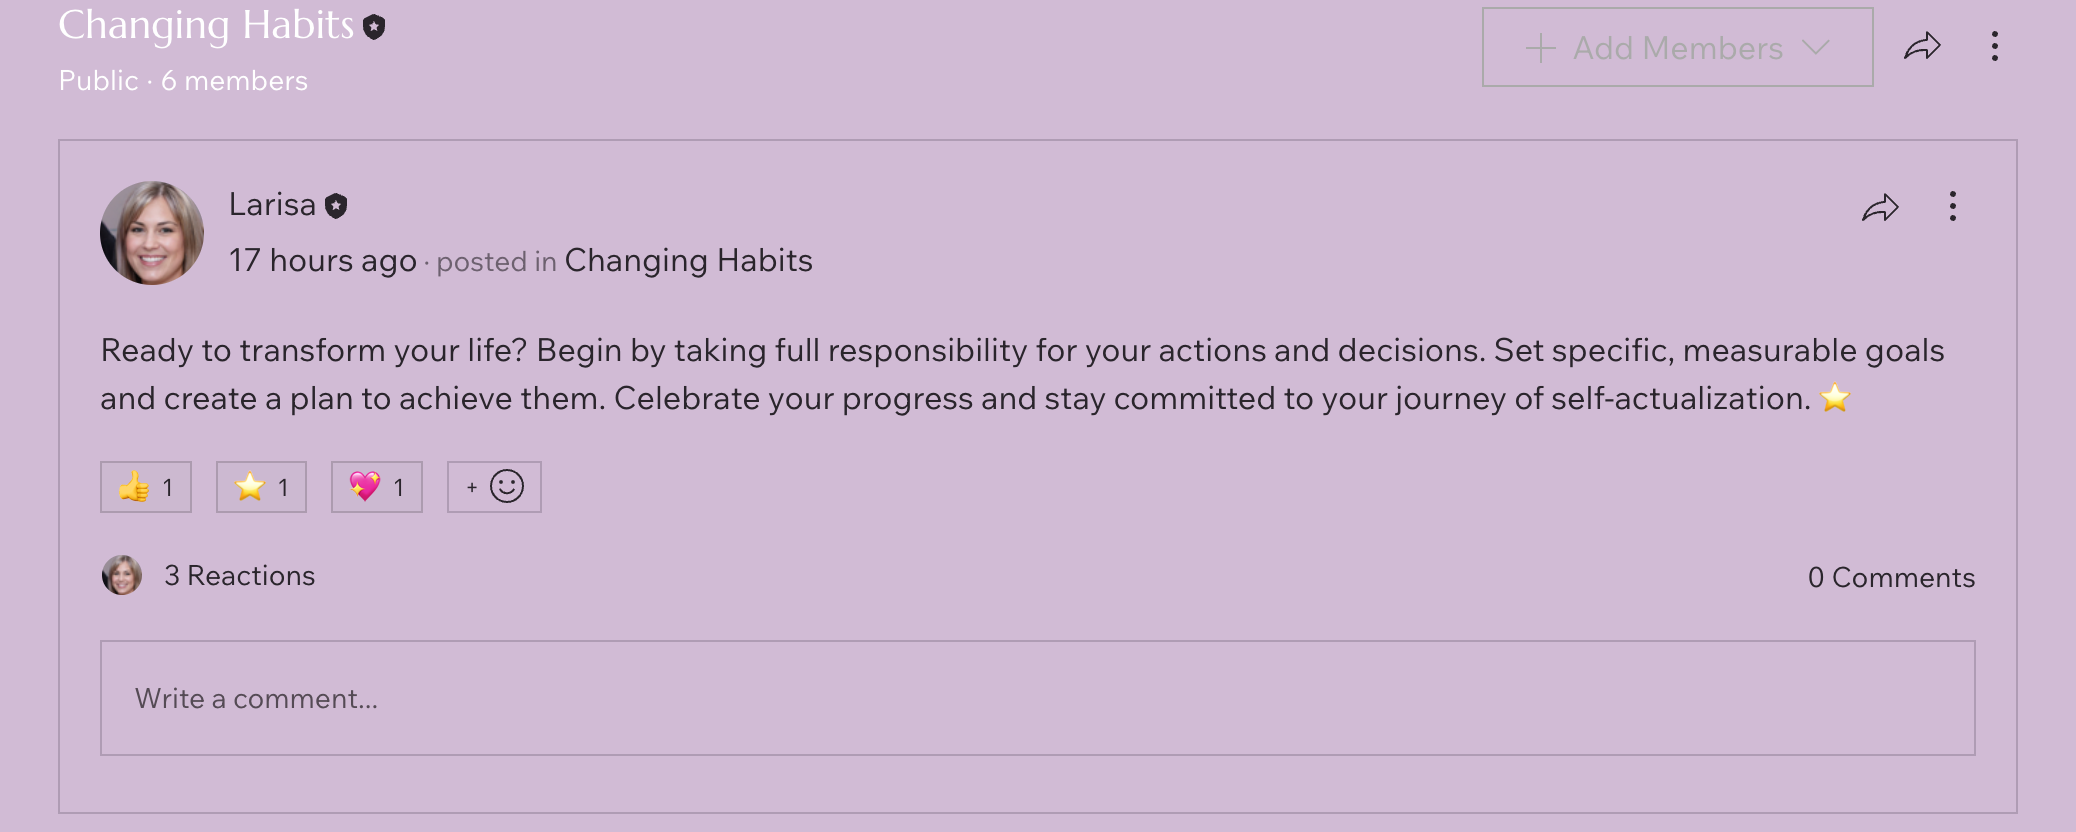
Adding and customizing your Groups Feed add-on
You can customize your Groups Feed add-on and design it in a unique way, unlike the design you chose for your group. This way you can match it to the design of the page you added it to. Only public groups appear in the add-on.
Wix Editor
Studio Editor
Wix Harmony Editor
- Go to your editor.
- Go to the Groups page in your site.
- Click the Groups element on your page.
- Click Settings.
- Click Add-Ons.
- Select the Feed add-on.
- Select the relevant page in your site.
- Click Add to Page.
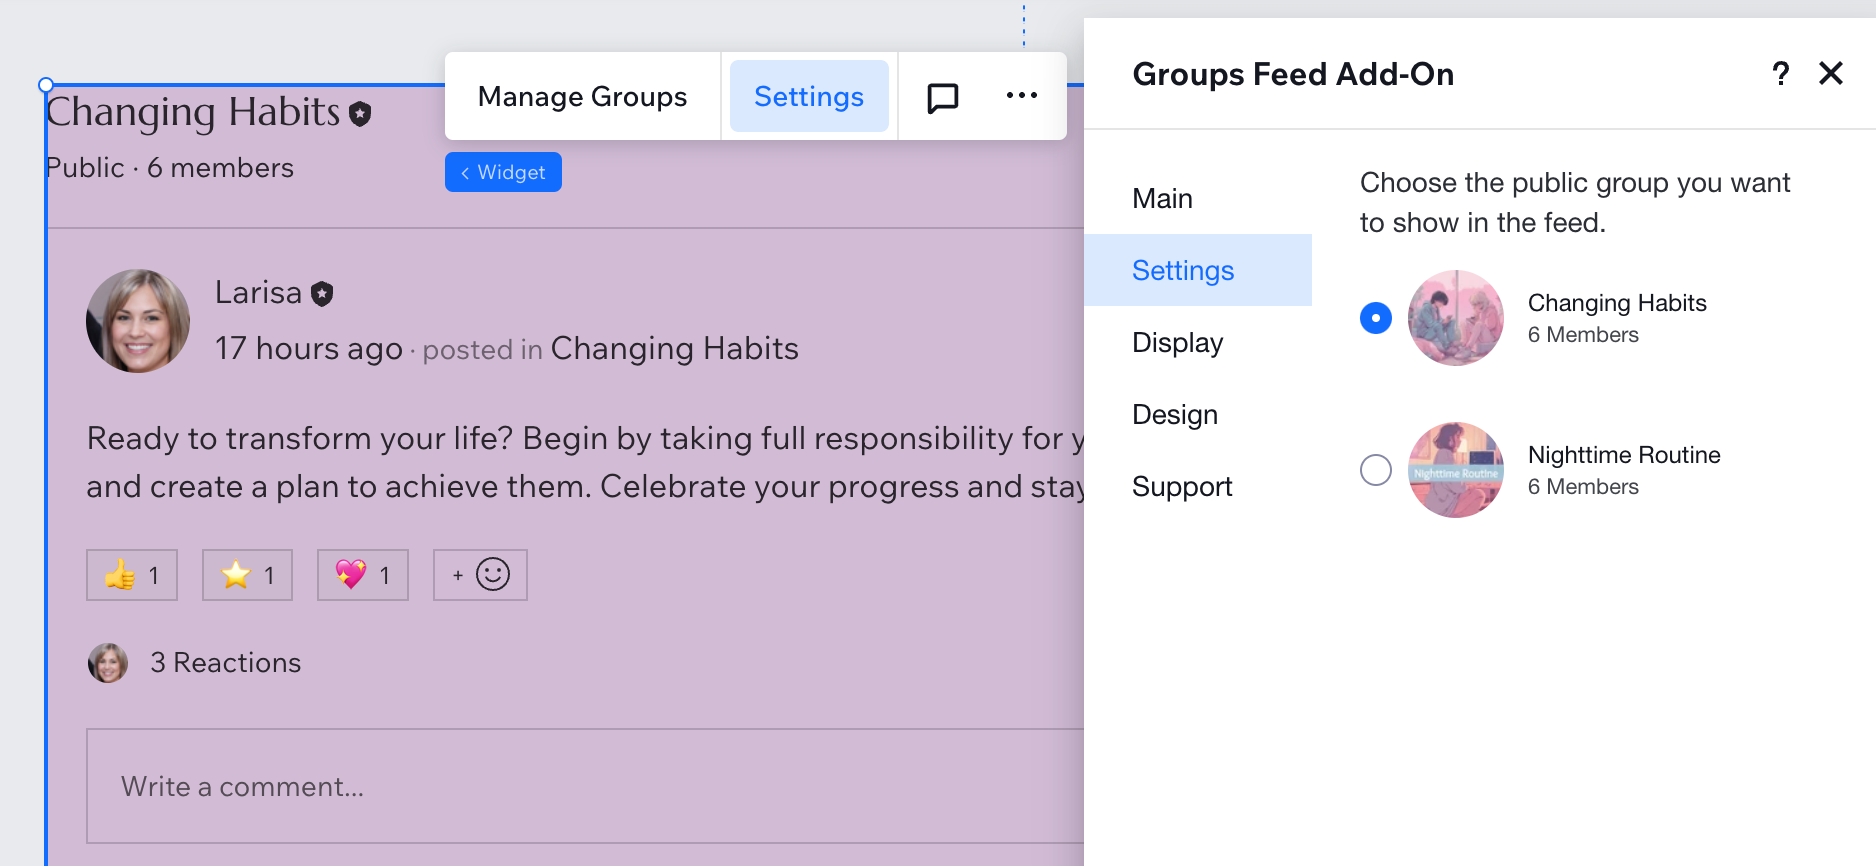
- Click the Groups Feed Add-On on your page.
- Click Settings.
- Click the relevant tabs to customize your add-on:
- Settings: Set the groups you want to display. Select all groups or specific ones.
- Display: Select the checkboxes next to the elements you want to show.
- Design: Click Header to customize the colors and fonts for your titles according to your site's design. Click Posts to change the app background and text design. Click Buttons to design your buttons and links for the regular and hover states.
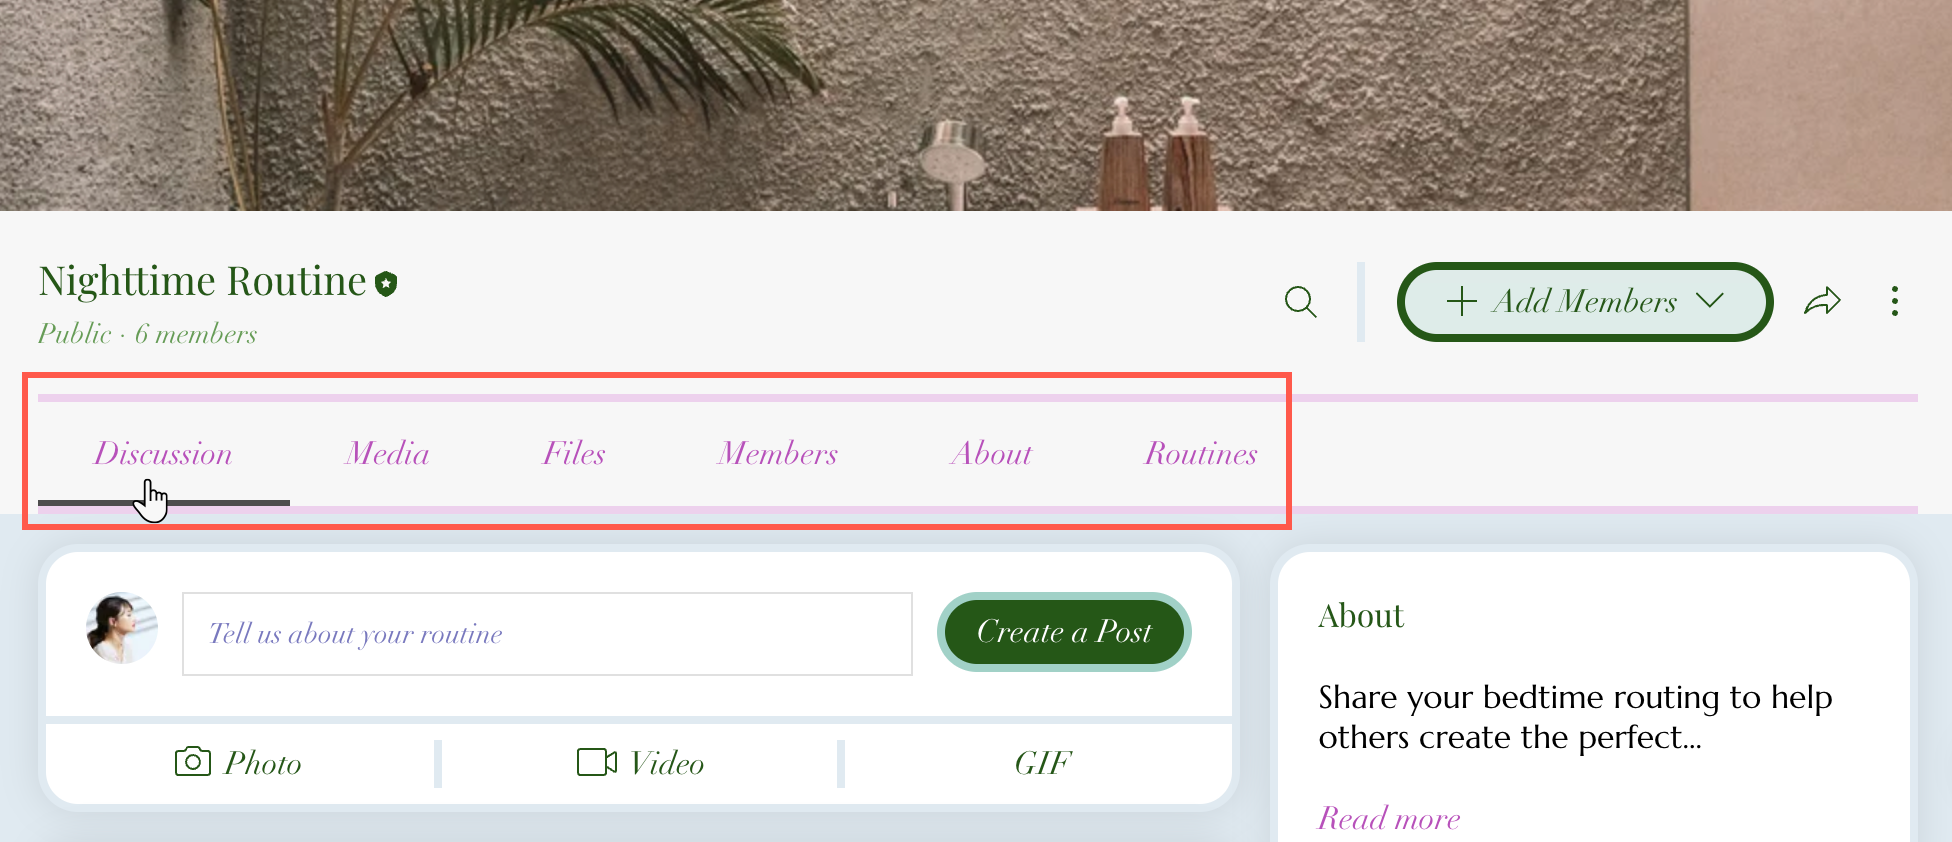
Customizing your Group page tabs
Your Group page has tabs at the top that help show different things about your group. You can change the names of these tabs, add new ones, or hide tabs you don't want people to see. If you change a tab, it only changes that tab for that group.
Dashboard
Wix app
- Go to Groups in your site's dashboard.
- Click the relevant group.
- Click Tabs.
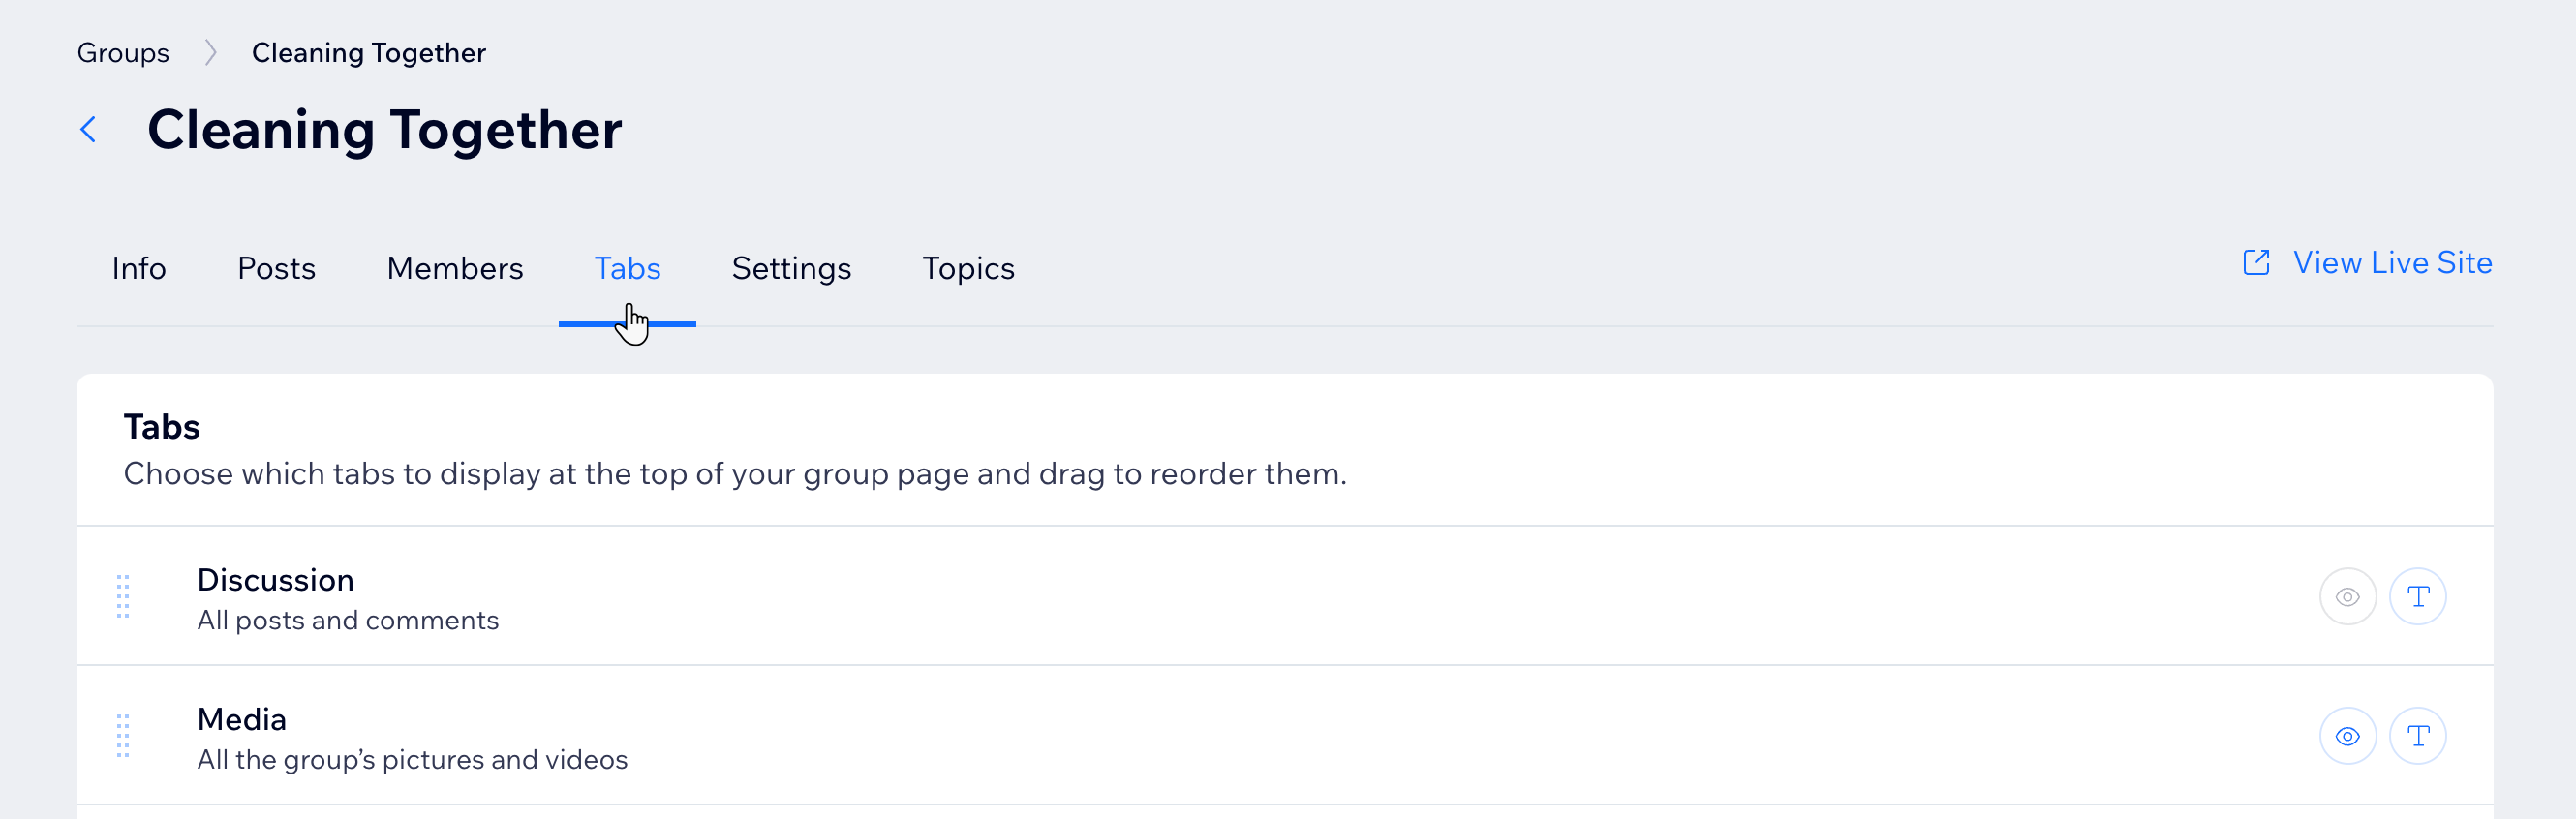
- Choose what you want to do next:
Rename a tab
 next to the relevant tab.
Show or hide a tab
 next to the relevant tab to show or hide it on your group page.
Create a custom tab

Reorder tabs

FAQs
Click a question below to learn more about designing your group.
Can I delete a group tab?
Can all my tabs be custom tabs?

Can I highlight a specific tab?
Can I fully customize every element in the post?

Can I reorder the About, Members, and Topics sections on the right?

Can I reorder the elements on the page to be right to left?
Can I change the topics text design?
What does the bodies and input design change?


