


Wix Forms: Adding Custom Validations to Your Forms
4 min
In this article
- Adding custom validation to your forms
- Creating a function to verify email addresses
- FAQs
Add your own custom validation to verify the info visitors enter before they submit your form. Setting your own rules ensures that the data meets your requirements – some reasons for adding custom validation include:
- Verifying email addresses and ensuring two fields match.
- Restricting email address entries to numbers and letters only.
- Limiting accepted email aliases (e.g. only Gmail).
The first section of this article explains how to build a custom validation, and the second section provides a step-by-step guide for setting up an email address verification.
Important:
This feature is only available for the new Wix Forms.
Adding custom validation to your forms
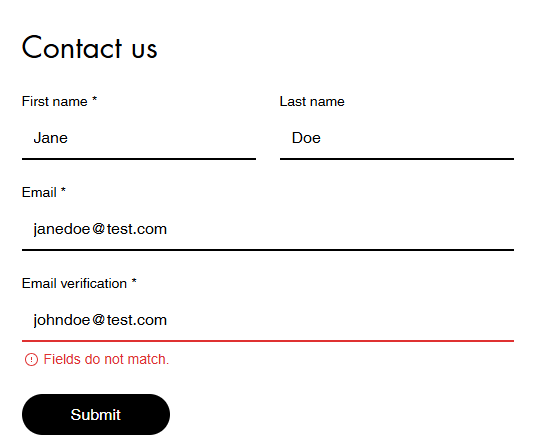
Add custom validation to your forms to control the data that visitors submit. The function uses the form submission data to check if the form passes your defined validation and if not, applies your custom error message.
To add custom validation to your forms:
- Go to Forms & Submissions in your site's dashboard.
- Click Edit next to the form you want to update or create a new form.
- Click the Settings tab at the top.
- Scroll down to Advanced form validations and click Create Validation to open the function builder.
- Click Start from Scratch.
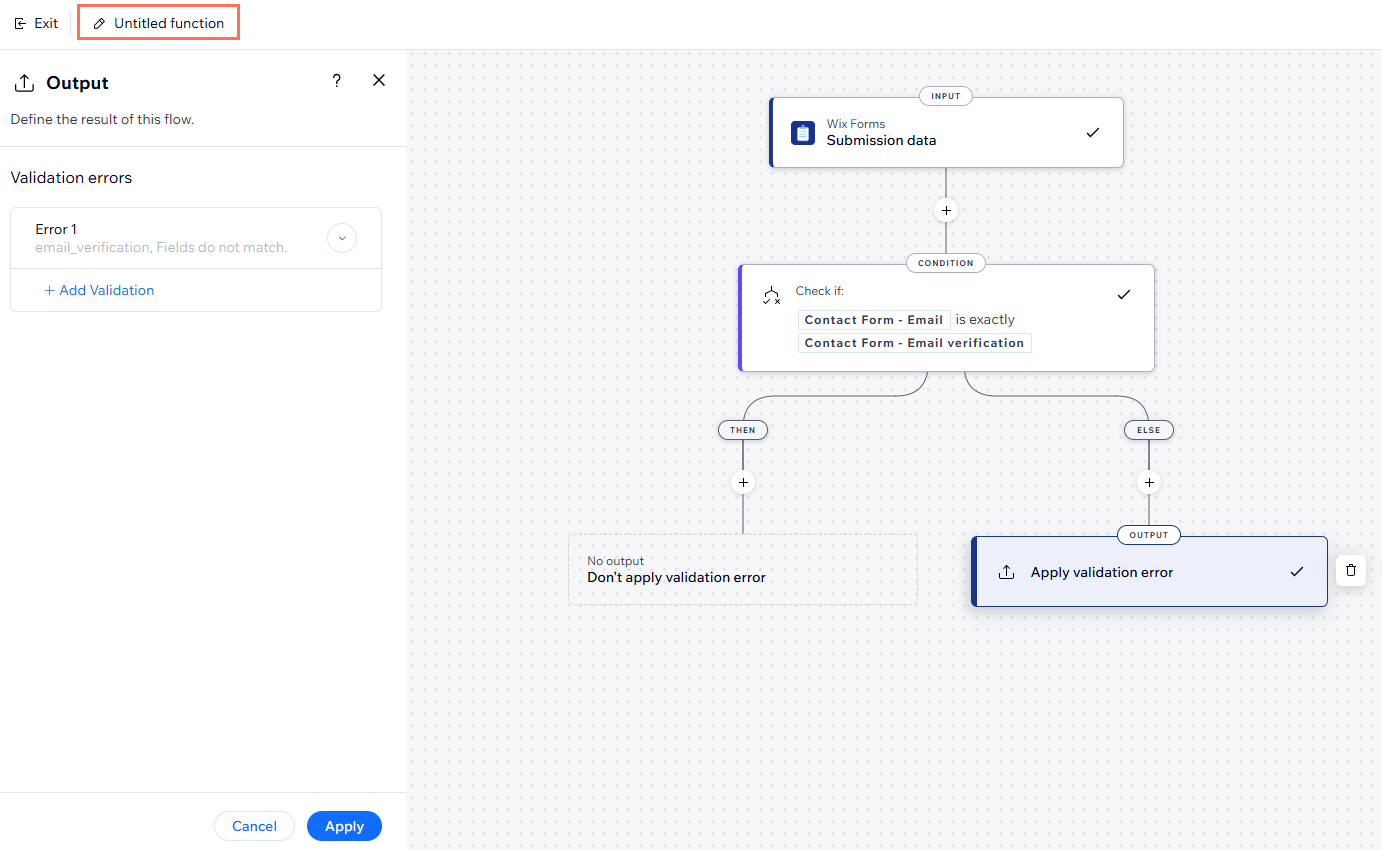
- Click the Condition step to add parameters to your function using if/else logic.
- Set the function's output:
- Click the Output step.
- Set the validation error, including:
- (Optional) Form field key: Apply the error message to a specific field. If no field key is added, the error message shows below the submit button.
- Error message: Enter the error message shown when the custom validation isn't met.
- Click Add to add the validation error.
- (Optional) Click + Add Validation to set another validation error.
- Click Apply to save your output.
- Continue creating your function to match your business needs, adding relevant conditions or actions.
- Connect this function to the relevant form:
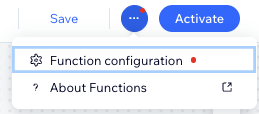
- Click the More Actions icon
 at the top right
 - Select Function configuration.
- Click Selected form 1 and then + Select.
- Select the relevant form and click OK.
- Click the More Actions icon
- Enter a name for your function at the top left.
Tip: It's only visible to you and helps identify the function in the dashboard. - Click Activate at the top right.
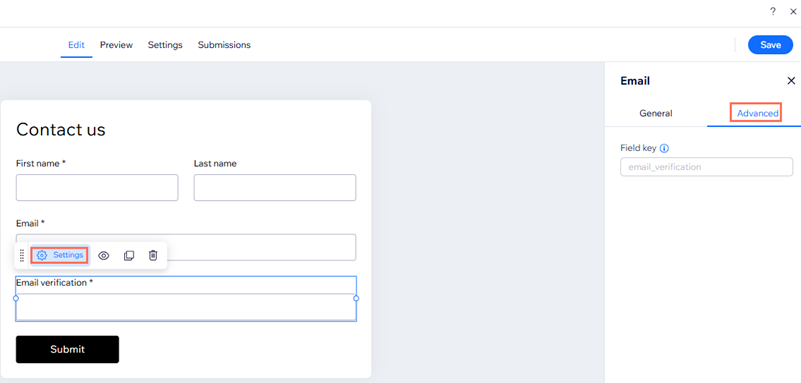
Where can I find my form field key?
Go to the relevant form in the form builder. Click the Advanced tab in the field settings panel. Copy the field key provided and add to the function output.
Creating a function to verify email addresses
One common scenario for creating a custom validation function is to ensure that two email address fields match before allowing a form's submission. The steps outlined below guide you through the process of setting up this particular function.
Before you begin: 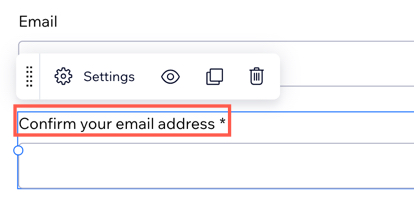
Ensure that your form includes two email address fields for validation. To clarify the purpose of the second field to visitors, we suggest renaming the field title to something like 'Confirm your email' or 'Email verification'.
To create a function to verify email addresses:
- Go to Forms & Submissions in your site's dashboard.
- Click Edit next to the form you want to update or create a new form.
- Click the Settings tab at the top.
- Scroll down to Advanced form validations and click Create Validation to open the function builder.
- Select Validate email address match before submission.
- Click Use Template.
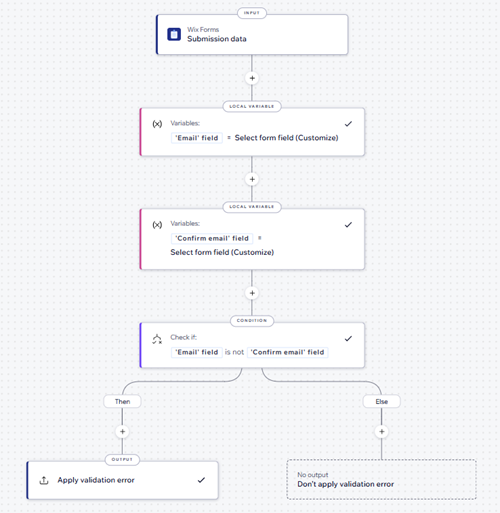
- Enter a name for your function at the top left.
Tip: It's only visible to you and helps identify the function in the dashboard. - Click Activate at the top right.
FAQs
Click a question below to learn more about custom form validations.
Can I access the functions builder from my forms dashboard?

Can I test my form validation?
