

Wix Events: Managing Emails You Send and Receive
4 min
In this article
- Setting the frequency of your email alerts
- Editing confirmation emails
- Customizing the reminder email
- Customizing cancelation emails
- Customizing waitlist emails
Emails are automatically sent to your guests at different times, such as when they register for an event. Depending on your preferences, you can edit the text of these emails and disable those you don't want guests to receive.
Additionally, you can set how often you want to receive email alerts with updates on your events.
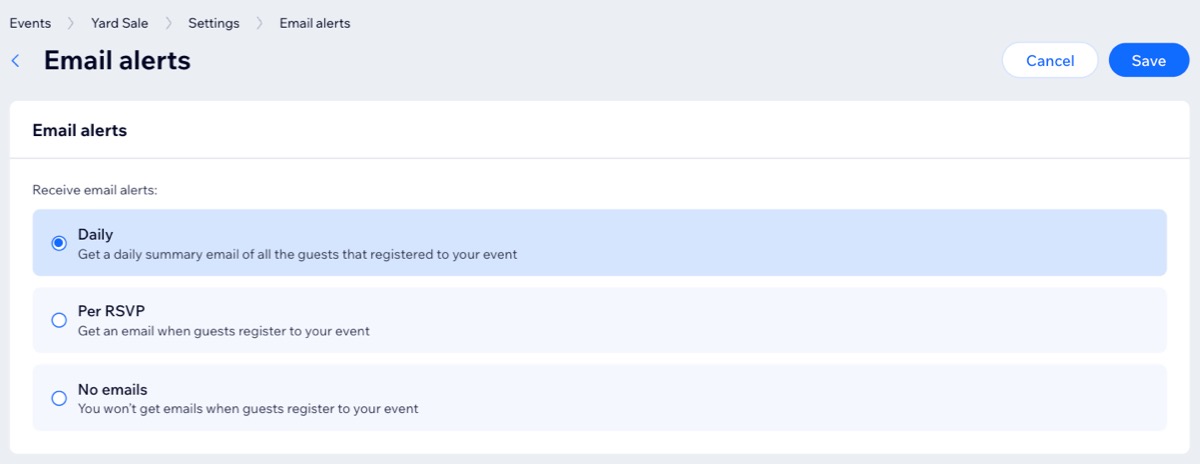
Setting the frequency of your email alerts
Decide how often you want to get email alerts with updates on your events. You can get a separate email every time a guest RSVPs or buys a ticket. Alternatively, if you prefer to receive fewer emails, you can get one email per day or no emails at all.
Tip:
When a guest RSVPs, you'll get an email at your Wix account address. Update your settings to use a different address.
To set your email alert frequency:
- Go to Events in your site's dashboard.
- Click Manage next to the relevant event.
- Click the Settings tab.
- Scroll down to Emails you receive.
- Click the toggle next to Receive email alerts:
- Enabled: Click Edit and select the frequency you receive email notifications about your event (Daily / Per RSVP / No emails). When done, click Save.
- Disabled: You won't receive any emails.
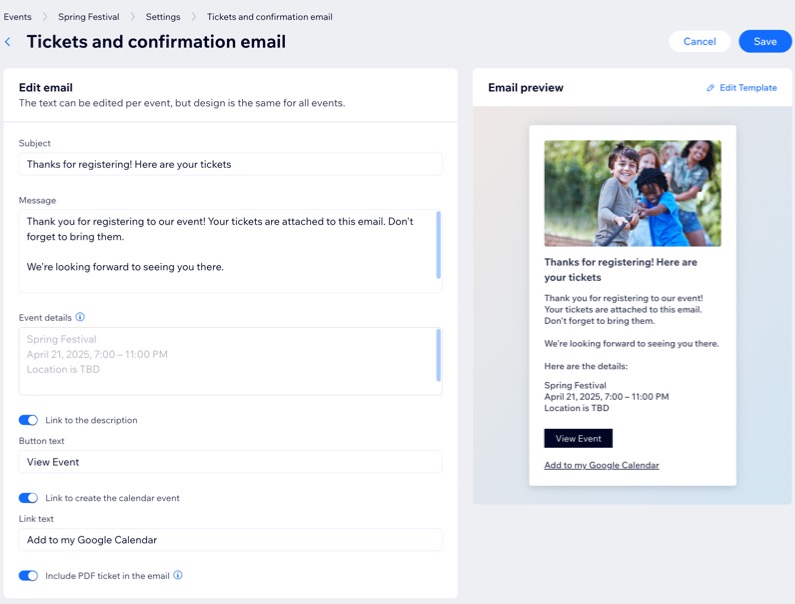
Editing confirmation emails
The confirmation email is the message a guest receives after they RSVP or purchase a ticket to your event. For ticketed events, the confirmation email includes the option to attach a PDF ticket and cannot be disabled. For RSVP events, you can choose to disable the confirmation email.
To edit the confirmation email:
- Go to Events in your site's dashboard.
- Click Manage next to the relevant event.
- Click the Settings tab.
- Scroll down to Emails you send to event guests.
- Click the toggle next to Tickets and confirmation email / Confirmation email:
- Enabled: Guests receive an email when they register for an event.
- Disabled: Guests do not receive email confirmation when registering.
- (Optional) Edit the content of the confirmation email:
- Click Edit next to Confirmation email.
- Adjust the relevant options in the email (e.g. subject line or whether to include a PDF ticket for ticketed events).
- Click Save.
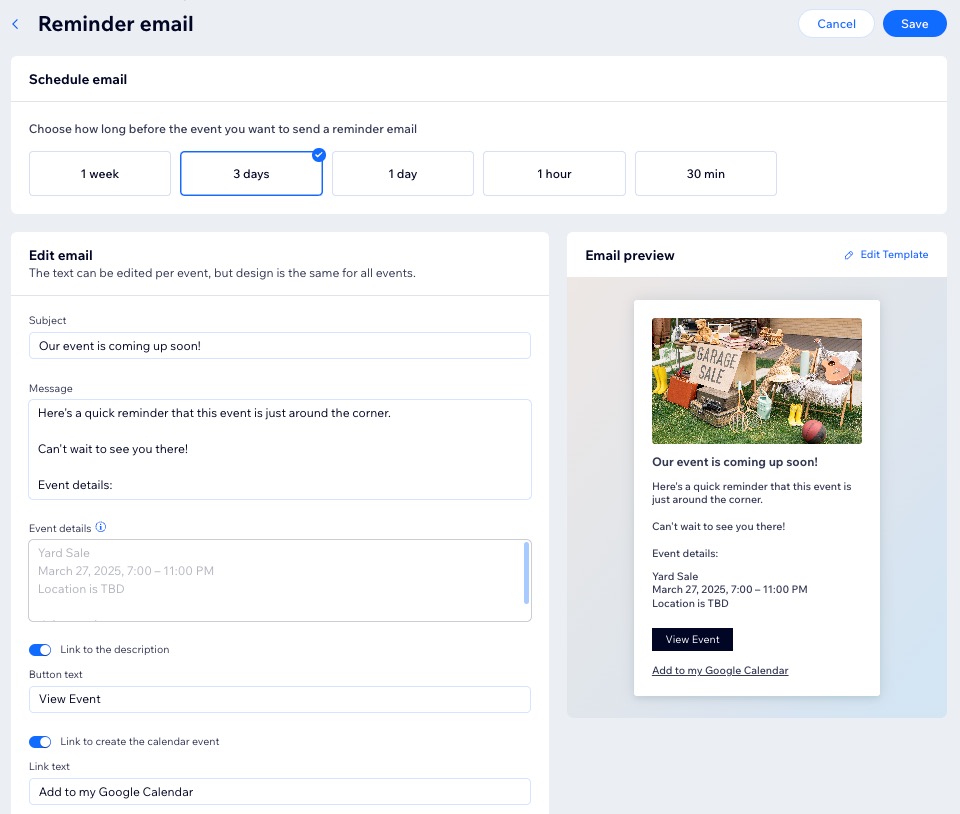
Customizing the reminder email
The reminder email lets guests know your event is coming up. You can customize when it’s sent and whether to send it at all.
To edit the reminder email:
- Go to Events in your site's dashboard.
- Click Manage next to the relevant event.
- Click the Settings tab.
- Scroll down to Emails you send to event guests.
- Click the toggle next to Reminder email:
- Enabled: Guests receive a reminder email before the event. You can set when the email is sent.
- Disabled: Guests receive no reminders about your event.
- (Optional) Change the content and timing of the reminder email:
- Click Edit next to Reminder email.
- Choose how long before the event you want to send a reminder email.
- Edit any of the default text.
- Click Save.
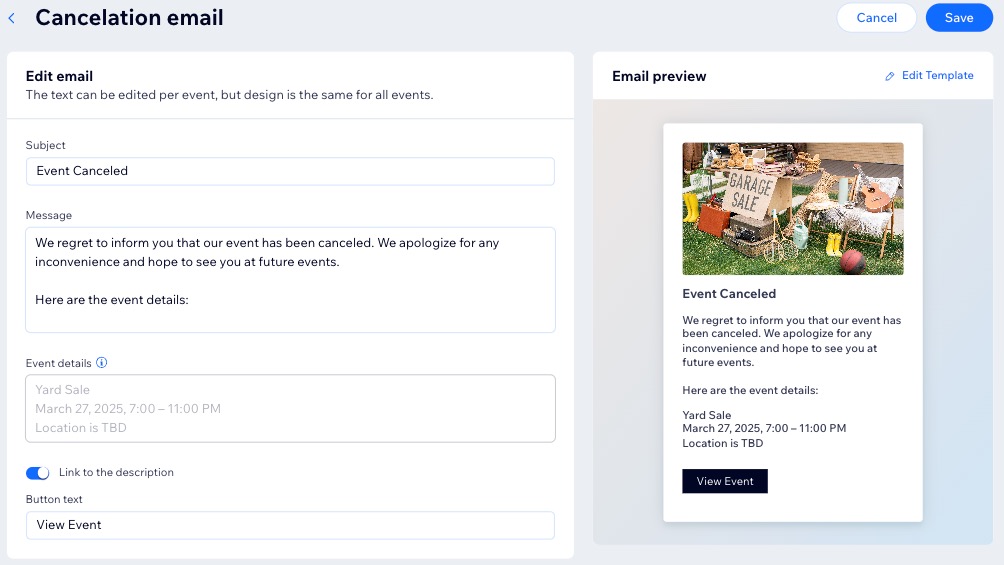
Customizing cancelation emails
Before you cancel an event, you can edit the cancelation email text. For example, you may want to explain why the event was canceled or direct guests to other upcoming events. You can also disable the cancelation email if it isn't necessary.
To edit the cancelation email:
- Go to Events in your site's dashboard.
- Click Manage next to the relevant event.
- Click the Settings tab.
- Scroll down to Emails you send to event guests.
- Click the toggle next to Cancelation email:
- Enabled: Guests receive a cancelation email if the event gets canceled.
- Disabled: Guests receive no cancelation email.
- (Optional) Edit the content of the cancelation email:
- Click Edit next to Cancelation email.
- Edit any of the default text.
- Select or deselect the checkbox next to the Link to the description.
- Click Save.
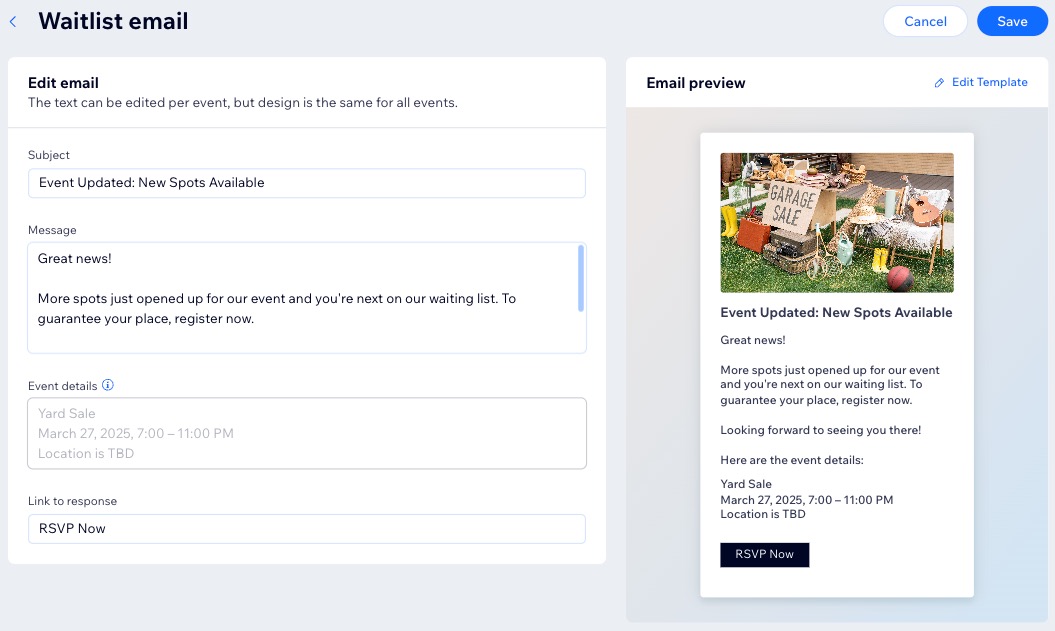
Customizing waitlist emails
Waitlists can be created for RSVP events. When you increase the maximum guest limit to allow more people to attend, you can send an automated email to guests on the waitlist.
To edit the waitlist email:
- Go to Events in your site's dashboard.
- Click Manage next to the relevant event.
- Click the Settings tab.
- Scroll down to Emails you send to event guests.
- Click the toggle next to Waitlist email to enable or disable it:
- Enabled: Waitlisted guests receive an email when free spots open up.
- Disabled: Guests on the waitlist don't receive a notification.
- (Optional) Edit the content of the waitlist email:
- Click Edit next to Waitlist email.
- Edit the relevant the default text.
- Click Save.
What's next?
Start customizing event emails that you send to guests.
