

Wix Events: Customizing Registration Settings & Messages
13 min
In this article
- Customizing registration settings for RSVP Events
- Customizing registration settings for Ticketed Events
- Editing the registration messages for RSVP / Ticketed events
- FAQs
Take control of your event registration by deciding where, when, and who can sign up. You can also personalize the messages guests see after registering or when registration is unavailable.
Customizing registration settings for RSVP Events
Choose how guests register for your event—on your site, an external site, or without registration at all. Set a guest limit and decide who can RSVP, whether it’s everyone or only site members. This flexibility is ideal for open events where attendance tracking isn’t essential, such as a public concert.
Dashboard
Wix app
Studio app
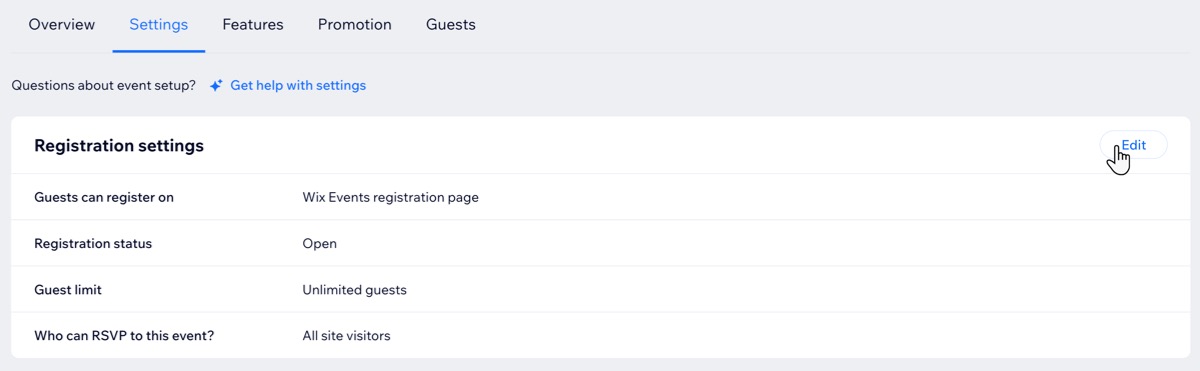
- Go to Events in your site's dashboard.
- Click Manage next to the relevant event.
- Click the Settings tab.
- Click Edit next to Registration settings.
- Select an option under Guests can register on:
Wix Events registration page

A different page or web address

Guests don't need to register

Customizing registration settings for Ticketed Events
Manage when guests can register by opening or closing registration manually, or by setting specific dates. You decide if guests can register on the event page, through a shared link, or access the page without registering.
Dashboard
Wix app
Studio app
- Go to Events in your site's dashboard.
- Click Manage next to the relevant event.
- Click the Settings tab.
- Click Edit next to Registration settings.
- Select an option under Guests can register on / :
Wix Events registration page

A different page or web address

Guests don't need to register


Editing the registration messages for RSVP / Ticketed events
Customize the messages guests see in different situations, such as when tickets sell out, registration is closed, or after they register. Personalize the text and button options to enhance the guest experience.
Note:
Currently, editing registration messages for RSVP / Ticketed events is only available on desktop.
To edit the registration message:
- Go to Events in your site's dashboard.
- Click Manage next to the relevant event.
- Click the Settings tab.
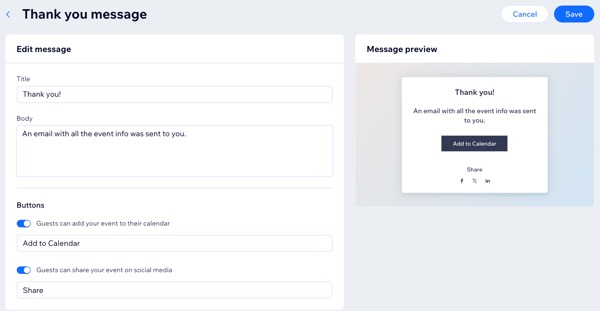
- Click Edit next to the relevant message under Registration messages:
- Tickets unavailable message: Shown for ticketed events when tickets can't be booked (e.g. past events). You can edit the message and button text.
- Registration closed message: Appears if you changed the registration status to "Closed". You can edit the message and button text.
- Thank you message: Shown after guests register for an RSVP event. You can customize the title, body, and enable buttons for guests to add the event to their calendar or share it on social media.
- When finished, click Save.
FAQs
Click a question below to learn more about customizing event registration settings and messages.
Can I add a policy that guests see at checkout?

What can I customize in my registration form?
Can I limit the number of tickets sold for my event?
Can I restrict access to my event page for an RSVP or ticketed event?
