

Wix Editor: Adding and Deleting Elements
2 min
In this article
- Adding an element to your site
- Deleting elements from your site
The Wix Editor contains hundreds of unique, customizable elements that you can use to create your site. Choose from images, text, shapes, strips, and more to really personalize and make your site stand out.
Add an element to your site in just a couple of clicks, and likewise delete them as you build your online presence.
Adding an element to your site
Choose from a wealth of beautiful, customizable elements and add them to your site in just a couple of clicks.
To add an element:
- Go to your editor.
- Click Add Elements
 on the left side of the editor.
 - Click a tab, e.g., Gallery, Interactive, Box etc.
- Click an element or drag it to your site to add it.
Tip:
Some element tabs (such as text and buttons) have themed elements. These elements have been handpicked for you, as they match your site's color and text theme.

What's next?
Once you have added an element to your site, use the options to customize and set it up.
Deleting elements from your site
You can delete an element you add to your site at any time. Delete elements individually, or select multiple and delete them all at once. Click an option below to learn more:
Deleting elements individually
Deleting multiple elements at once
Deleted an element by mistake?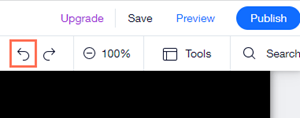
If you delete an element by mistake, you can easily undo this by clicking the Undo  icon in the top bar of the editor.
icon in the top bar of the editor.