

Wix Editor: Adding and Customizing an Animation
4 min
In this article
- Adding animation to an element
- Customizing an animation
- Adding animations to your mobile site
Use animations to bring your site to life. We offer various animations for any aspect of your design – entrance, scroll, loop and even mouse effects.
You can customize the animation so it's exactly what you envisioned. For example, adjust the distance, duration, delay and much more. Our mobile animations are designed to fit smaller screens, so you can wow your visitors on any device.
You can apply different animations and effects to the same element.
Issues with your animation?
Follow our steps to ensure they're working as expected on your live site.
Adding animation to an element
Make your site dynamic and engaging by adding an animation to your elements. Each animation has its own different effect, so you can mix them up with different elements and give your visitors a lasting impression.
Tip:
You can add animation to a group of elements by selecting the group, and clicking the Animation icon  .
.
.To add animation:
- Click the relevant element in your editor.
- Click the Animation icon .
- Select an animation from the available options.
- Entrance: The animation only plays once when the selected element appears on the screen.
- Loop: The animation plays continuously on loop.
- Scroll: The animation plays when the element scrolls into view.
- Motion and Effects: The animation starts moving when the visitor's cursor hovers over the element.
Note:
Elements in your header will animate only once, during the first visit to the page.
Customizing an animation
After adding animation to an element, you can customize it to make it behave the way you want and suit your site's feel.
Adjust settings such as the power, direction, and delay to make an impact and engage your visitors.
Note:
The available customization options depend on the animation you choose.
To customize the animation:
- Click the relevant element in your editor.
- Click the Animation icon .
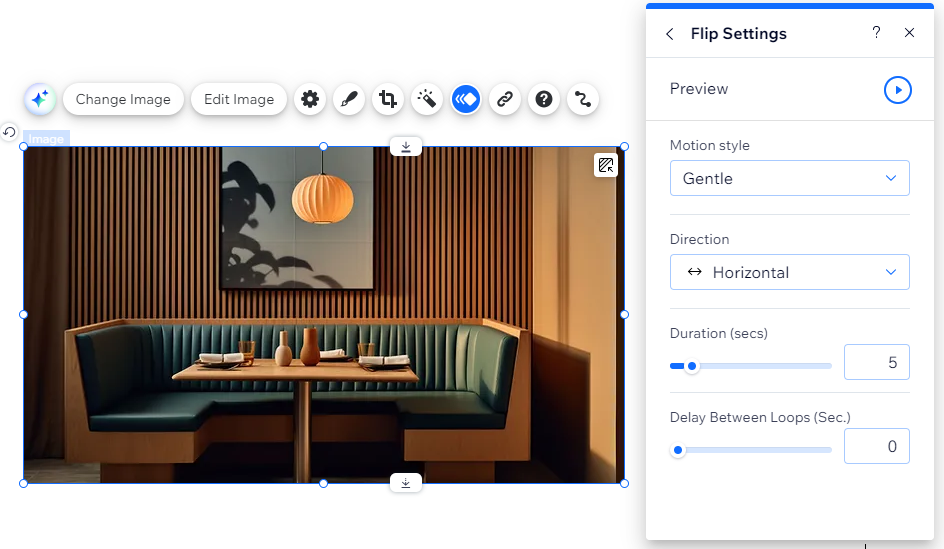
- Click Customize and use the options to adjust your animation:
- Power: Click the drop-down to select how powerful the animation is when it plays.
- Direction: Select what direction the animation enters from (e.g. clockwise, from the right).
- Distance: Use the slider to change the distance between the effect's start and end point.
- Duration: Use the slider to adjust how long you want the animation to play for.
- Delay: Use the slider to increase or decrease the delay between the page loading and the animation beginning.
- Velocity: Drag the slider to change the speed of the effect – the lower the number, the faster the effect.
- Movement axis: Decide if the element moves horizontally, vertically or on both axes.
- Animation type: Choose from in, out or continuous animation type when scrolling.
- Pivot: Choose the reference point from which the element starts moving.
- Motion: Select the intensity of the motion, such as gentle or moderate.
Accessibility tip:
If this element is purely decorative, meaning it does not include important information for screen readers, select the Decorative checkbox in the Settings  panel.
panel.Adding animations to your mobile site
As well as adding animation to elements on your desktop site, you can also add them to your mobile site, so your visitors get a great browsing experience from all of their devices.
Animations for mobile have been designed specifically for smaller screen resolutions and sizes, so you don't need to worry about spacing.
Note:
Animation effects you add in desktop do not carry over to your mobile site, as they are optimized for different screen sizes. If you want an element to be animated on mobile as well, follow the steps below.
To add animation on mobile:
- Go to your mobile editor.
- Click the relevant element.
- Click the Animation icon .
- Select an animation from the available options.
Important note for Velo:
If you're using Velo (code) to hide or show an element, its animation needs to be set via Velo as well.
