

Wix Editor: Adding an Age Disclaimer to Your Site
3 min
In this article
- Creating an age disclaimer using a popup
- Creating a landing page with an age disclaimer
There are two ways to add an age disclaimer to your site. You can either show it on a popup window, or create a landing page for it.
Both options have a confirmation button and no other navigational options. That way, in order for visitors to view the rest of your site, they are required to click the confirmation button.
Creating an age disclaimer using a popup
- Add a popup.
- Click the popup.
- Click the Settings icon
 .
.
- Select Yes under Automatically display popup on pages.
- Click the Which pages is it on? field and select First page visitor sees.
- Drag the Delay slider to 0 seconds.
- Disable the X icon toggle.
- Enable the Close button toggle.
- Select Yes under Automatically display popup on pages.
- Set up the button that leads to your site:
- Click the Close button on your popup and click Change Text.
- Enter the confirmation text (e.g. "Yes, I'm over 18").
- Customize your popup to create your age disclaimer.
- Customize and set up this popup for mobile.
Note: By default, popups won’t appear on your mobile site unless enabled in the mobile editor. This is because Google does not like intrusive popups on mobile sites so having a popup enabled may negatively impact your site’s SEO.
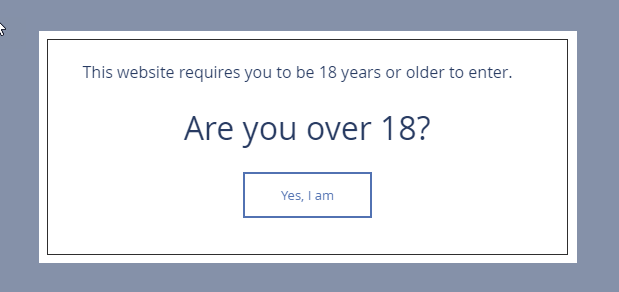
Creating a landing page with an age disclaimer
- Create a landing page.
- Set your landing page as the homepage:
- Click Pages & Menu
 on the left side of the editor.
 - Click the More Actions icon
 next to the landing page you created.
 - Click Settings.
- Click Page Info.
- Click Set next to Make this your homepage?.
- Click Pages & Menu
- Add a text element.
- Edit the text to reflect the notification. For example: "Are you over 18?".
- Add a button to lead to your site:
- Add a text button.
- Click Change Text on the button.
- Type the button text to reflect the user's confirmation. For example: "Yes, I am over 18".
- Click the Link icon
 next to Where does it link to?.
 - Select Page / Anchor.
- Select the page for users to be redirected to under Which page?.
- Click Done.
Note:
To ensure that your visitors are taken to the landing page of your site only, hide the other pages of your site from search engines.
