

Accessibility: Creating an Accessible Wix Form
4 min
In this article
- Step 1 | Display field titles
- Step 2 | Define your field titles
- Step 3 | Customize the form's design
- Step 4 | Enable visual indicators on your site
Forms allow site visitors to submit information, join a mailing list, and more. When creating a form, it's important to keep accessibility in mind to ensure that everyone can view and use it.
Follow the steps in this article to build a form that visitors can navigate and interact with, and get the most out of your site.
Important:
Old Wix Forms are not accessible. If you need to comply with accessibility regulations, switch to the new Wix Forms.
Step 1 | Display field titles
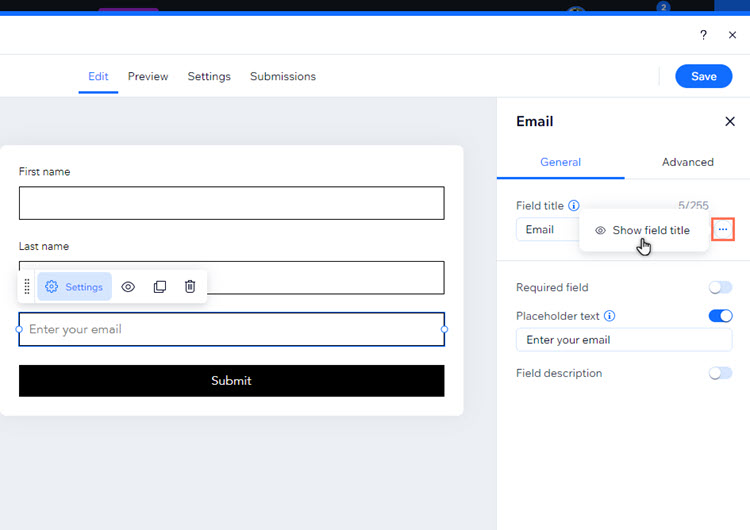
Display field titles to allow visitors to identify each form field. Displaying titles provides clarity, and indicates to visitors the field they are currently in.
To display field titles:
- Select the form in your editor.
- Click Edit Form.
- Select a form field.
- Click Settings.
- Hover over the field title and click the More actions icon
.
- Click Show field title.
Step 2 | Define your field titles
After you've enabled field titles, make sure you clearly define them. The title should be specific to ensure visitors know what exactly is required (last name, phone number, etc.).
To define the field titles:
- Select the form in your editor.
- Click Edit Form.
- Select a form field.
- Click Settings.
- Enter the text under Field title.
- Click Save.

Step 3 | Customize the form's design
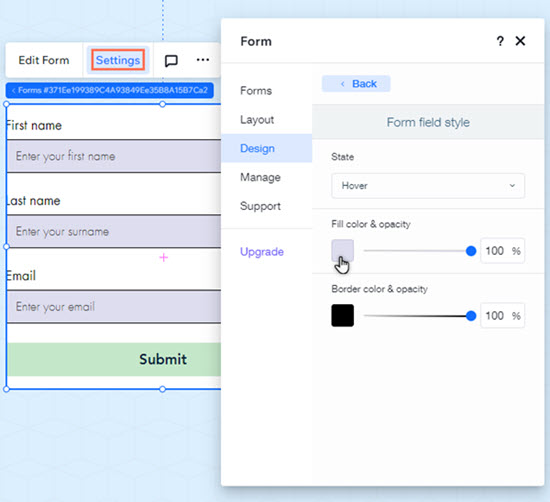
Adjusting the form's fields and buttons by state (Regular, Hover, and Error) can create a logical visual experience. We recommend customizing the design for the Hover state, for example - so visitors know which part of the form they're interacting with.
Good to know:
The Hover state is how the form field / button looks when a visitor hovers over it. The Regular state is how it's displayed before a visitor interacts with it.
To customize the form's design:
- Select the form in your editor.
- Click Settings.
- Select Design.
- Choose which part of the form you want to customize:
- Fields:
- Select Form Fields.
- Select Hover from the drop-down menu.
- Change the field design:
- Fill color & opacity: Set the color of the field background and drag the slider to change the opacity.
- Border color & opacity: Set the color and opacity of the field border.
- Buttons:
- Select Buttons.
- Select the button you want to customize (Submit, Back, Upload, etc.).
- Click the Hover tab.
- Change the button's design:
- Text color: Set the color of the button text in the hover state.
- Color & opacity: Set the color of the button background and drag the slider to change the opacity.
- Border color & opacity: Set the color and opacity of the button's border.
- Fields:
Tips:
- You should also customize the form fields in the Error state to ensure improved accessibility.
- Learn more about colors and contrast in site accessibility
Step 4 | Enable visual indicators on your site
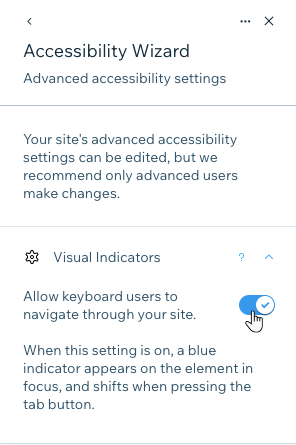
Visual indicators can help those with different vision / mobility needs navigate your site. When you enable them, visitors using the Tab key can see a blue box around the section or element they are on. Learn more about visual indicators
Visual indicators are automatically enabled on sites built in the Studio Editor.
To enable visual indicators:
- Select Settings on the top bar of the Wix Editor.
- Select Accessibility Wizard.
- Select the More actions icon
on the top right of the Wizard.
- Select Advanced accessibility settings.
- Select Visual indicators.
- Enable the Allow keyboard users to navigate through your site toggle.
Next step:
Go back to the Accessibility Checklist to continue improving your site's accessibility.
