

Wix Blog: Linking Editor Elements to Blog Posts
5 min
In this article
- Linking text to a blog post
- Linking a button to a blog post
Bring your blog content front and center by linking elements such as text and buttons to a specific blog post. This makes it easy for visitors to discover your articles and explore more of what your site has to offer.

Linking text to a blog post
Text links help readers find your blog posts naturally while they browse your site. For example, linking a piece of text from your homepage that sends visitors to your blog is a great way to increase traffic and enhance engagement.
Wix Editor
Studio Editor
Wix Harmony Editor
- Retrieve the live URL of the blog post:
- Go to the live site.
- Open the relevant blog post.
- Copy the URL.
- Go to your editor.
- Click the text you want to link.
- Highlight the relevant text.
- Click the Link icon
 .
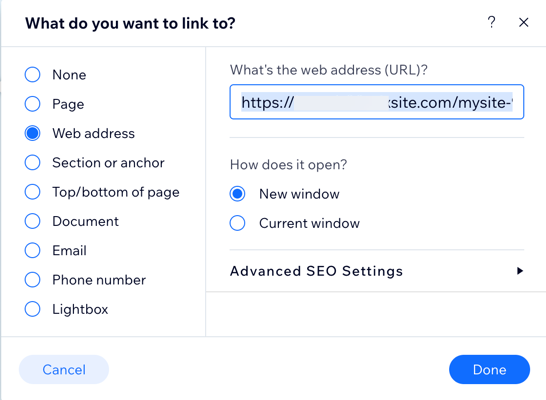
. - Select Web Address.
- Paste the blog post URL in the What's the web address (URL)? field.
- Select whether the external URL opens in a New Window or in the Current Window.
- Click Done.

Linking a button to a blog post
Buttons are a great way to grab attention and guide visitors toward your blog content. By linking a button to a specific post, you give people a clear call to action that encourages them to explore your blog. For example, adding a 'read more' button that takes your visitors to the post they saw on another page.
Wix Editor
Studio Editor
Wix Harmony Editor
- Retrieve the live URL of the blog post:
- Go to the live site.
- Open the relevant blog post.
- Copy the URL.
- Go to your editor and navigate to the relevant page.
- Click Add Elements
 on the left side of the editor.
 - Click Button.
- Click the button you want to add, or drag it to the relevant location.
- Click the Link icon .
- Select Web Address.
- Paste the blog post URL in the What's the web address (URL)? field.
- Select whether the external URL opens in a New Window or in the Current Window.
- Click Done.
Hire a Professional WriterGet the content you need for your website. Hire a writer from the Wix Marketplace to create text that fits your message and brand.
