

Wix Blog: Editing Author Names and Images
2 min
In this article
- Editing author details for writers added in Your Blog Settings
- Editing author details for writers added through the Members Area
- Manually adding an author in your Blog Settings.
In your blog feed and in individual posts, readers can see the author's name and image (unless you chose to hide these elements).

Writers can edit their name and image at any time. The instructions for the writer differ depending on how you added the writers to your blog.
Select how you added your writers for instructions:
Editing author details for writers added in Your Blog Settings
- Go to the Blog tab in your site's dashboard.
- Click More Actions at the top right.
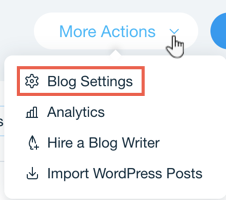
3. Click Blog Settings.
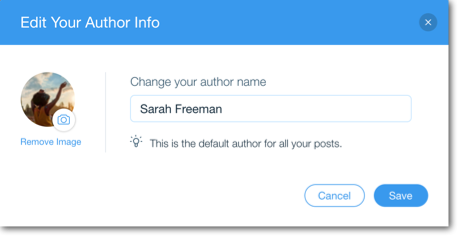
4. Click Edit next to Your Author Info.
5. Enter the author name in the text box.
6. Click the Image icon  to upload a new image.
to upload a new image. 7. Click Save.
Editing author details for writers added through the Members Area
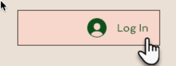
- The writer needs to log in via the login bar on your live site.
2. Select Profile.
3. Click Edit.
4. The writer can select an option:
- Edit the author name: The author can enter a new name.
- Edit the author image: The author can click the image to add one or to replace the existing image.
5. Click Save.
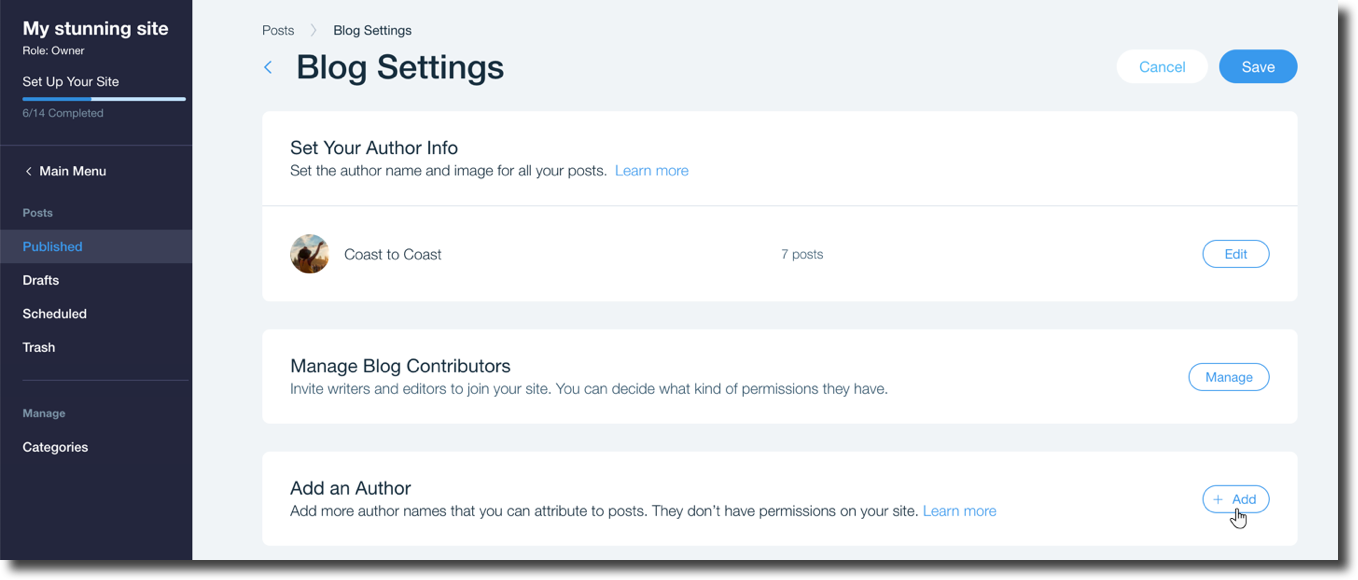
Manually adding an author in your Blog Settings.
You can manually add authors to your blog via your blog settings. This means you can give a visitor temporary author status to help complete a task.
- Go to the Blog tab in your site's dashboard.
- Click More Actions at the top right.
- Click Blog Settings.
- Click Add in the Add an Author section.
- Enter the name of the author you want to add.
Hire a Professional WriterGet the content you need for your website. Hire a writer from the Wix Marketplace to create text that fits your message and brand.
