

Velo: Working with CMS
9 min
In this article
- Enable Velo Dev Mode
- Velo Sidebar
- Collections
- Field IDs
- Hooks
- Non-Schema Fields
- Removing and Restoring Collections
- Data APIs
- Data Quotas
- User Input
- Input Validation
- Convert Regular Elements into Submit Buttons
- Create a Custom Signup Form
- Dynamic Pages
- Hiding Dynamic Pages in Mobile
- Dynamic Pages and Hooks
- Working with Wix App Collections in Your Code
Visit the Velo by Wix website to onboard and continue learning.
The Wix CMS (Content Management System) lets you work with database collections, user input elements, and dynamic pages on your site. This article explains how you can enhance CMS functionality using Velo.
Enable Velo Dev Mode
To work with the CMS and Velo, you first have to enable Velo Dev mode.
To enable Velo Dev Mode: In the Editor toolbar, click Dev Mode and turn on Enable Developer Mode in the drop-down. A Velo sidebar is added to the left side of the Editor, and a code panel appears at the bottom of the screen.
Velo Sidebar
The Velo sidebar shows all of the files that make up your site, including regular and dynamic pages, lightboxes, code files, and database collections. It only appears if you have Velo Dev Mode enabled on your site.
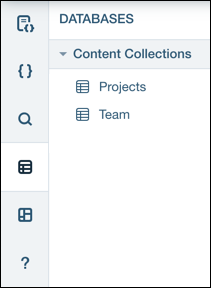
Your database collections appear in the Databases section of the sidebar.
Your dynamic pages appear in the Page Code section of the sidebar.
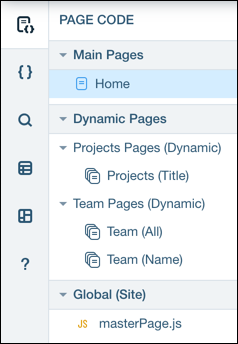
Note
Dynamic pages are grouped in the Velo sidebar according to dynamic page URL prefixes. Learn more.
From the Velo sidebar, you can perform the following CMS actions:
Manage Collections
 plus icon, and click New Collection.
 , click Edit Settings, and click the dropdown in What's this collection for?. Choose one of the permission presets or select Custom Use and then Set Custom Permissions to customize your permissions settings.
 and click Remove Collection.
Manage Dynamic Pages
 and click Add a Dynamic Page.
View Page Settings
Collections
With the CMS, you can create and manage database collections on your site. Velo lets you expand your capabilities when working with collections. Keep the following information in mind when working with collections and code:
Field IDs
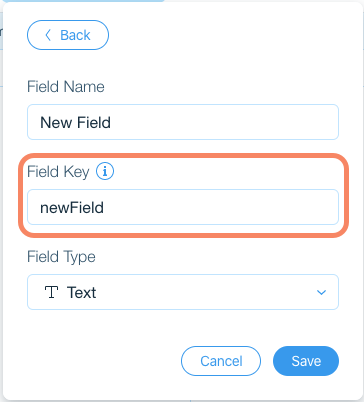
When you add a field to your collection, a Field ID is automatically created based on the Field Name. Field IDs are only visible if Velo Dev Mode is enabled. You can specify your own Field ID, if you wish.
Important
- You cannot change the Field IDs once the field has been created.
- Field IDs cannot begin with $ or contain a period '.'
Field IDs are used when working with fields in code using the Data API or Dataset API. For example, if you want to insert an item into a collection using the Data API, you can use the following code:
1wixData.insert("MyCollectionName", {"someFieldKey": "someValue"});Hooks
The Data API contains hooks that allow you to run code before or after you interact with a collection. You add hooks from inside the Velo sidebar.
To add a hook to a collection, hover over the collection name in the Databases section of the sidebar, click the More Actions icon and select Add/Remove Hooks. Learn more.
To add a hook to a collection, hover over the collection name in the Databases section of the sidebar, click the More Actions icon
and select Add/Remove Hooks. Learn more. Non-Schema Fields
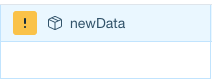
When you add fields to your collection using code, the fields are not automatically added to the collection structure and must be added manually. In the CMS, these fields appear with a warning icon, indicating that the field isn't defined yet. Learn more.. You can click on the field name to define the field type and add it to the structure.
Removing and Restoring Collections
If you remove a collection that is referenced in code, the code will no longer work and will generate an error in the Editor and in the published site. You can replace the collection name with a different one if relevant.
If you restore a collection you removed, the code will work again.
If you restore a collection you removed, the code will work again.
Data APIs
The Velo Data API and Dataset API provide additional functionality for working with data collections in your site. You can create customized searches and filters, manage and manipulate your data, and work with pagination, permissions, and hooks. Learn more.
Data Quotas
Wix places quotas on data requests made by your site. These quotas affect the number of requests your site can make per minute and the amount of time your requests can run for.
To find more about these quotas and how to work with them, see About Data Quotas.
To find more about these quotas and how to work with them, see About Data Quotas.
User Input
With the CMS, you can create user input forms and store user data in your collections. Velo provides additional layers of functionality when working with user input elements:
Input Validation
When collecting user input data, you want to make sure that the data entered is valid. Some input validation is available via the user input element Settings panel, but with code you can provide additional validation measures. Learn more.
Convert Regular Elements into Submit Buttons
Without code, you can create a form using user input elements and a "submit" element that saves the data into your collection when clicked. Only selected elements, such as buttons and images, can act as submit elements.
With code, you can add submit functionality to elements without a Submit option in the Connect panel. You can also add submit success and error messages when using those elements to submit.
With code, you can add submit functionality to elements without a Submit option in the Connect panel. You can also add submit success and error messages when using those elements to submit.
Create a Custom Signup Form
With Velo you can create your own custom signup form to replace the standard one. Then enable custom signup so your visitors are directed to your custom form for site registration.
Dynamic Pages
With the CMS you can create dynamic pages to display content from your database collection on multiple pages in your site. You can also use Velo to interact with dynamic pages:
Hiding Dynamic Pages in Mobile
Without code, you can hide dynamic pages in the mobile version of your site by hiding the elements that link to the pages using the Mobile Editor.
If you are using code on your site, and you hide the elements using the Mobile Editor, any code connected to those elements will generate an error. Therefore it's best to use the formFactor property of the Window API to determine if the visitor is viewing the site from a mobile device, and use the elements' hide() or collapse() functions to visually remove the elements from the page.
Important:
Hiding an element using the Mobile Editor removes that element from the page completely. This causes any code that relies on the hidden element's existence to break.
Dynamic Pages and Hooks
When Velo Dev Mode is enabled, you can add hooks to dynamic pages from your Page Settings:
- Click Menus & Pages
 on the left side of the Editor.
 - Click the More Actions icon
 next to the dynamic page.
 - Select Settings and select the Page Info tab.
- Click Add hooks.
When a request comes in for one of your dynamic pages, a router uses the URL of the request to decide which page to show and what data to bind to the page's dataset. You can add a data binding router hook to intercept this process at certain points and insert additional logic.
Working with Wix App Collections in Your Code
You reference the collections that Wix Apps add to your site similar to how you reference collections you create yourself, with one difference.
To reference a collection in your code that you created yourself, you just use the collection name in the code. For example, this code retrieves an item with an ID of 00001 from the collection named myCollection:
To reference a collection in your code that you created yourself, you just use the collection name in the code. For example, this code retrieves an item with an ID of 00001 from the collection named myCollection:
1wixData.get("myCollection", "00001")To reference a collection that a Wix App added to your site you need to also include the App name in the path of the collection name. For example, let's say you also want to retrieve an item with an ID of 00001, but this time from the PrivateMembersData collection inside the Members database.
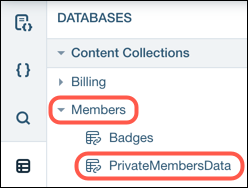
In this case, you need to include Members in the path for the collection name, like this:
1wixData.get("Members/PrivateMembersData", "00001")You can also use the CMS to add and update information in some Wix App collections. For example:
1let collectionToInsert = {
2  "title":"New Collection"
3};
4
5wixData.insert("Portfolio/Collections", collectionToInsert)
6  .then((item) => {
7  console.log(item);
8    })
You can find many examples in the Stores, Bookings, and Blog sections of the Velo Examples site.
Hire a Velo Web DeveloperNeed a little extra help with your site? Hire a developer from the Wix Marketplace to build and deploy advanced web applications.
