

Wix Blocks: Using Your Widget API When Editing a Site
3 min
In this article
- Access Widget API Properties
- Access Properties Through the Settings Panel
- Access Properties Through Code
- Access Widget API Events
- Access Widget API Functions
Wix Blocks is currently open to a limited number of users.
After a Widget API was defined in Blocks and the widget is now installed on a site, you can easily access the Widget API from the Wix Editor or Editor X.
Learn more about using the Widget API when editing a site:
Important
Any changes that you make to the API while editing a site, only impact this specific site. The original widget is not impacted. If this isn't your intention and you want to edit the Widget API so that it updates on all sites using the widget, edit it in Wix Blocks.
Access Widget API Properties
Access Properties Through the Settings Panel
- Select the widget in the Wix Editor or Editor X.
- Click Settings in the widget's action bar to access its properties.
- Edit the properties in the Settings panel. Note: Your changes will only apply to the site you're editing.
- Click Preview to see how your widget works on this site.
Important
If you did not define properties in your Widget API, you won't see the Settings button.
If you have created a custom panel for the Settings button, the default Settings panel with all your widget's properties won't be available. Learn more

Access Properties Through Code
- Select the widget in the Wix Editor or Editor X.
- Click the Properties and Events
 icon to view the widget's ID.
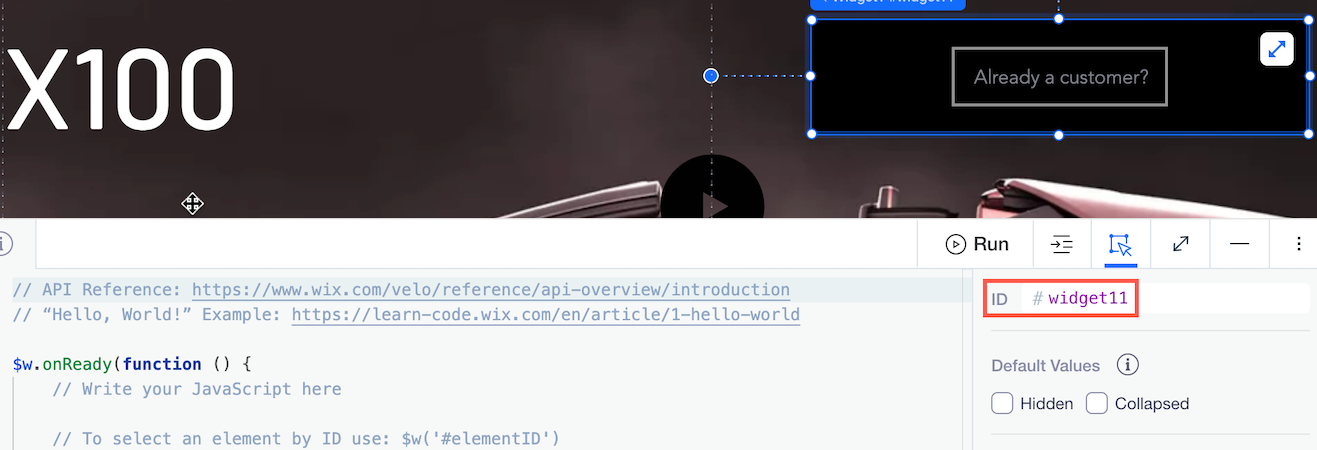
- Use the syntax: $w("#<widget ID>)".property to access properties (use extra dots if the property is an object and you want to access its inner properties). For example, let's log the name of our customer from the shopping widget to the console.
1let name = $w("#widget11").existingCustomer.name;
2console.log(name);
Access Widget API Events
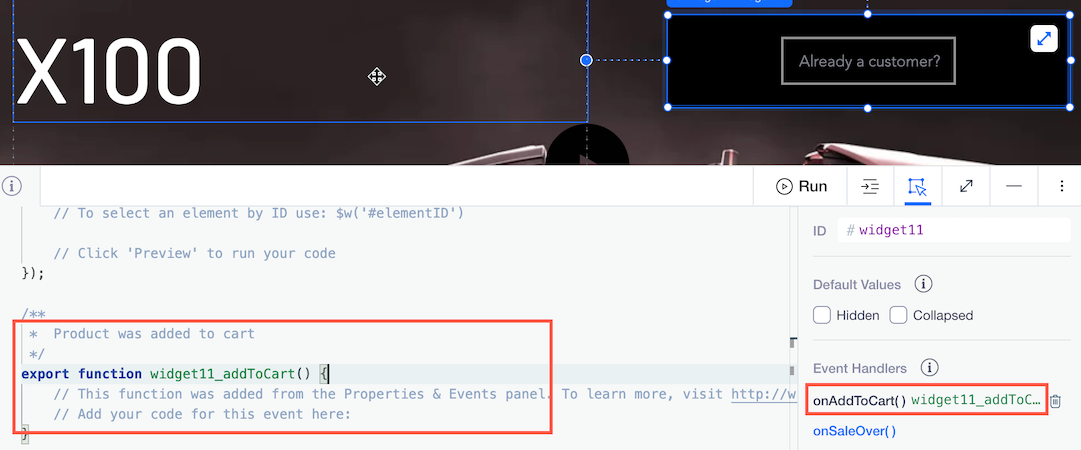
- Select the widget in the Wix Editor or Editor X.
- Click the Properties and Events
 icon to view available events.
 - Select the event you'd like to handle.
- Use the empty event-handler function that appears in your code panel to write whatever should happen when the event is triggered.
Important
Note that the condition for firing the event was defined in Blocks, while the actions to take when catching the event are defined in the site that installed the widget.
Learn more about defining your API events in Blocks.
Access Widget API Functions
1let productAddedToCart = $w('#widget11').addItemToCart(productID, quantity));Access your Widget API functions in your site's code easily, with Velo's auto-complete.
For example, when an item was successfully added to the cart - you can notify the user.
Once you begin to write the functions name (such as "add"), Velo auto completes so you can see what functions are available:

Learn more about the Blocks Widget API.
