

Wix Automations: Sending an HTTP Request
5 min
In this article
- Step 1 | Set up a new automation
- Step 2 | Configure the HTTP request
- (Optional) Step 3 | Set response data structure
- Step 4 | Activate the automation
- FAQs
Before you begin:
This article is intended for advanced users. Sending an HTTP request requires prior technical knowledge and experience working with webhooks.
Wix Automations integrate seamlessly with external services by sending or retrieving data from any webhook or API endpoint. Use the HTTP request action to trigger events, update external records, or incorporate external data into later steps of your automation flow.
This action supports real-time communication between disconnected systems, making it easy to handle request bodies, manage responses (e.g. JSON), and map the returned data for subsequent automation steps.
Step 1 | Set up a new automation
To get started, create a new automation and add the HTTP request action.
To set up an automation:
- Go to Automations in your site's dashboard.
- Click + Create Automation at the top right
- Click + Start from Scratch.
- Click the title to give your automation a name.
- Select a trigger for your automation.
- Click + to add a step.
- Click Action.
- Select Send HTTP request on the left.
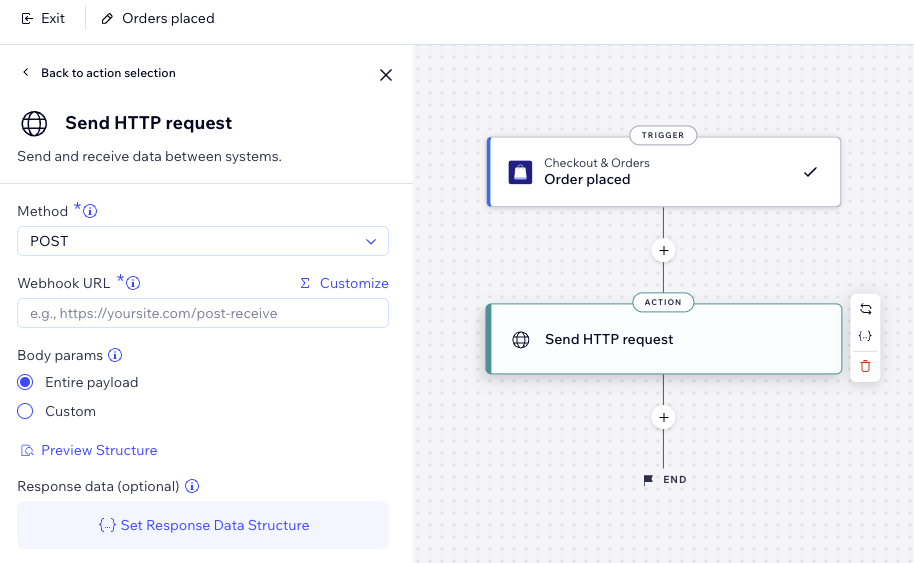
Step 2 | Configure the HTTP request
Set up the details of your HTTP request, including the method, URL, and the data you’d like to send.
Click below to learn how to configure each field.
Method

Webhook URL


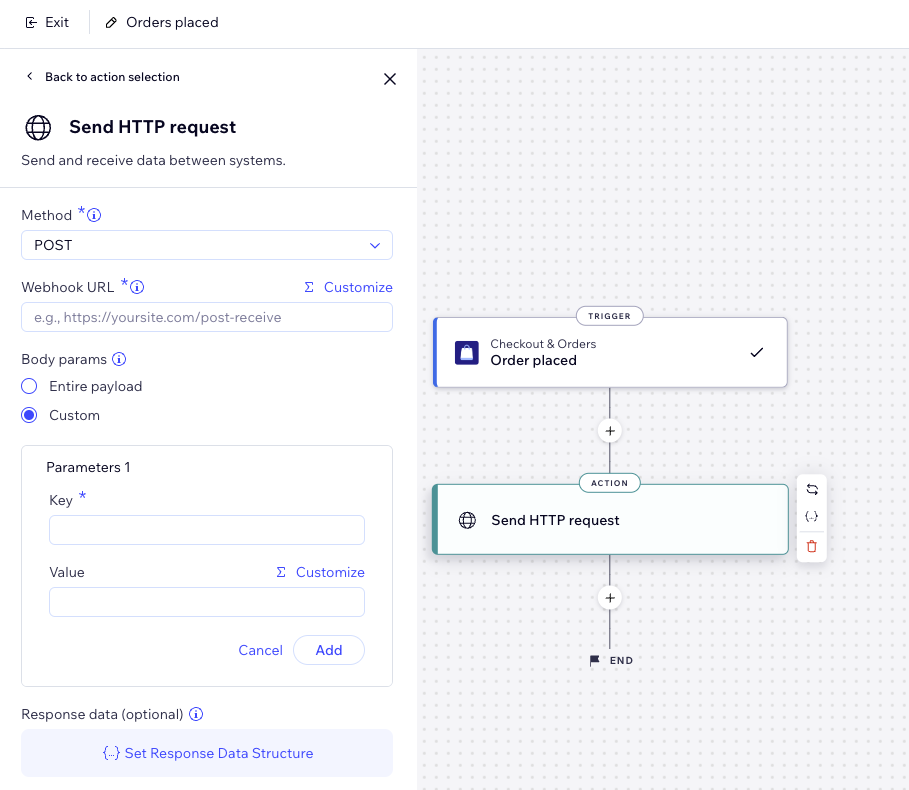
Body params

(Optional) Step 3 | Set response data structure
Finally, configure the data structure returned from the external service to match Wix Automations' schema. For example, for a response from the weather app we can enter a sample JSON like this:
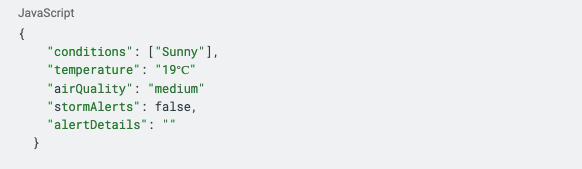
Note:
This sample data is used to generate an output data structure. The automation can then treat these fields (e.g. firstName, id, age) as distinct variables, which you can use in later steps.
To set your response structure:
- Click Set Response Data Structure to define the data passed to your automation.
- Enter a JSON example that you expect to see in the response.
- Click Preview Structure.
- Click Save Structure or Edit JSON to continue editing.
- When you're done, click Apply.

Step 4 | Activate the automation
At the top right save as a draft and come back later or activate right away. It now appears on your Automations page where you can monitor, edit, deactivate, or delete according to your needs.
Tip:
Send a test request to make sure you have successfully set up your response to meet your expectations.
FAQs
Click below to learn more about sending an HTTP request.
Can I call Wix APIs using this feature?
What happens if my automation is turned off?
What if the payload I receive from an external service doesn’t match my defined schema?
Why didn't the data I expected appear in the next steps?
