

Taking a Screenshot Using Windows
1 min
Communicate what you see on your screen better by taking a screenshot using the Snipping Tool on your PC.
To take a screenshot using the Snipping Tool:
- Click the Windows Start button (the Windows logo).
Note: On Windows 8.1, hover over the lower right corner of your screen, and select Search). - Type Snipping Tool in the search box then select Snipping Tool.
- Click the top left corner of the area you want to snip.
- Drag the cursor down and to the right until the area you want to snip is outlined.
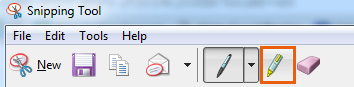
- (Optional) Use the Highlighter to mark an area of the snip.
- Click File on the top menu.
- Click Save as.
- Enter the File name.
- Click Save.
View more details about using the Snipping Tool.
Sending your screenshot to Wix Customer Care?
Make sure to save your screenshot in one of the following file types: .jpeg, .jpg, .png, .gif, .ico, .bmp, or .tiff. Learn how to add a screenshot to a support ticket.
