


Studio Editor: Using Multi-State Boxes
In this article
- Step 1 | Add a multi-state box
- Step 2 | Add and design the states
- Step 3 | Add code
Multi-state boxes let you show different content for different situations in the same container box, displaying one state at a time. Choose the amount of states your box should have, design them completely and give them IDs that you will later use in your code.
Your code defines when each state should be displayed. You can create conditions for each state to appear automatically, or let visitors navigate on their own.

Step 1 | Add a multi-state box
The first step is adding a multi-state box to your site directly from the Add panel. Drag the box to the desired location on your page.
To add a multi-state box:
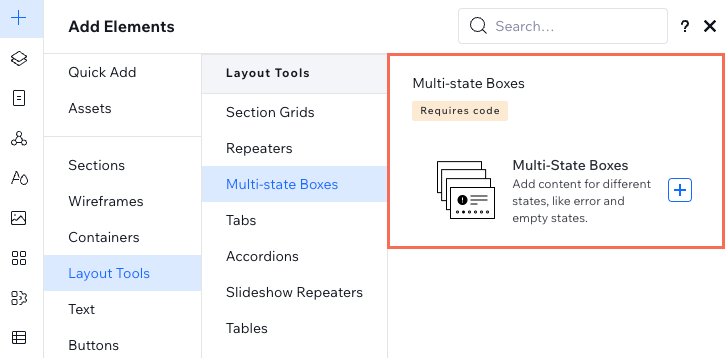
- Click Add Elements
 on the left side of the Editor.
 - Click Layout Tools.
- Click Multi-state Boxes.
- Drag a multi-state box to the relevant location on your page.
Use multi-state boxes inside repeaters:
Once you add a multi-state box to a
repeater item, it's automatically added to the rest of the items with the exact same design. This is useful for lists with repeating items like FAQs or product galleries.
Step 2 | Add and design the states
Once you've added the box, design the states that it displays. You can customize these states however you choose: Use them for small badges like product availability (e.g., "New", "Out of Stock"), or create a completely different design for each state.
Click below to learn how to:
Select and design a state
Add a state
 .
.Rename a state
Remove a state
Reorder states
 up or down to change the order of the states.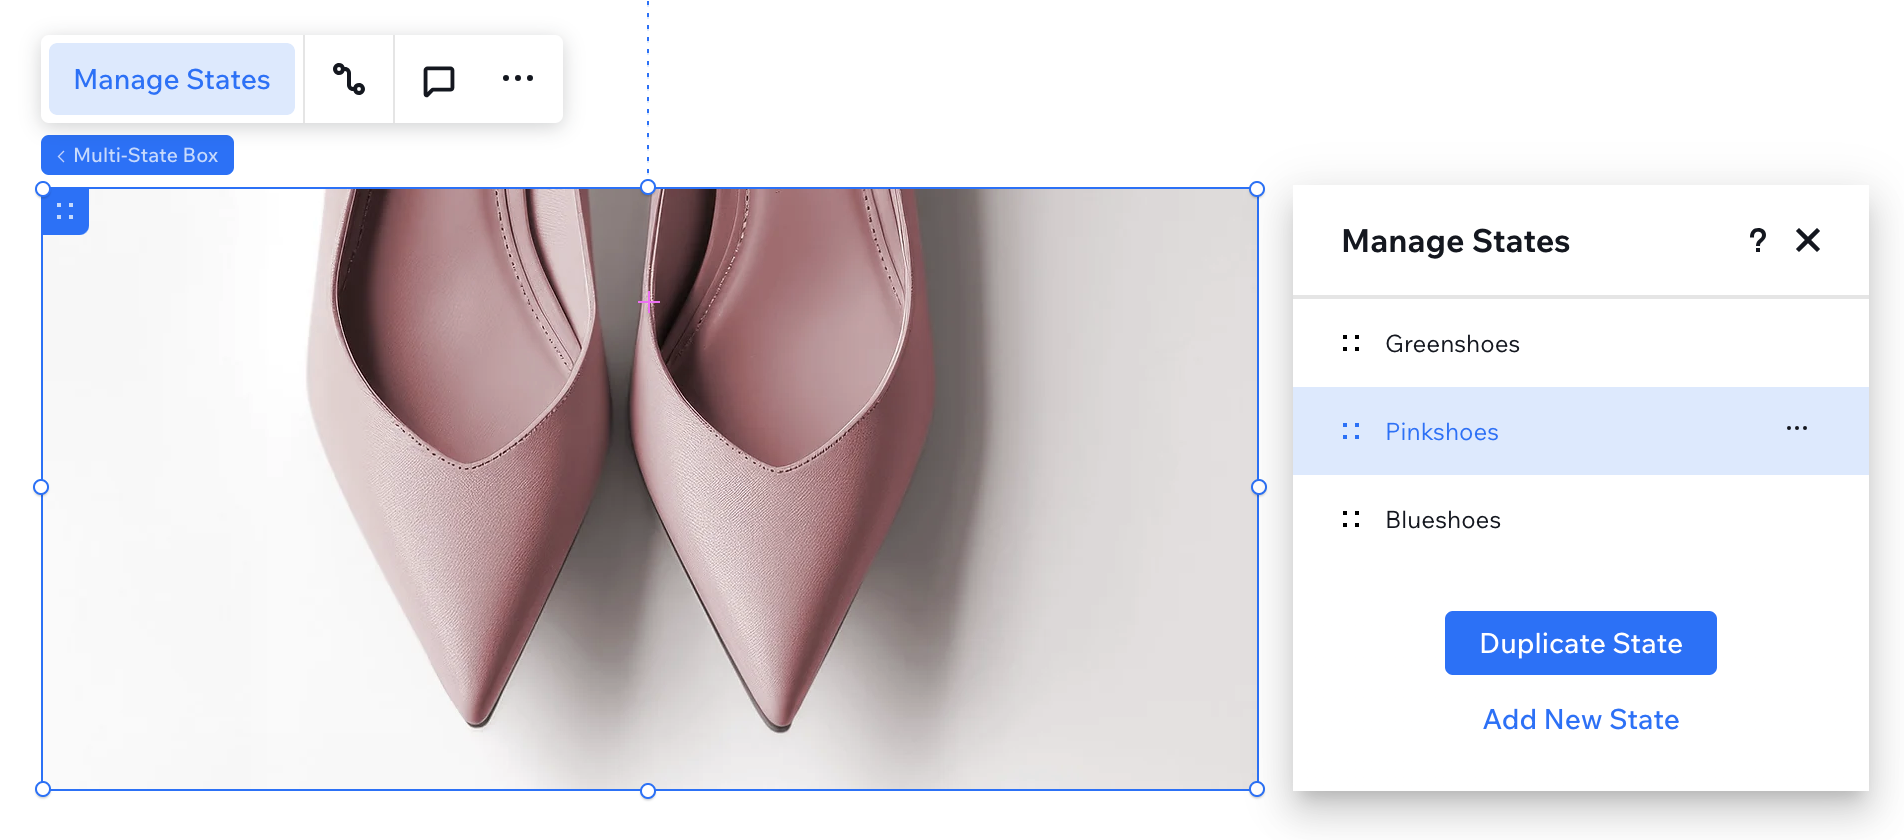
Design tip:
The states can have different height properties, which allow you to reveal additional info for example. However, the width of your states always stays the same.
Step 3 | Add code
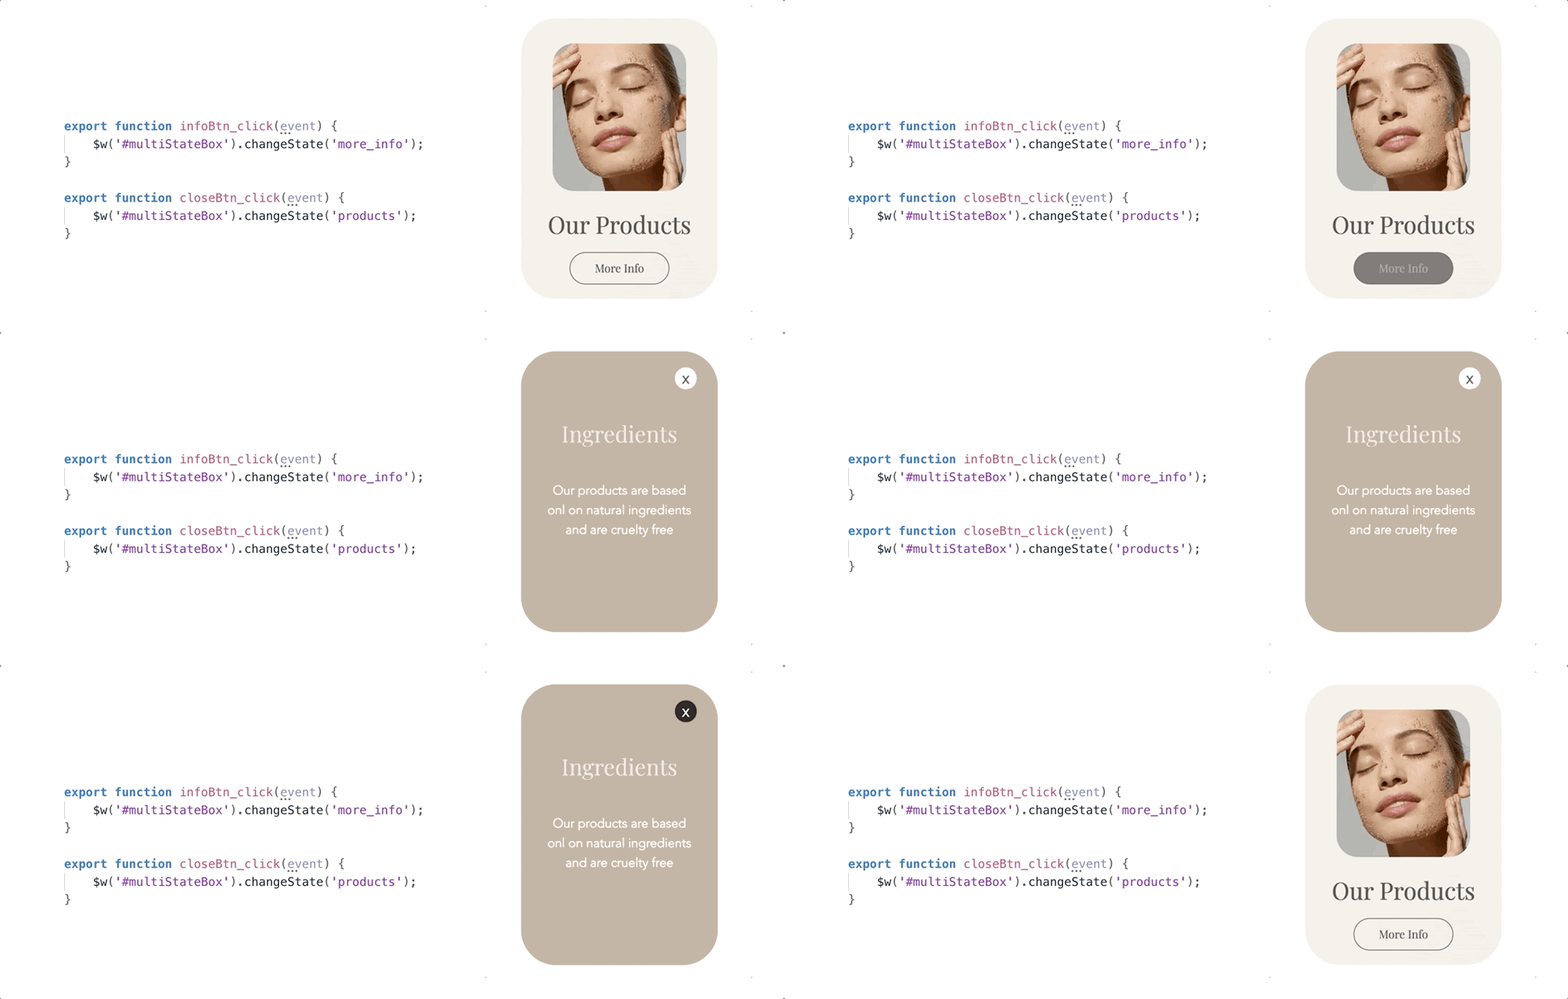
The last step to make the multi-state box functional is adding code that controls when each state appears.
Using the functions and events available in the
Velo API for multi-state boxes, you can define and implement rules for displaying and navigating your states.
Important:
While adding the relevant code, make sure you wrote the state IDs correctly, with the exact same spelling and capitalization.
Next:
Learn more about
working with your multi-state box and code.
