

Studio Editor: Creating Sticky Elements and Sections
3 min
In this article
- Applying the sticky position to an element or section
- Removing the sticky position
- Useful tutorials
Make a section or an element stick to the page as visitors scroll up and down. When the element or section reaches the visitor's viewport, it sticks to the top, bottom or both. You can set the offset, which is the distance from the top or bottom.
Go to our Wix Studio Academy to check out additional Wix Studio webinars, tutorials, and courses.
Did you know?
You can add a header scroll effect to change the way it looks as visitors scroll up and down. For example, make the header change colors on scroll, or move it out of the way to help visitors focus on the page.
Applying the sticky position to an element or section
- Go to your editor.
- Select the relevant section or element.
- Click the Open Inspector icon
 at the top right of the editor.

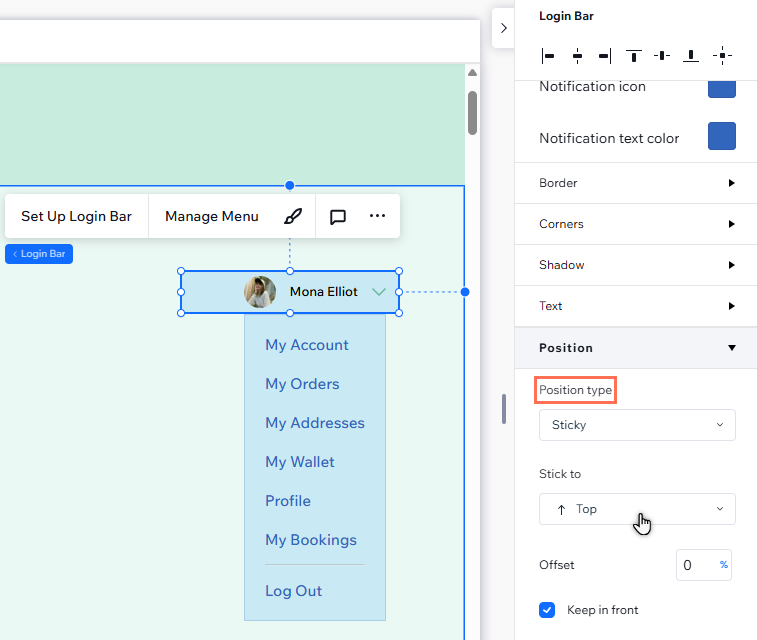
- Scroll down to Position.
- Select Sticky from the Position type drop-down.
- Choose where the section/element sticks to: Top, Bottom, or Bottom and top.
- (Optional) Enter an offset value to create space above or below.
- Select the Keep in front checkbox to enable or disable this option:
- Enabled: The section / element is visually in the front, but doesn't change its position in the page's DOM order.
- Disabled: The visual position of the section or element matches its position in the page's DOM order. Depending on how the page is organized, the element / section may not be in the front.
Note:
DOM order is an important part of site accessibility, performance, and search result rankings. We therefore recommend enabling Keep in front—so you can get the visual effect you want, while maintaining the page's structure.
Removing the sticky position
You can always revert elements and sections back to the default position. This means they no longer stick to the screen when reaching the viewport, they stay in their position.
To remove the sticky position:
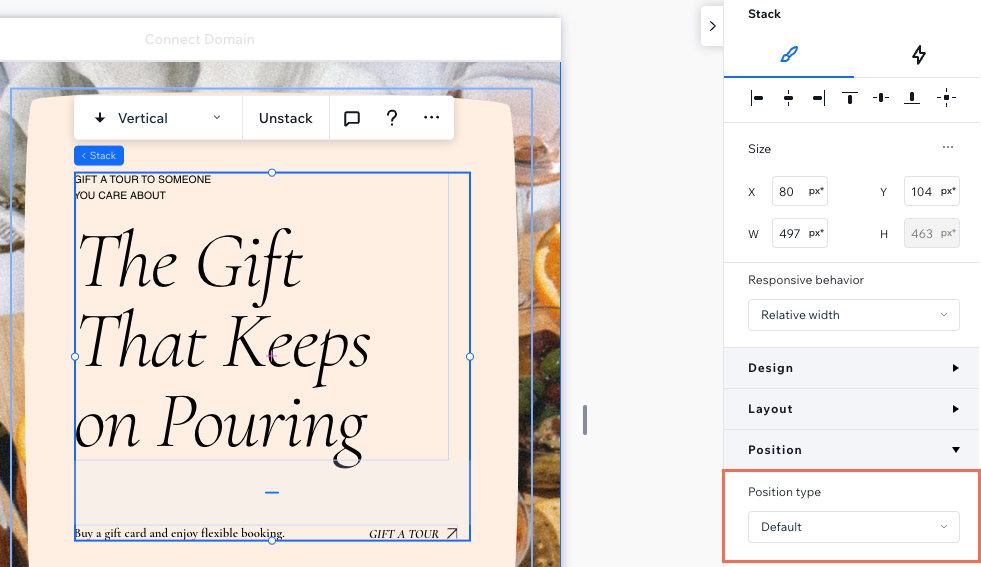
- Go to your editor.
- Select the relevant section or element.
- Click the Open Inspector icon at the top right of the editor.
- Scroll down to Position.
- Select Default from the Position type drop-down.
Useful tutorials
There are so many interesting effects you can create with sticky elements and sections. Check out these videos from the Wix Studio Academy and explore your options:
