Studio Editor: Creating and Managing Design Libraries
6 min
In this article
- Creating a new library
- Saving styles and assets to a library
- Viewing and managing libraries
- Sharing a library
- FAQs
Create a design library with assets that you can use at any time, on any Studio Editor site in your workspace. This is a great tool to speed up the design process as it lets you save color palettes, typography styles and designed sections and elements.
How can I access my libraries?
Creating a new library
Create as many libraries as you need. You can create libraries per sites, themes, or any kind of classification that meets your needs.
To create a new library:
- Access your design libraries:
- Go to your editor.
- Click the Wix Studio icon
 at the top left.
 - Hover over Tools.
- Click Libraries.
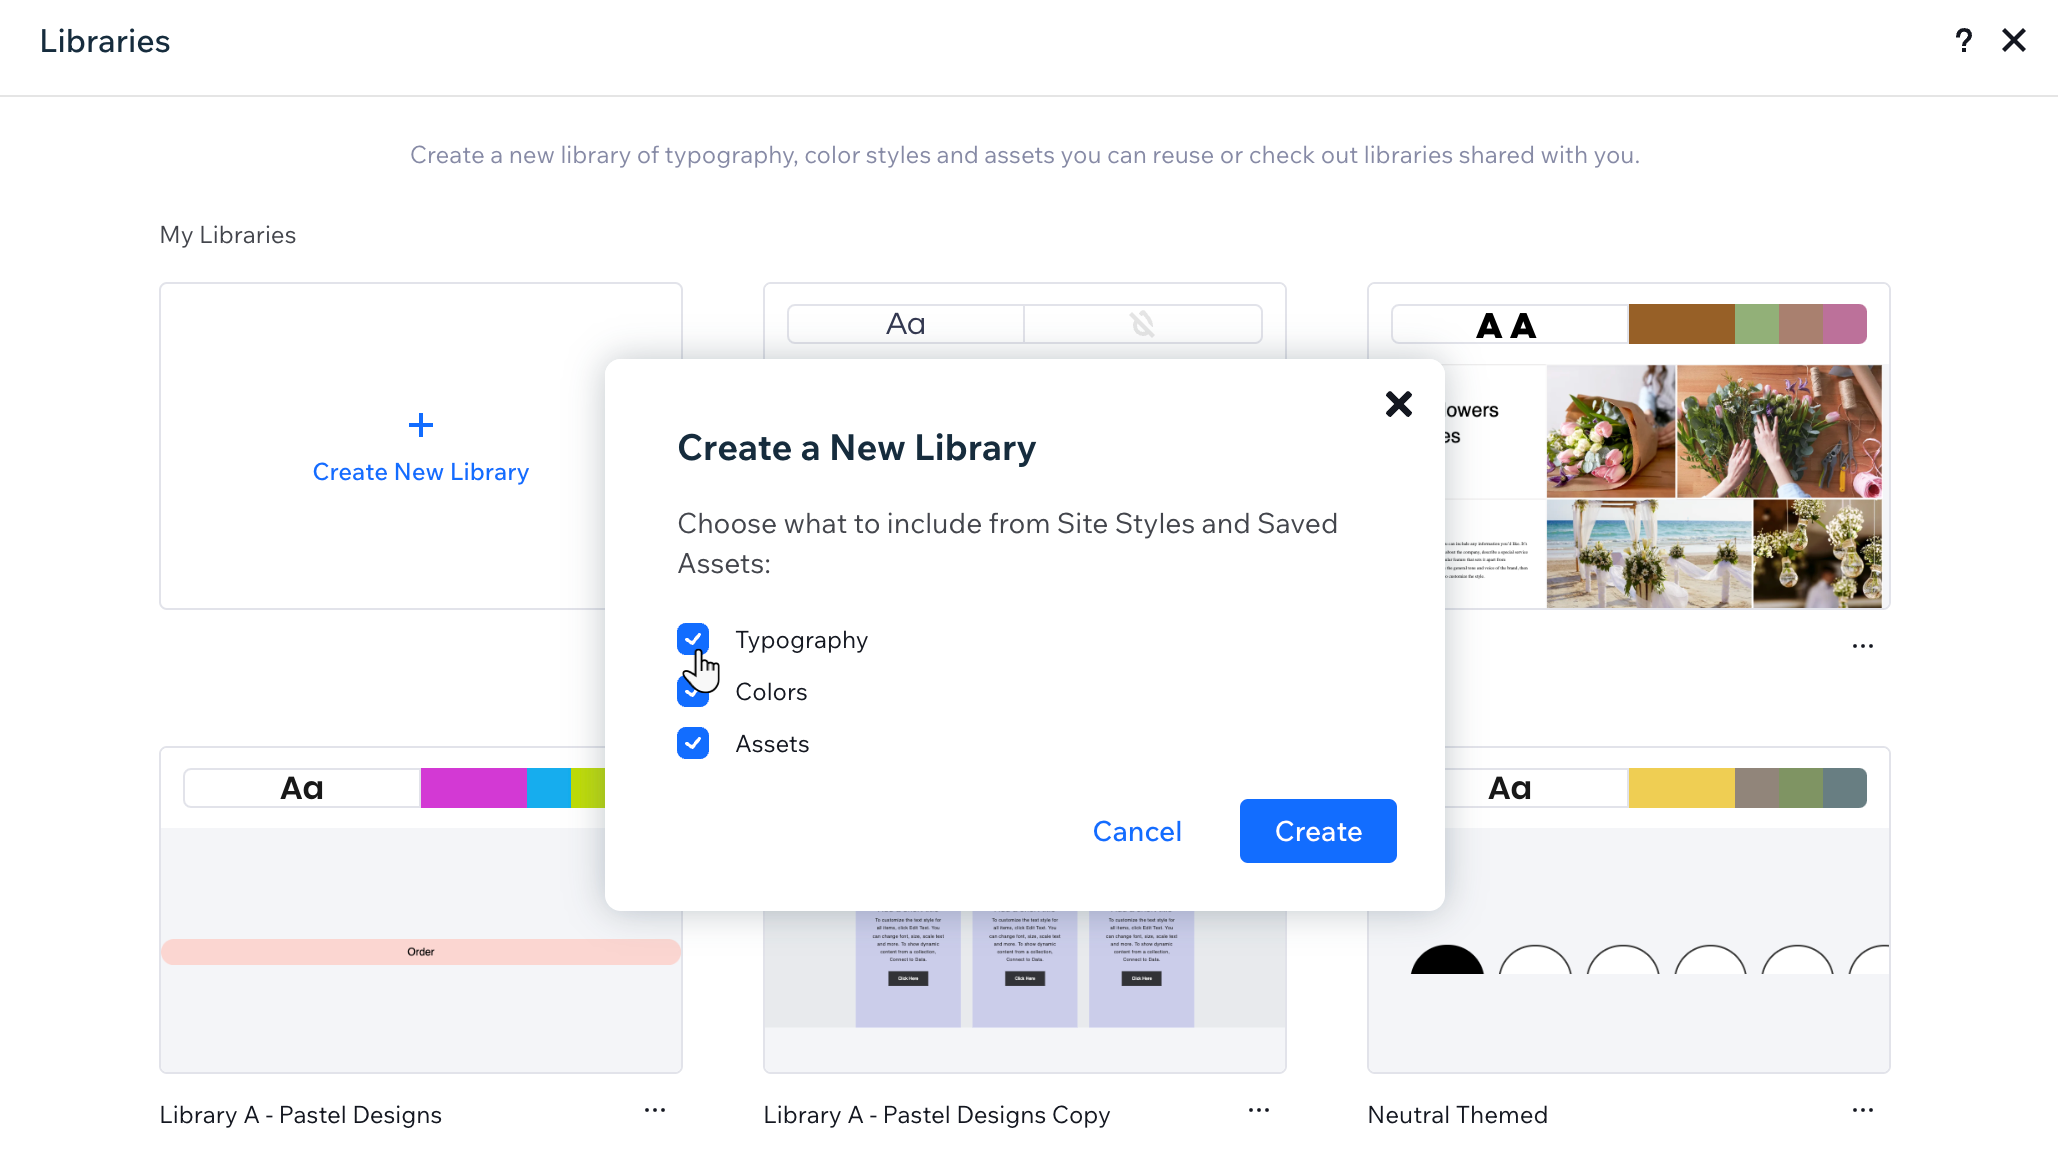
- Click + Create New Library.
- Choose what to include from the site you're working on: Typography, Colors and / or Assets.
- Click Create.
- Enter a name for your library under Library Name.
- (Optional) Enable the Turn on sharing toggle to share this library with your teammates.

Saving styles and assets to a library
You can save design assets from any Studio Editor site in your workspace. Every library contains a single set of color and typography styles, and unlimited space for designed assets.
Depending on what you want to save to your library, click below to learn how to do it:
The site's color and / or typography styles
Saved assets from this site (e.g. sections, elements, etc.)
Viewing and managing libraries
View all of your libraries in one place, whether they're libraries that you created, or libraries your team shares with you. You can open libraries to see their contents, duplicate and delete libraries.
To view and manage your libraries:
- Go to your editor.
- Click the Wix Studio icon
 at the top left.
 - Hover over Tools.
- Click Libraries.
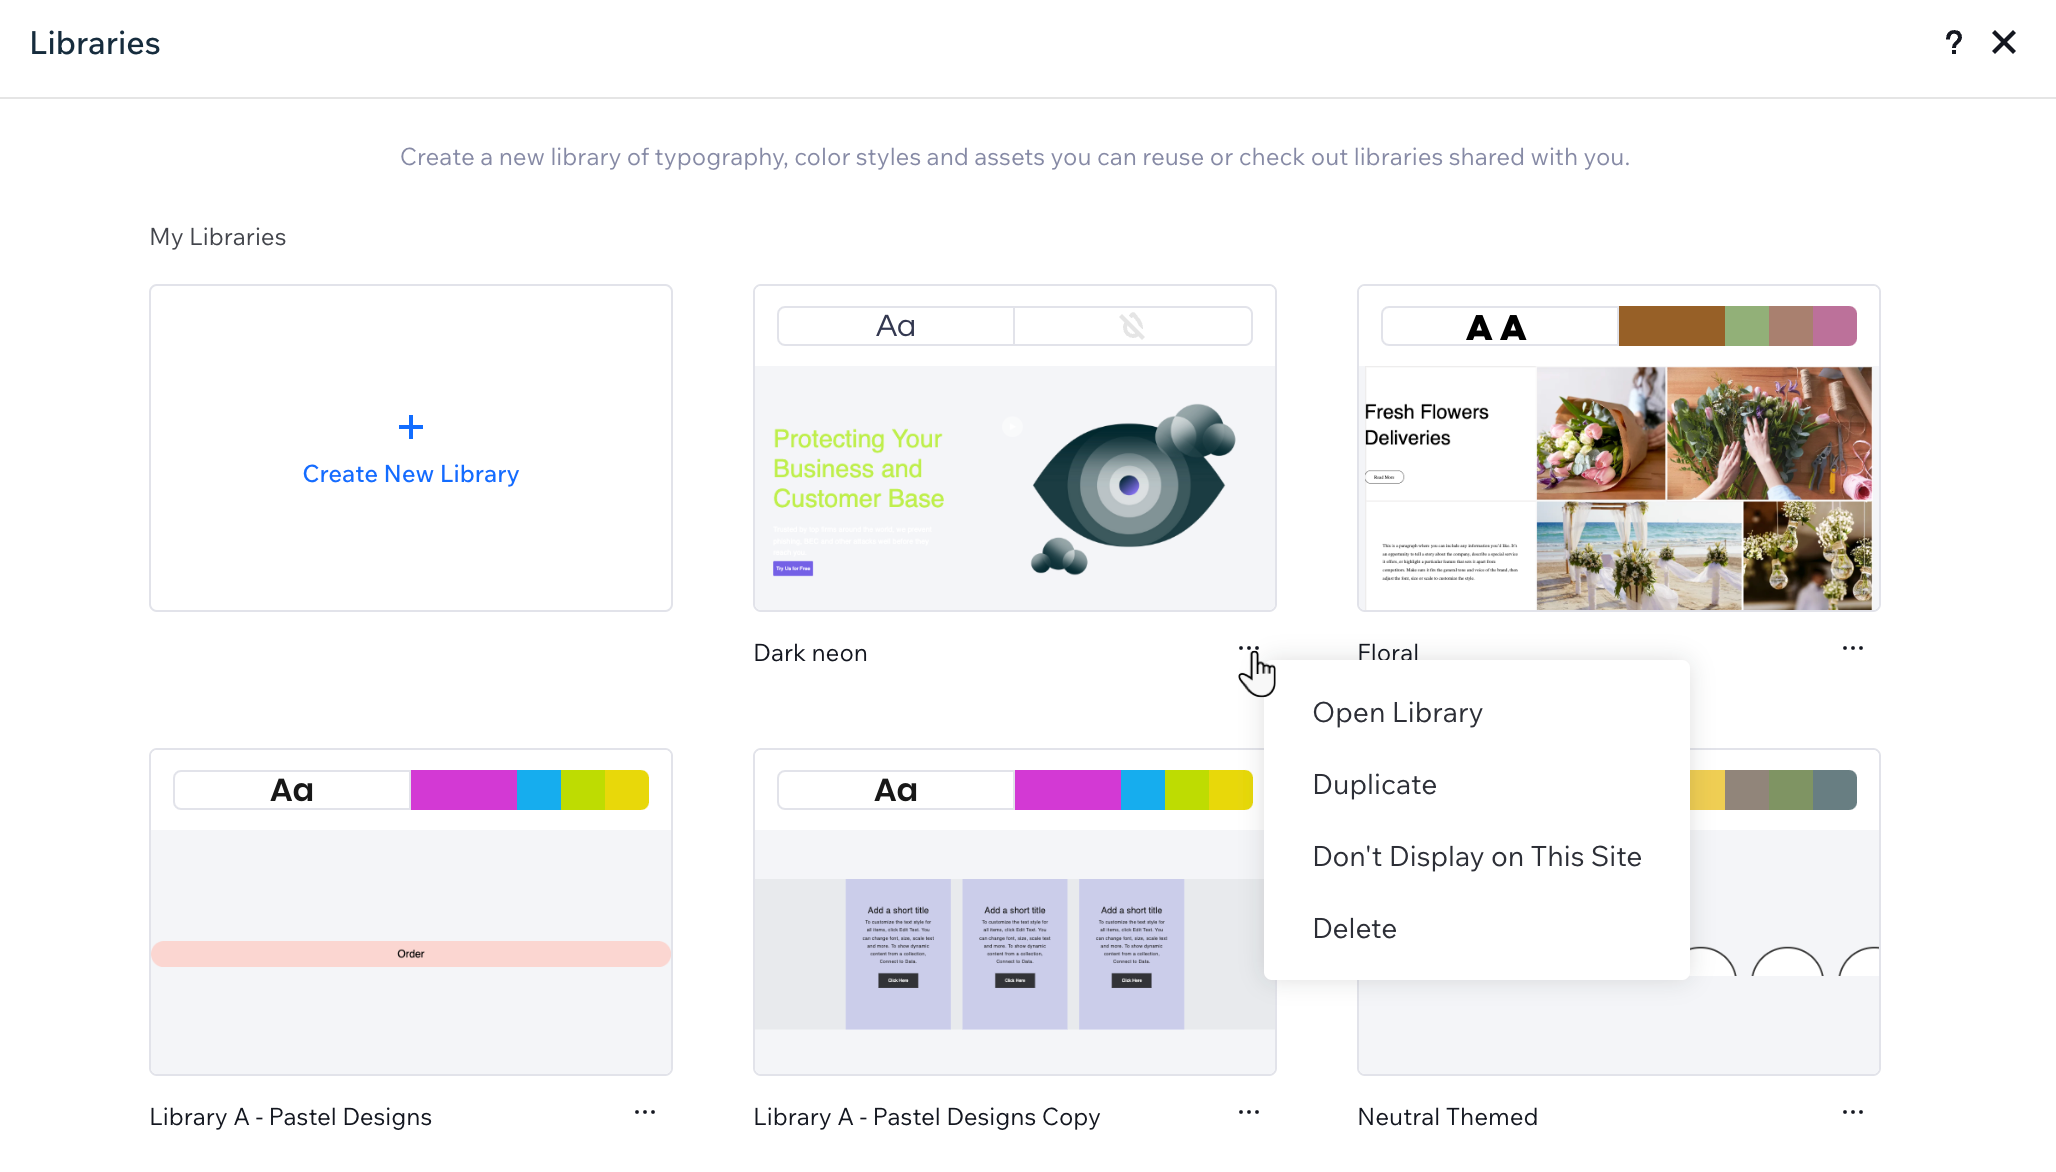
- Click the More Actions icon
 under the relevant library.
 - Select an option:
- Open Library: View the library and edit its settings.
- Duplicate: Make a copy of the library.
- Don't Display on This Site: Hide the library from the Assets tab in the Add Elements panel, specifically on the site you're working on.
- Delete: Permanently remove the library from your account. This won't affect existing sites that include assets from the library.

Sharing a library
When creating a library, you can decide whether to keep it private or share its assets with others.
The access link to your library allows anyone with a Studio Editor site to add the assets to their account. In addition, the library becomes visible to everyone in your workspace once you turn on sharing.
To share a library:
- Access your libraries:
- Go to your editor.
- Click the Wix Studio icon
 at the top left.
 - Hover over Tools.
- Click Libraries.
- Click the More Actions icon
 under the relevant library.
 - Click Open Library.
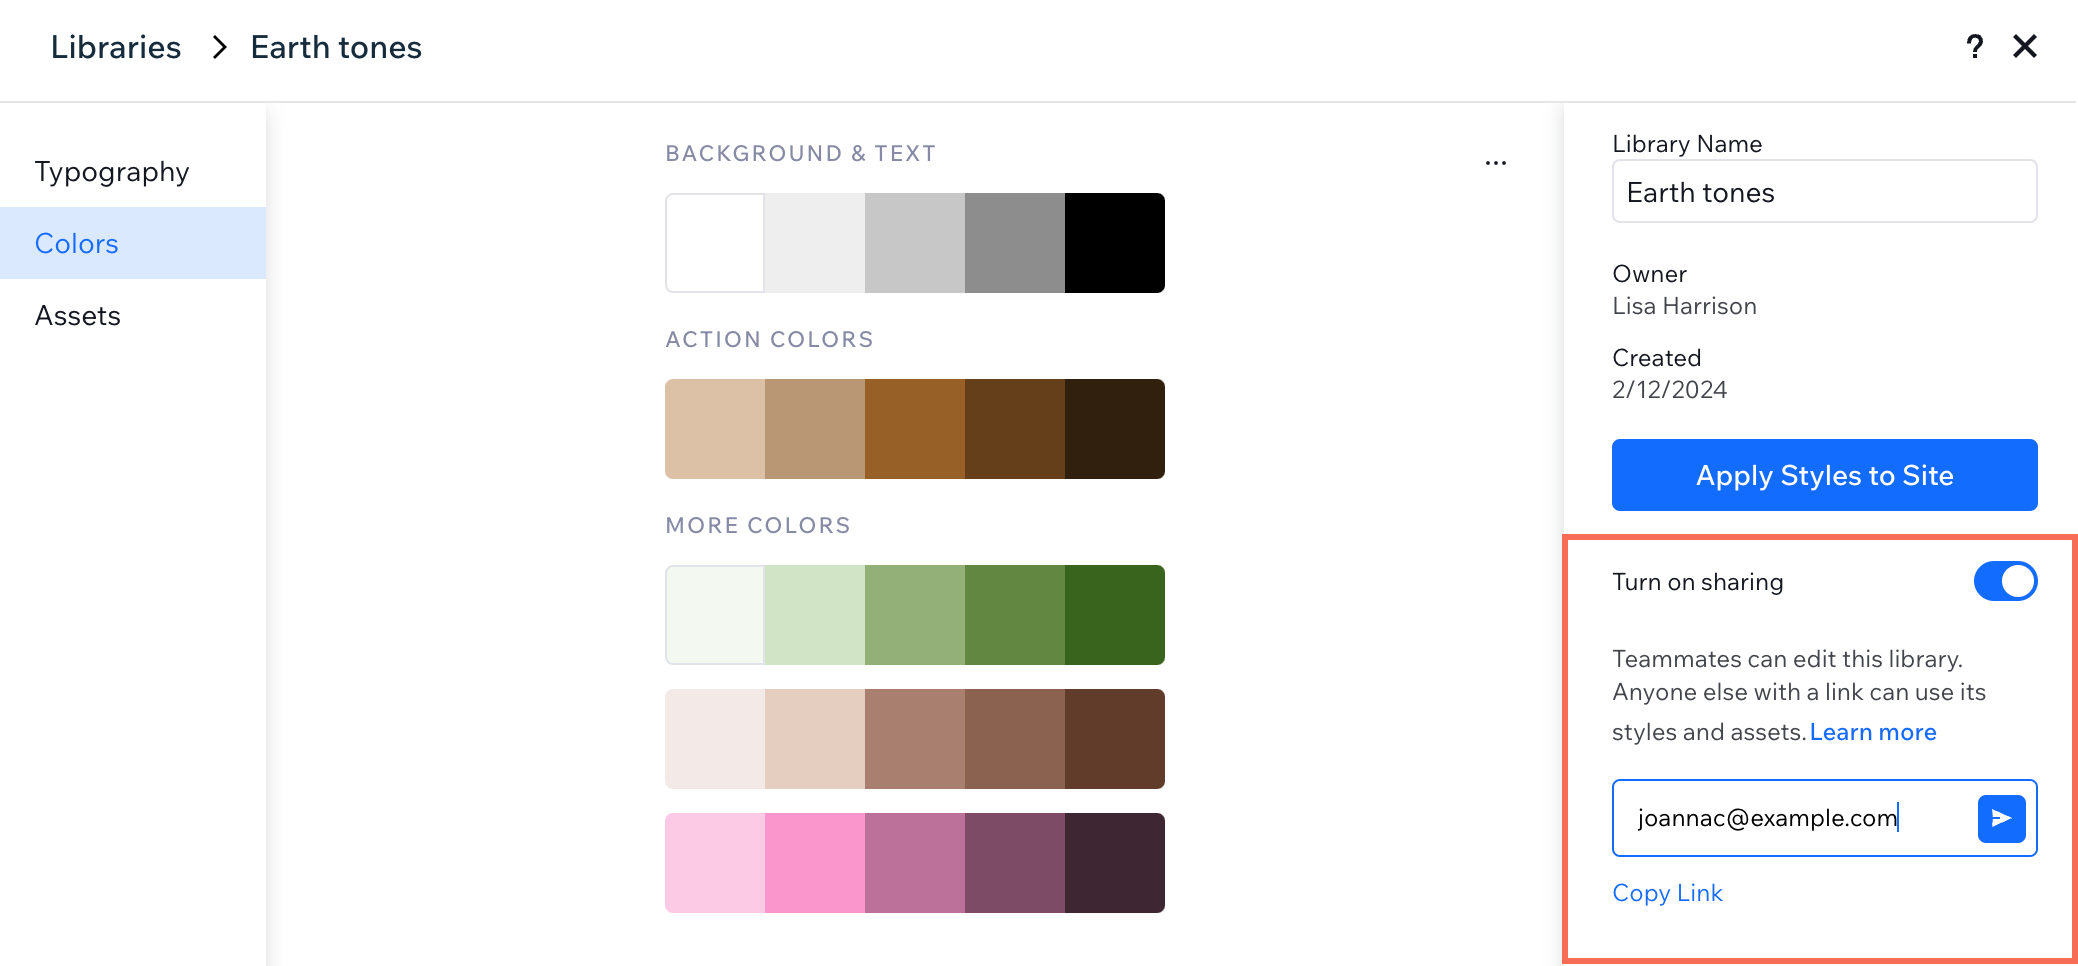
- Enable the Turn on sharing toggle to make this library available for sharing.
- Share the library with people in one of the following ways:
- Send an email: Enter the person's email address and click the Send icon
 . They'll receive an email from Wix Studio with a link to your library.
 - Copy the link: Click to copy the direct link to your clipboard.
- Send an email: Enter the person's email address and click the Send icon

FAQs
Click a question below to learn more.
What's the difference between private and public libraries?
Can teammates edit or share my library?
What happens if I delete a library I previously shared?


 on the left side of the editor.
 .
.
 on the left side of the editor.
