

Social Media Marketing: Creating and Publishing Your Social Posts
14 min
In this article
- Creating an image to share on social media
- Creating a video to share on social media
- Publishing your social posts
- FAQs
Social posts are a great way to engage with your audience. Create images and videos that give exciting updates about your business, promoting awareness and driving traffic to your site. When you're ready, publish the content you created straight from the dashboard.
Creating an image to share on social media
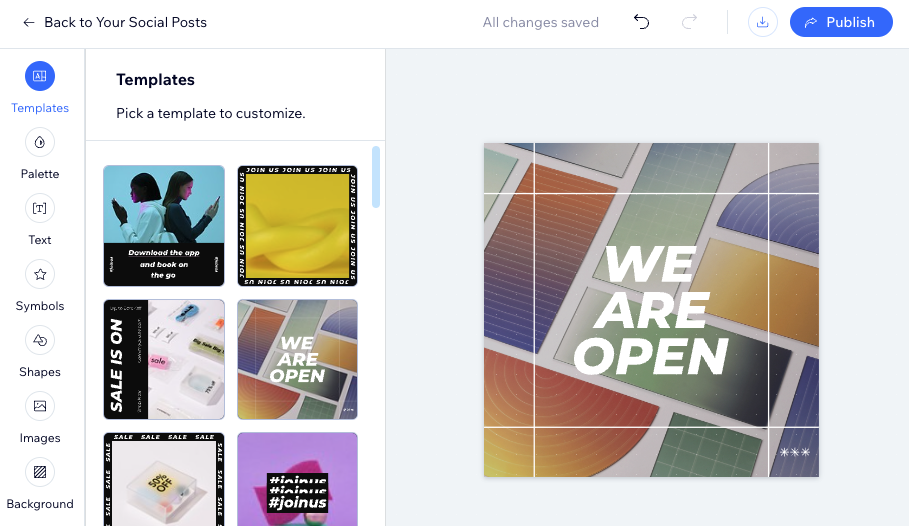
Create custom images for your social media posts using Wix. Ensure your visuals are unique and aligned with your brand identity. There are helpful templates or you can start from scratch, adding text, symbols, media and more.
To create an image with Wix:
Dashboard
Wix app
- Go to Social Media Marketing in your site's dashboard.
- Click More Actions on the top right.
- Click Create image with Wix.
- Select an option from the settings on the left to begin customizing your post:
- Template: Select a template to customize.
- Palette: Select a pre-made palette of colors that are designed to look well together.
Tip: The colors can be changed and adjusted if you need specific colors. - Text: Select from the suggested fonts or add your own.
- Symbols: Add your business' logo to make your social post look like your own. Or choose from a selection of pre-made icons and symbols to add to your post.
- Shapes: Add shapes to your post. You can even build them on top of each other to make a truly unique design.
- Images: Upload your own image or choose from the library of pre-existing ones.
- Background: Select a background color for your post.
- Choose what you want to do:
- Back to Social Media Marketing: Save the image to the Your Social Posts tab in your Social Media Marketing dashboard.
- Publish: Share your image on social media.
Creating a video to share on social media
Create high-quality, unique videos for your social media. Tailor your content to fit your brand identity by customizing text, style, colors, music, and more. Choose from a variety of templates or start from scratch, giving you full creative control to craft videos that stand out and engage your audience..
To create a video:
Dashboard
Wix app
- Go to Social Media Marketing in your site's dashboard.
- Click More Actions at the top right.
- Choose Create video with Vimeo.
- Choose how to create your video.
Wix Video Maker
 under Add Photos and Videos.
Vimeo Create

Avoid video copyright issues:
Downloading and uploading the video manually will not protect you from copyright. The best way to avoid any copyright issues is to make sure that you share your video using the Share feature described in this article. Wix works with Magisto to ensure that any videos created with Wix Video Maker are whitelisted. This releases any copyright and monetization claims from the file.
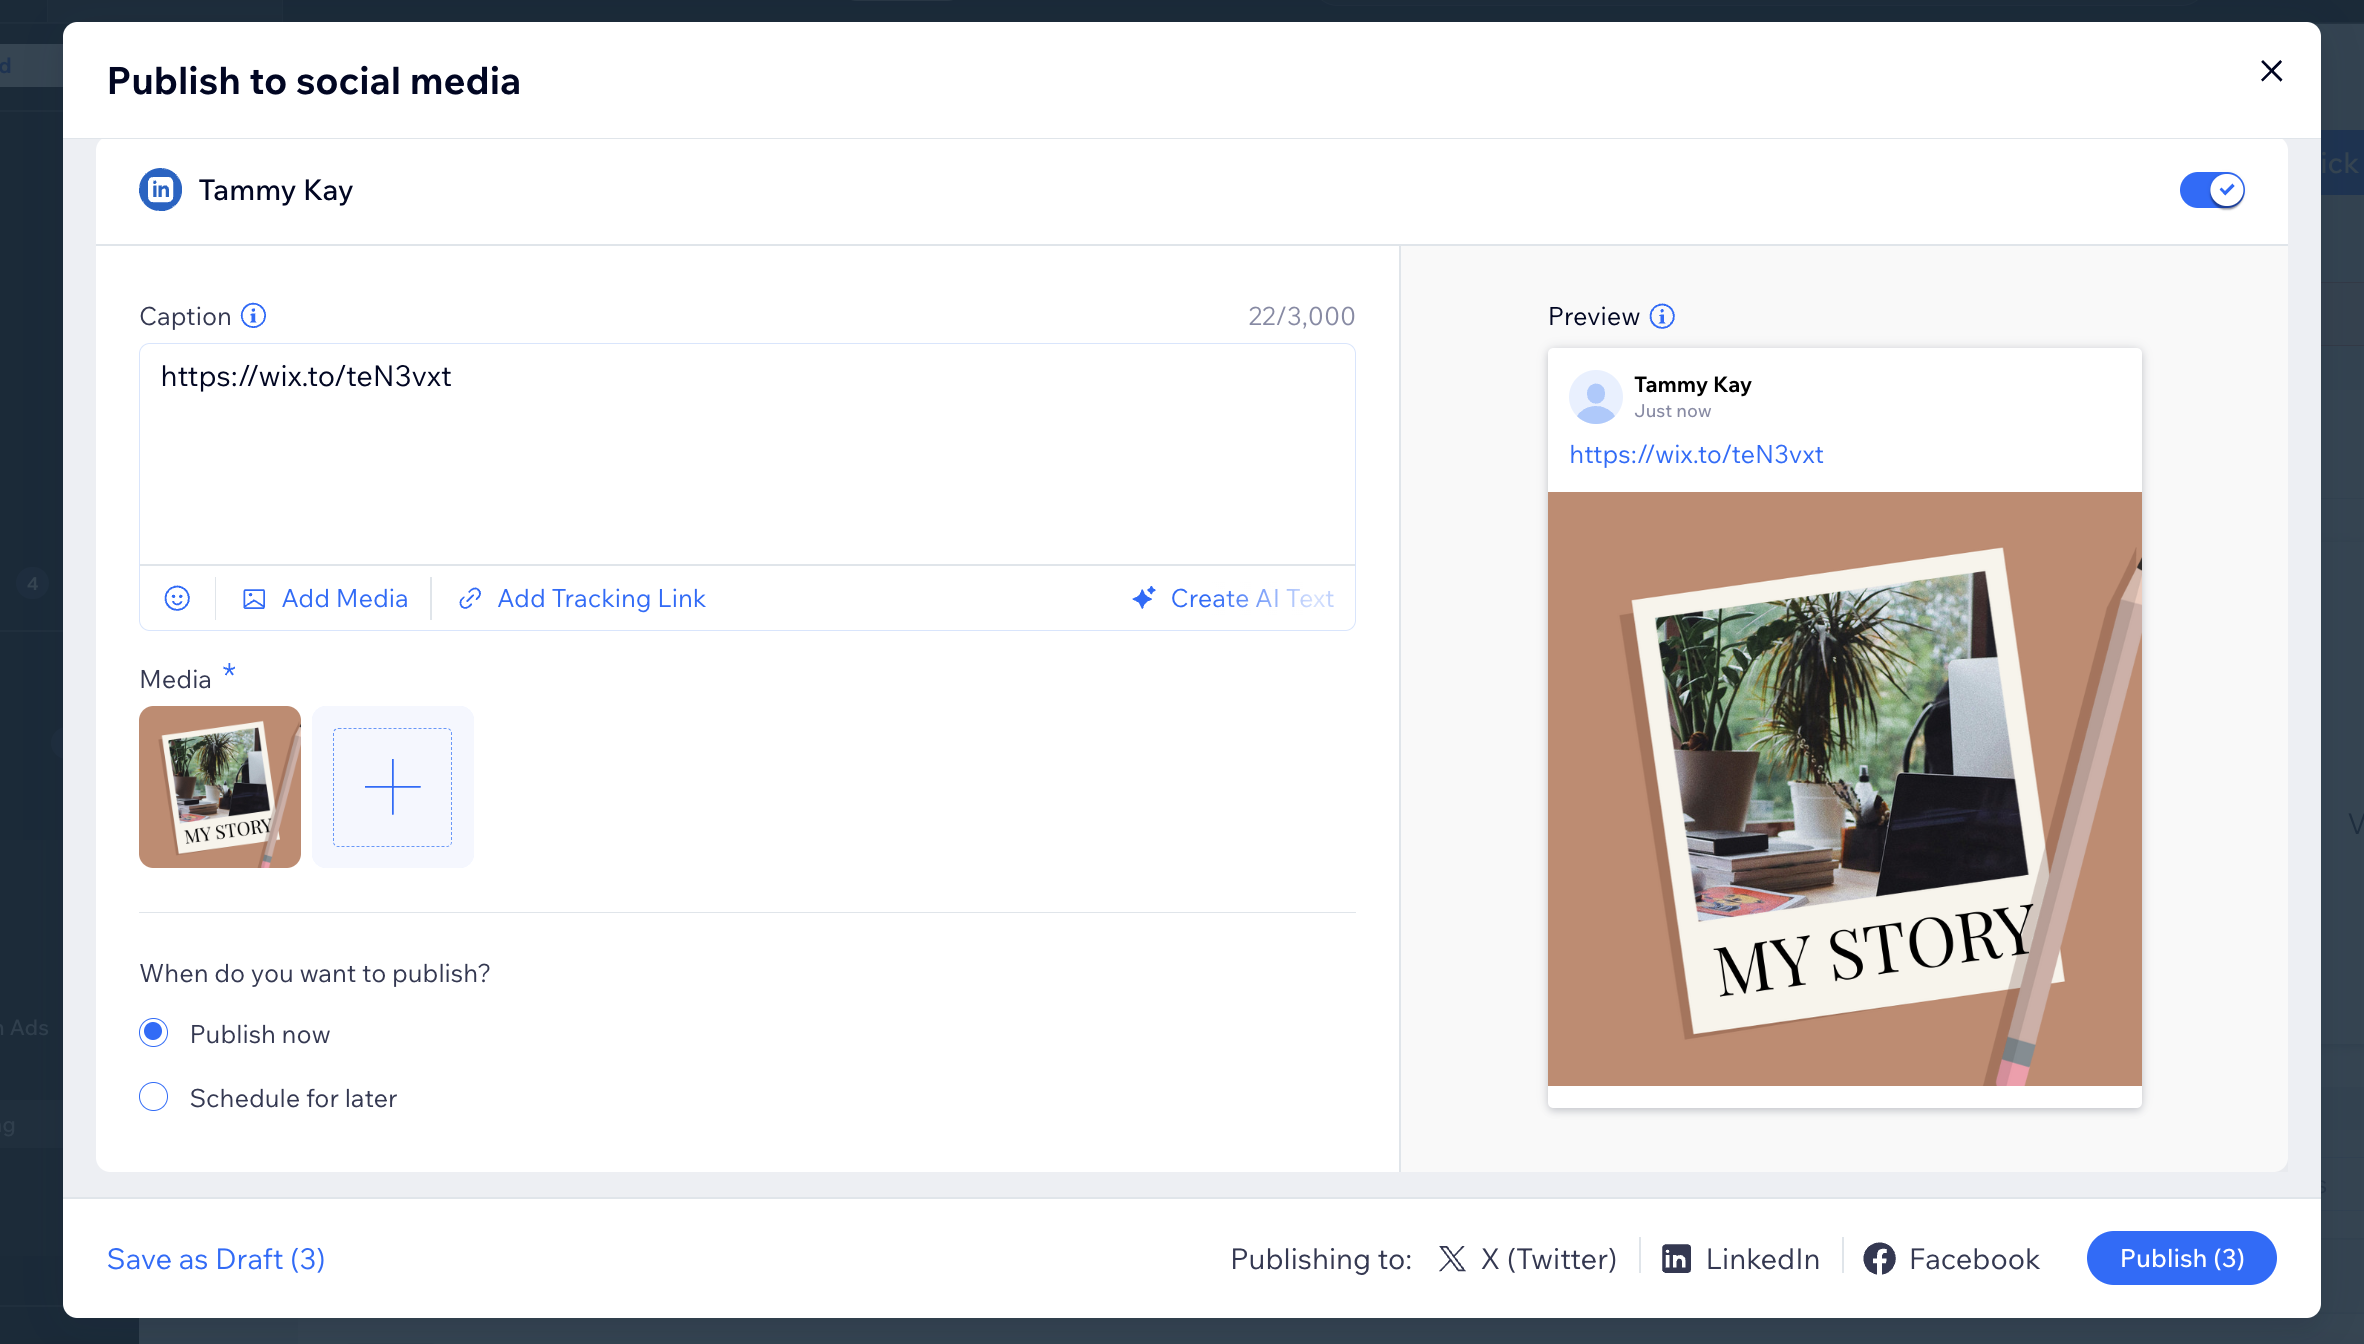
Publishing your social posts
Publish your social posts to get them seen by your audience. You can edit previously saved designs before sharing, and customize each post's caption accordingly.
Important:
You can publish up to 10 social posts a month or you can upgrade to publish more.
To publish a post:
- Go to Social Media Marketing in your site's dashboard.
- Click Your Social Posts tab.
- Hover over the post you want to publish and click the More Actions icon
 .
. - Click Edit & Publish.
Tip: Click Download to save your post to your computer. - (If you haven't yet) Connect the social accounts you want to publish to.
- Customize how your social post will appear on each social channel:
Facebook
 .
.Instagram
Youtube
TikTok
LinkedIn
Google Business
Pinterest
7. Click Publish at the bottom right.
Note: The number next to Publish indicates how many posts you are about to publish. For example, if you have created both a Facebook and Instagram post, the number will show (2).
Note: The number next to Publish indicates how many posts you are about to publish. For example, if you have created both a Facebook and Instagram post, the number will show (2).
Posting as a story?
- This kind of post includes up to 5 images.
- This option is not yet available to all Wix accounts.
FAQs
Click below to learn more.
Can I add a specific caption for each platform that I publish to?
Do I need a Vimeo account to create videos with Vimeo on Wix?
Can I publish to multiple social media platforms at the same time?
Can I edit my images and videos after saving them?
Can I edit my post after publishing it?
Can I add an image or video that I created for a social post in my Wix site?
