

Social Media Marketing: Managing and Scheduling a Social Post
4 min
In this article
- Scheduling a new social post
- Scheduling a draft post
- Managing your scheduled posts
Schedule posts ahead of time for holidays or important events so you don't have to worry about being near your computer. Create your content in advance and schedule social posts to be published at a later date.
You can see a list of all your scheduled posts from the Social Media Marketing dashboard where you can also edit the timing.
Before you begin:
Scheduling a social post is available if you have upgraded your social media plan.
Scheduling a new social post
After you connect your social accounts and create your social post content, you can choose to schedule the post for a specific date and time.
To schedule a social post:
- Go to Social Media Marketing in your site's dashboard.
- Click More Actions and select an option from the drop-down:
Select media to publish
Create image with Wix
Create video with Vimeo
Note:
You will see 'Scheduled' instead of 'Published' in the final publishing status.
Scheduling a draft post
Schedule your draft posts to go out at a time that best suits you and your audience.
To schedule a draft post:
- Go to Social Media Marketing in your site's dashboard.
- Click Your Social Posts tab.
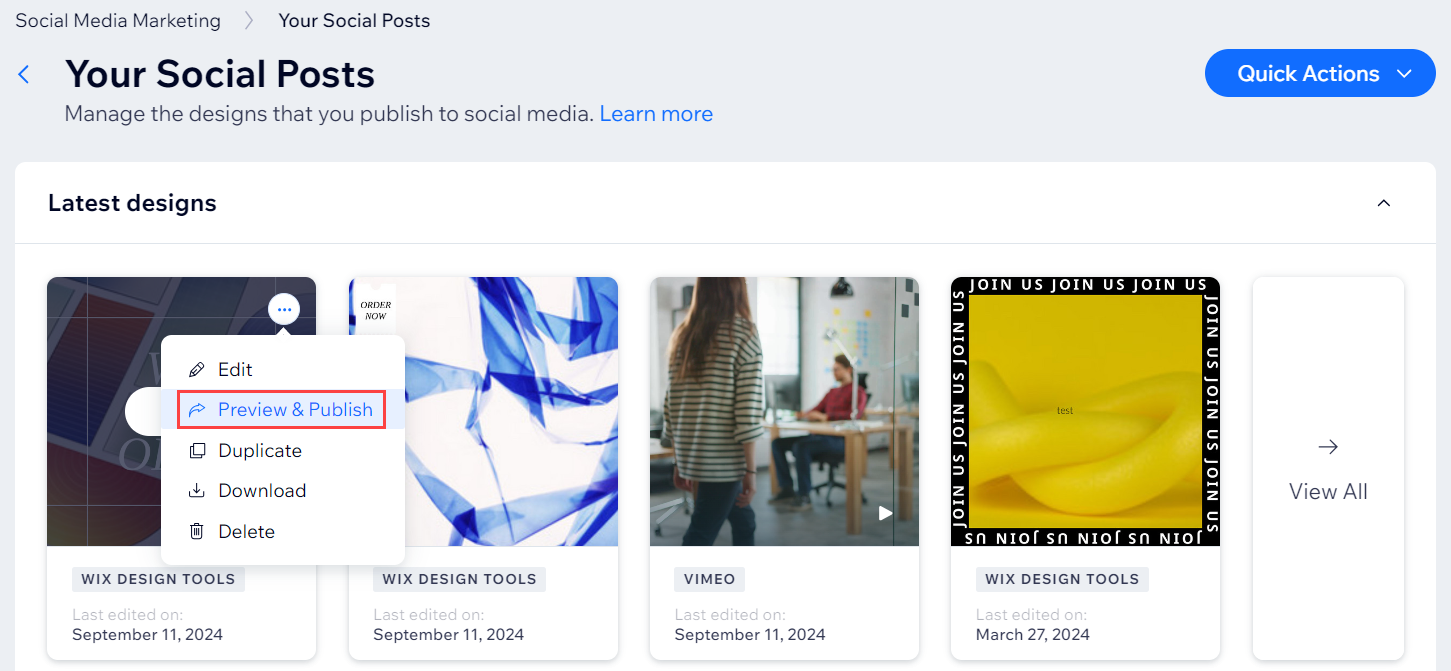
- Hover over the relevant draft post and click the More Actions icon
 .
. - Click Edit & Publish.
- Click Schedule for later under When do you want to publish?
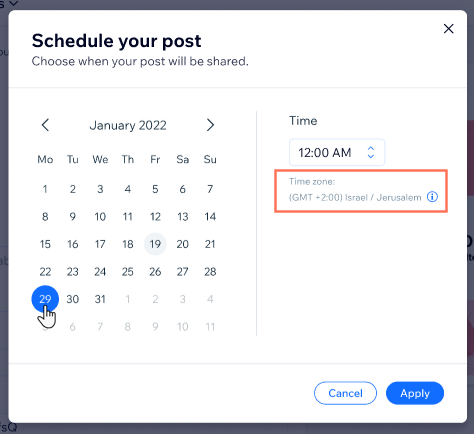
- Use the date picker to choose the day you want the post to be published.
- Choose a time of day the post should be published.
Note: Make sure to check the time zone. If it is incorrect, change it in your browser's settings. - Click Apply.
- Click Schedule on the bottom right to schedule the post.
Managing your scheduled posts
View all your scheduled posts from the Social Media Marketing dashboard. You can edit an existing post, reschedule it for another day, or delete the post.
To manage your scheduled posts:
- Go to Social Media Marketing in your site's dashboard.
- Click Your Social Posts tab.
- Select Scheduled from the All statuses drop-down.

- Click the More Actions icon next to the post you want to manage.
- Manage your post using the following options:
Reschedule
Edit & Publish
Cancel Scheduling
Download
Delete
