Site Members: Customize the Members Menu
4 min
In this article
- Managing the pages on the Members Menu
- Adjusting the layout of the Members Menu
- Designing the Members Menu
This article refers to the previous version of the Members Area app. If you're using the new version, click here. Click here to check which version you're using.
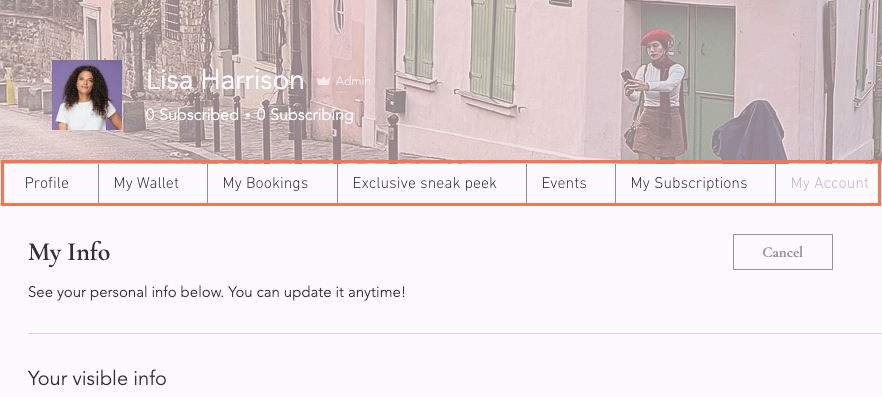
The Members Menu appears on every page of your Members Area, allowing your members to navigate between their private member pages with ease. You can decide which pages appear on the menu and control its layout and design.
Managing the pages on the Members Menu
You have full control of the pages that appear on your Members Menu. You can choose which pages it shows, change their order and add a submenu to keep your menu neat and minimal.
To manage the pages on the Members Menu:
- Go to any Members Area page in your Editor.
- Click the Members Menu.
- Click Manage Menu.
- Manage the pages of your menu, depending on the Editor you're using:
- Add a new item: Click + Add Menu Item at the bottom. You can add existing member pages or a new submenu title.
- Remove an item:
- Hover over the relevant item and click the More Actions icon
 .
. - Click Remove from menu.
- Hover over the relevant item and click the More Actions icon
- Reorder items:
- Hover over the item you want to move.
- Hold the Reorder icon
 and drag the item to its new position.

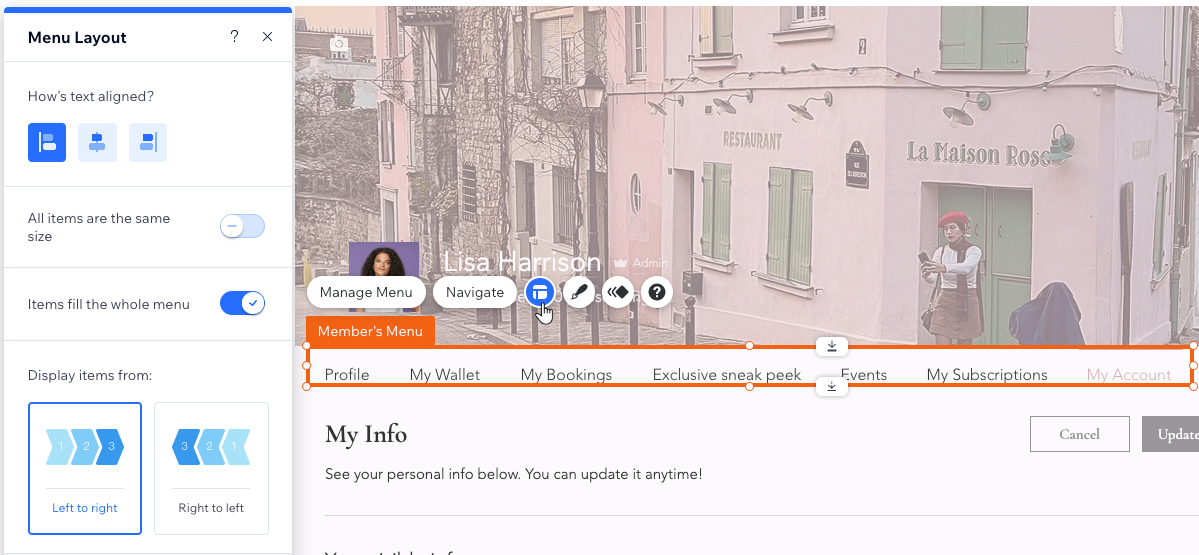
Adjusting the layout of the Members Menu
Change your Members Menu's layout so it fits your style and your member pages. Choose how to display the items by adjusting their alignment, size, direction and more.
Wix Editor tip:
The available settings depend on the type of menu you have (vertical or horizontal). To change your menu from vertical to horizontal or vice versa, you need to change the layout of your member pages.
To adjust the layout of the Members Menu:
- Go to any Members Area page in your Editor.
- Click the Members Menu.
- Click the Layout icon
 .
. - Choose how to adjust the menu layout:
- How's text aligned?: Align the menu item's title to the left, right or center of the item.
- All items are the same size: Enable the toggle to make all menu items the same size, regardless of the length of each title.
- Items fill the whole menu: Enable the toggle to stretch the items so they fill up the entire space of the menu.
- How are items aligned?: Align your menu items to the left, right or center.
- Display items from: Choose whether to display menu items from left to right, or right to left.
- Hidden items on menus: Edit the text that appears on the "More" item. This item appears when your menu is not wide enough to fit all of the items on it.
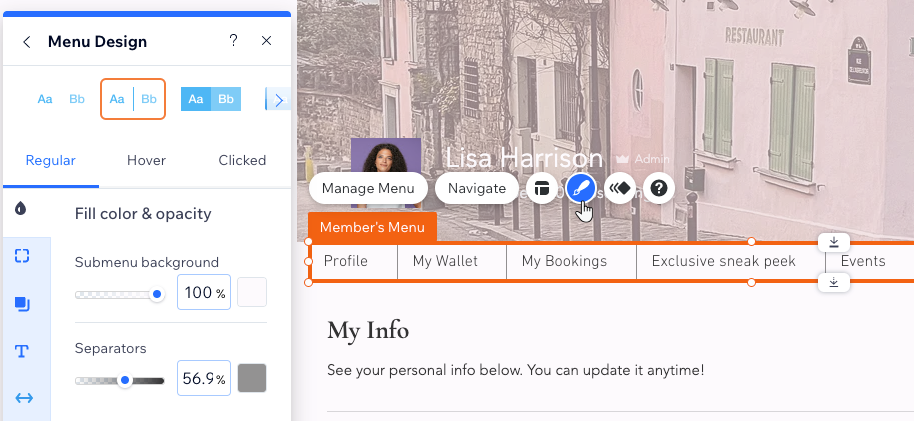
Designing the Members Menu
Customize the look of your Members Menu to fit your aesthetic. Design the menu's background, the text it shows and the borders and corners. You can also design your menu items so they stand out from the rest of the menu when members hover over or select them.
To design the Members Menu:
- Go to any Members Area page in your Editor.
- Click the Members Menu.
- Click the Design icon
 .
. - Choose one of our suggested designs, or create your own style for your menu:
- Click Customize Design.
- Select a preset design for your menu items at the top.
- Select the menu state you want to design: Regular, Hover or Clicked.
- Adjust the design:
- Fill Color & Opacity: Change the background color of your menu / submenu, and adjust the opacity to your liking. If your design includes separators, you can color them from here.
- Border: Adjust the width and color of your menu's borders.
- Corners: Make the corners of your menu / submenu more round or rectangular by adjusting the radius.
- Shadow: Add shadow to your menu and customize its angle, color, distance and more.
- Text: Adjust the style and formatting of your menu and submenu items.
- Spacing: Adjust the spacing between the menu items and the borders.
Note: The available design options depend on the menu state and preset you chose to design.