Wix Events: Limiting Registration and Creating Waitlists for RSVP Events
7 min
In this article
- Managing guest limits and registration settings
- Viewing the waitlist
- Adding someone on the waitlist to an event
- Managing waitlist notifications
Managing your RSVP event just got easier with options to set guest limits and offer a waitlist. By defining the maximum number of attendees, you can minimize overbooking while keeping the event accessible to those who still want to attend.

Note:
Waitlists are not available for ticketed events. You can, however, limit the number of tickets available to be purchased.
Managing guest limits and registration settings
Set an attendee limit for your event and choose whether to offer a waitlist option.
To manage guest limits and settings:
Dashboard
Wix app
Wix Studio app
- Go to Events in your site's dashboard.
- Hover over the relevant event and click Manage.
- Select the Settings tab.
- Click Edit next to Registration settings.
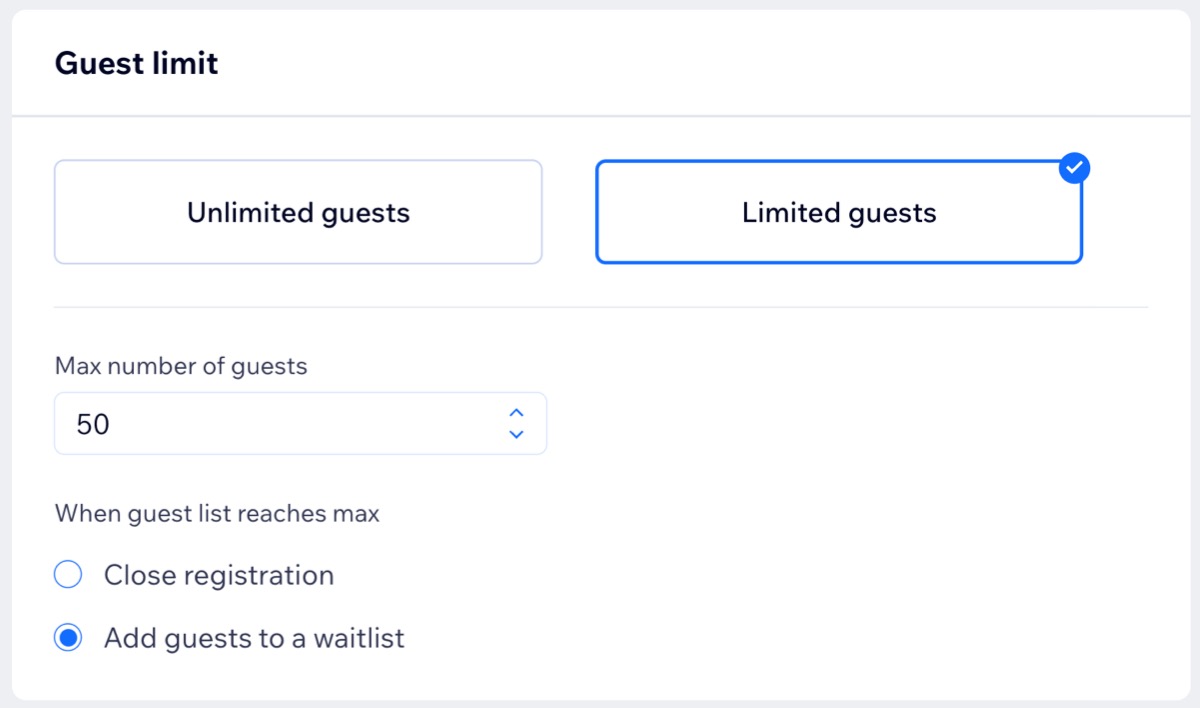
- Choose the relevant option under Guest limit:
- Unlimited guests: No restrictions on the number of attendees for your event.
- Limited guests: Set a specific number of attendees allowed for your event.
- Enter the limit in the Max number of guests field.
- Select what happens when then guest limit is reached:
- Close Registration: Guests can no longer register.
- Add guests to a waitlist: Guests can continue to register, but are added to a waitlist.
- Click Save.
Tip:
You can limit registrations to one per email by setting event permissions to 'Only site members.'
Viewing the waitlist
Quickly see how many people have RSVP'd and how many are on the waitlist, helping you manage event capacity and plan accordingly.
Note:
Viewing your waitlist is available only if you've enabled the waitlist from the guest limit settings (see the section above).
To view the complete waitlist:
Dashboard
Wix app
Wix Studio app
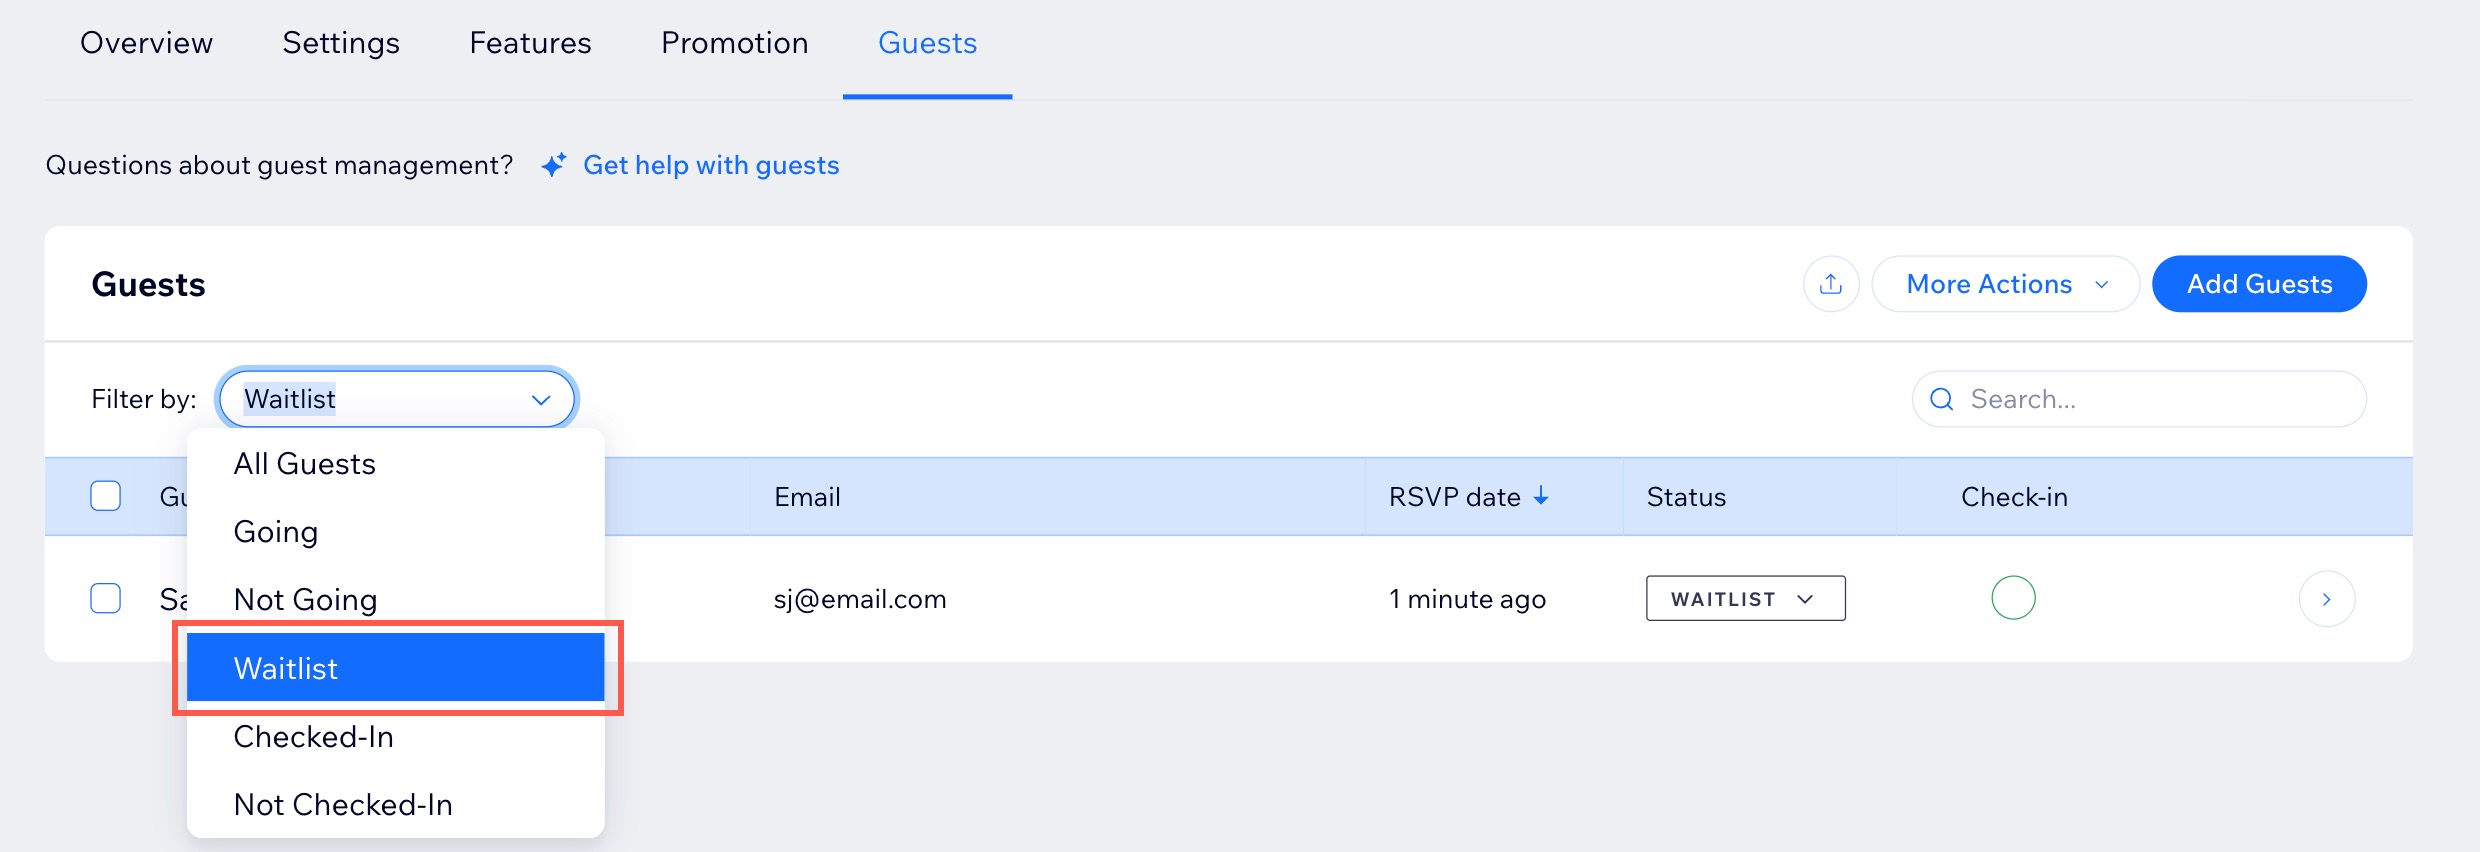
- Go to Events in your site's dashboard.
- Hover over the relevant event and click Manage.
- Click the Guests tab.
- Click the Filter by drop-down and select Waitlist.
Adding someone on the waitlist to an event
You can give waitlisted individuals the opportunity to attend by manually adding them to your event.
To add someone to the event:
Dashboard
Wix app
Wix Studio app
- Go to Events in your site's dashboard.
- Hover over the relevant event and click Manage.
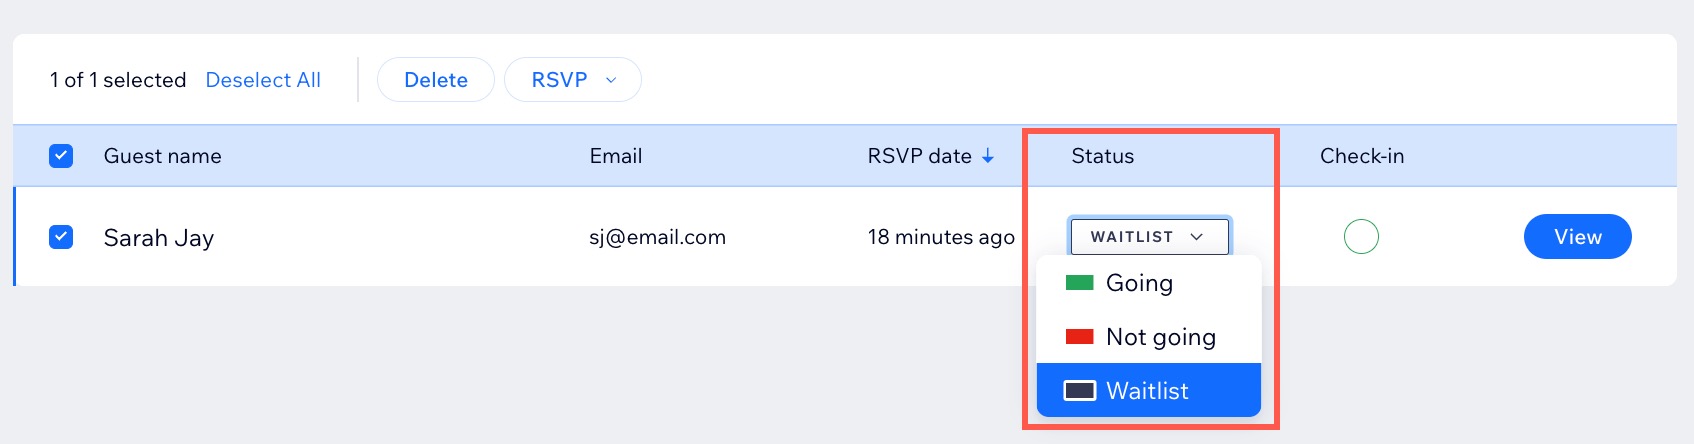
- Select the Guests tab.
- Click the Filter by drop-down and select Waitlist.
- Select the Guest name next to the relevant person.
- Click the Status drop-down and change it from Waitlist to Going.
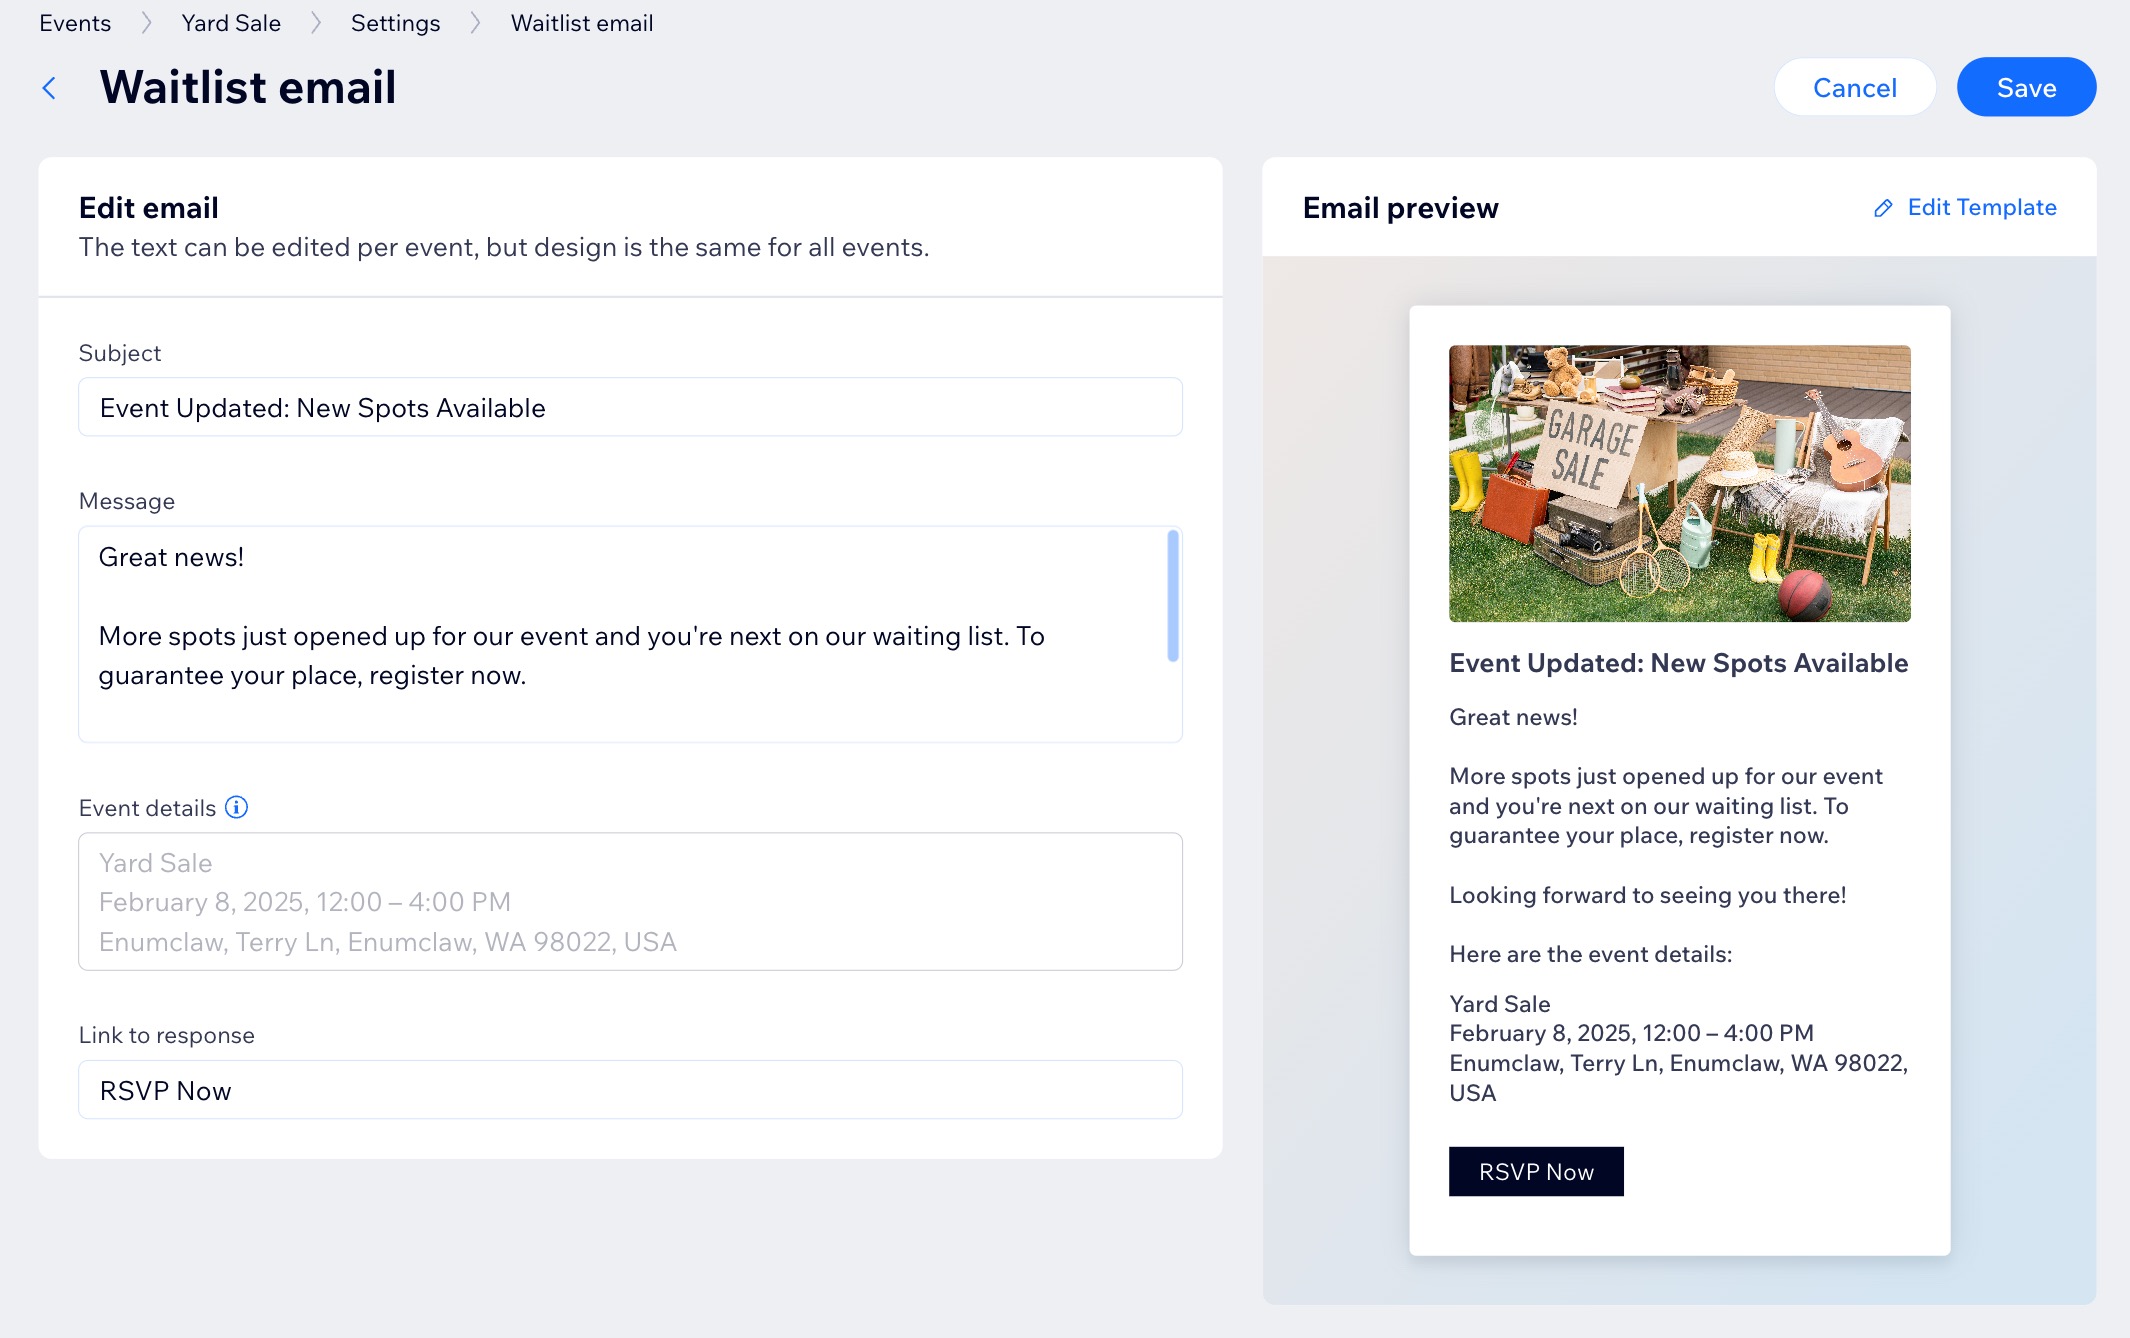
Managing waitlist notifications
When you update the guest limit for your RSVP event, an automated email is sent to waitlisted guests. Additional spots are filled on a first-come, first-served basis. You can disable or modify this email as needed.
Note:
Updating the emails you send to event guests is only available on desktop.
To manage waitlist notifications:
- Go to Events in your site's dashboard.
- Click Manage next to the relevant event.
- Click the Settings tab.
- Edit or disable the Waitlist email under Emails you send to event guests:
- Disable the email: Click the toggle next to Waitlist email to disable it.
- Edit the email: Click Edit to modify or customize the email text / template, then click Save.