

Enterprise Solution: Adding and Setting Up ActiveCampaign Integration
8 min
In this article
- Step 1 | Add and connect ActiveCampaign
- Step 2 | Create an automation
- Step 3 | Choose a trigger
- Step 4 | Choose what you want to add to your automation
- Add a delay
- Add a condition
- Choose an action
- Step 5 | Map data from the trigger to ActiveCampaign
- Step 6 | Activate the automation
- FAQs
Connect your Wix Studio for enterprise account to your ActiveCampaign account so you always have the most up-to-date information. Using our automations, you can send data like store orders, form submissions, and more to ActiveCampaign as soon as they're captured in Wix.
Before you begin:
Learn more about Wix Studio for enterprise or contact our sales team.
Step 1 | Add and connect ActiveCampaign
Contact your enterprise solution success manager to connect ActiveCampaign to your Wix Studio for enterprise account. When connecting your organization's ActiveCampaign account, you are providing permissions for Wix to access your CRM data. You can remove permissions at any time from your ActiveCampaign account.
Note:
- Wix integrates with ActiveCampaign using API version 3. For the most up-to-date information on ActiveCampaign's API capabilities, please consult their documentation.
- When integrating ActiveCampaign with Wix, a special Wix tag is created in your ActiveCampaign account. This tag allows you to track user actions and segment your audience effectively. You can then create campaigns based on this tag and trigger specific automations.
- To understand how Site Tracking works with ActiveCampaign, please review ActiveCampaign’s overview of Site Tracking.
- To set up Site Tracking with your Wix website, please follow ActiveCampaign’s How to set up Site Tracking guide.
To connect ActiveCampaign to your Wix Studio enterprise solution account:
- Sign in to your ActiveCampaign account.
- Go to Settings in the ActiveCampaign dashboard.
- Click Developer.
- Copy the API Access URL and Key under API Access.

- Go to Manage Apps in the relevant site's dashboard.
- Click ActiveCampaign.
- Click Connect.
- Enter the API Access URL and Key from ActiveCampaign you copied in Step 4 above.
- Click Connect.

Step 2 | Create an automation
Once you have connected your ActiveCampaign account, you can now create an automation with ActiveCampaign as the action.
To create an automation:
- Go to Automations in your site's dashboard.
- Click + Create Automation at the top right.
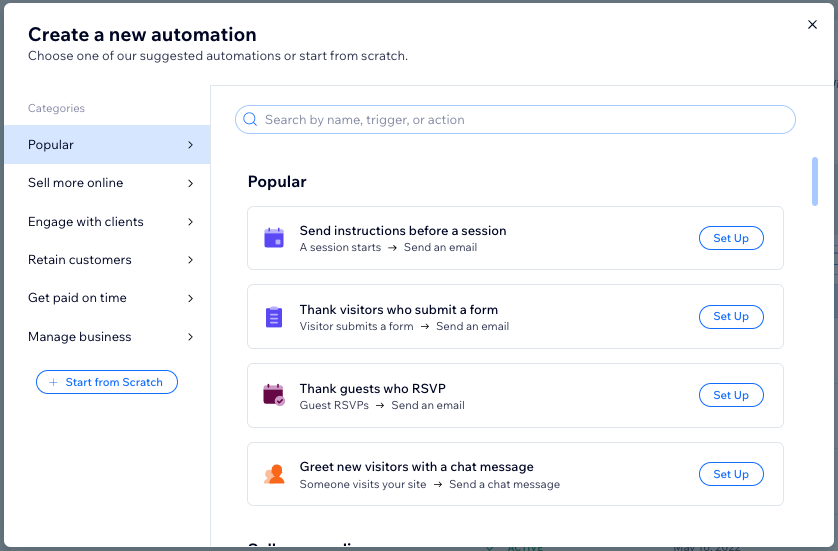
- Choose how you want to start creating your automation:
- From Scratch: Click Start from Scratch to begin from a blank automation template.
- Suggested automation: Use the categories or search bar to find the suggested automation you want to edit. Then click Set Up next to the automation.
- Click the title to give your automation a name.
Step 3 | Choose a trigger
Select the trigger you wish to initiate the automation. This may be something that a visitor does on your site (for example, filling in a form), or something you or your teammates do (e.g. creating an invoice).
Note:
The triggers you'll see listed differ depending on which apps are installed on your organization's site (e.g. Wix Forms, Wix Stores).
To choose a trigger:
- Choose a trigger in the trigger selection panel from the available options under the relevant app.
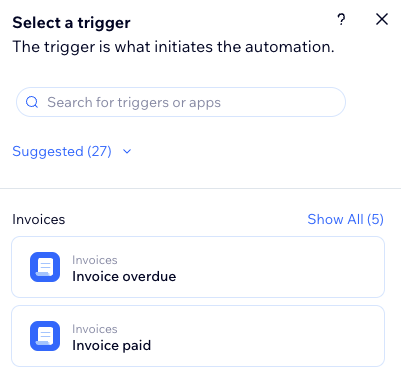
- Set up the trigger.
Note: Based on the trigger you choose, you will see different settings to finish configuring the trigger. - (Optional) Enable the Trigger once per person toggle to limit trigger frequency:
- Select the person from the trigger data: Decide how often the automation can be triggered for the same person (e.g. Contact ID, Post Author Contact ID, Visitor ID etc.).
Tip: Useful for triggers that might occur repeatedly. - Trigger once per person every: Select this checkbox if you want to set a specific amount of time that should pass before the automation can be triggered again for the same person.
- Select the person from the trigger data: Decide how often the automation can be triggered for the same person (e.g. Contact ID, Post Author Contact ID, Visitor ID etc.).
Step 4 | Choose what you want to add to your automation
After selecting a trigger, continue setting up your automation using any of the available steps: Action, Delay, Condition. These steps can be added anywhere in your automation sequence depending on the logic you are trying to implement.
Add a delay
Add a time buffer between steps. For example, if your trigger is 'Form submitted' and your action is 'Send an email', you might want to delay the automation by sending this after a certain amount of time has passed.
Note:
If you don't add a delay, the action is performed immediately.
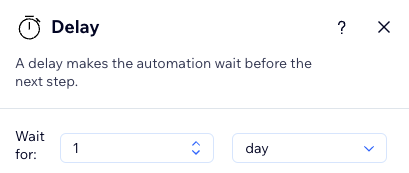
To add a delay:
- Click + to add a step.
- Click Delay.
- Click the up and down arrows (or enter a number in the field) and click the drop-down to choose between days, hours, and minutes.
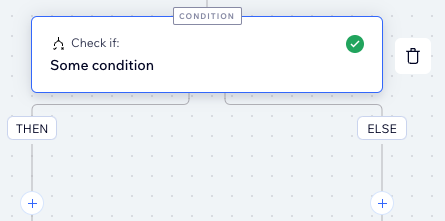
Add a condition
Conditions let you create complex automation flows by defining criteria for continuing the flow. In the ‘THEN’ path, the automation flow continues only if the condition is met. You can set an ELSE path to define what happens if it isn’t.
To add a condition:
- Click + to add a step
- Click Condition.
- Click the Select a property drop-down and choose the dynamic field that the automation collects when it runs (e.g. Party Size).
Tip: Learn more about the property picker and all that it offers. - Click the Select logic drop-down and choose an operator that will compare the received data with the value (e.g. 'is greater than').
- Click the next field to set the value (e.g. '3').
Tip: Click Customize to create custom workflows using the formula field. - (Optional) Click + Or or + And to add more criteria to the condition.
Note: If you add more than one criterion, you can choose ‘and’/’or’ relations between criteria of the same condition. - Click Apply.
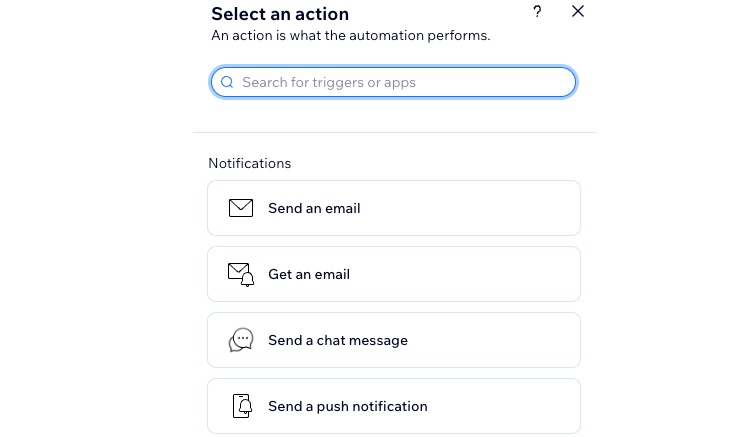
Choose an action
Actions are what the automation performs. For example, if your trigger is 'Form submitted', you might want to send that visitor an automated reply to arrange a follow-up. You could also "Add label to contact" for your team to make preparations for a follow-up call.
In the actions selection panel, you can find the action offering relevant to the selected trigger, which can be customized to suit your needs.
To choose an action:
- Click + to add a step.
- Click Action.
- Choose an action from the panel.
Note: The actions available will differ based on your trigger choice.
- Set up the action using the available settings.
Step 5 | Map data from the trigger to ActiveCampaign
Once your automation is set up with the relevant delay, conditions, and actions, you need to match the data from your chosen trigger to the relevant ActiveCampaign entity and fields. This ensures the data from Wix gets to the right place on ActiveCampaign.
For example, if your trigger is a new form submission, you will need to match the customer's data to the relevant entity fields in ActiveCampaign.
To map data from the trigger to ActiveCampaign:
- Click + to add a step.
- Click Action.
- Select Update ActiveCampaign.
- Select the relevant entity from the Select which object to update in ActiveCampaign drop-down:
- Accounts: Store company-level information to manage and track interactions with businesses rather than individual contacts.
- Contacts: Represent individual people in your database, allowing you to track engagement, communication, and automation.
- Deals: Help manage sales opportunities by tracking the progress of leads through a customizable pipeline.
- Click Map Fields.
- Choose the relevant pieces of Wix data under Data from trigger, so the right ActiveCampaign fields get updated.
- (Optional) Click + Add Field to add collect more information and send it to your ActiveCampaign account.
- Click Save.

Step 6 | Activate the automation
Click Activate to make your automation live. For example, if you created an automation with a form submission trigger, every time a site visitor fills in that form, their submission details are sent to the relevant ActiveCampaign entity and fields.

FAQs
Click a question below to learn more about the Wix Studio for enterprise ActiveCampaign integration.
What is an ActiveCampaign field?
What is an ActiveCampaign required field?
Why can't I see some of my ActiveCampaign fields while mapping them?
What happens if I delete a field in my Wix form being mapped to ActiveCampaign?
What happens if I rename a field in the Wix form mapped to ActiveCampaign?
What happens if a contact submits multiple forms with the same email address in ActiveCampaign?
How do I pass UTM parameters from my Wix website to ActiveCampaign?
How do I manage site tracking on both ActiveCampaign and my Wix website?
