

CMS: Using a Dynamic Item Page as Your Event Details & Registration Page
15 min
In this article
- Step 1 | Add a dynamic item page for your event
- Step 2 | (Optional) Modify the URL slug structure
- Step 3 | Customize your new dynamic item page
Do you need more control over the design and layout of your Event Details & Registration page? If so, you can use the Wix CMS (Content Management System) to build a dynamic item page that serves as a custom template for displaying each individual event.
You only need to design the page once by connecting image, text, and button elements to the relevant fields in your CMS Events collection. When you publish your site, each event gets its own version of the dynamic item page with a unique URL.
With this method, we recommend also creating a dynamic list page for your events where visitors can view all of your events in one place. When they click an event on the dynamic list page, they're taken to this dynamic item page where details about the event are displayed.
Before you begin:
- Add Wix Events to your site and publish your events.
- Add the CMS to your site if you haven't already.
- Enable Wix app collections so you can use Wix Events with the CMS.
Step 1 | Add a dynamic item page for your event
Start in your editor by accessing the CMS Wix App Collections and finding the Events collection. Then create a dynamic item page from this collection. This dynamic page will act as a template, with each event getting its own version of the page.
Wix Editor
Studio Editor
- Go to your editor.
- Click CMS
 on the left of the editor.
 - Click Wix App Collections on the left.
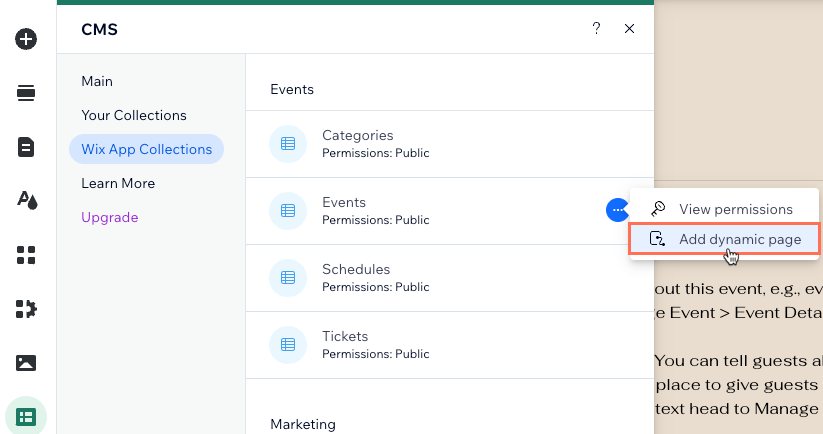
- Scroll down to the Events collections.
- Hover over Events, click the More Actions icon
 and select Add dynamic page.
- Click Item page.
- Click Add to Site.
Step 2 | (Optional) Modify the URL slug structure
Each of your events will have a dedicated version of the dynamic item page you just created. By default, these pages have the following URL structure, with the last {Title} part changing based on the name of the event:
- In the Wix Editor: https://www.{your-domain.com}/events-1/{Title}
- In the Studio Editor: https://www.{your-domain.com}/events/{Title}
When editing the URL slug structure, the structure cannot already be used by other existing pages on your site. To be unique, the URL slug structure cannot have the same prefix (e.g. {Collection name}) and the same number of variables as another page on your site, even if the variables are different. Learn more about creating unique dynamic page URLs.
Show me an example of conflicting URL slug structures that cannot be used

To edit the URL slug structure:
Wix Editor
Studio Editor
If you're using the Wix Editor, the events part of your URL slug is already used by a page that displays your upcoming and past events. This is why the CMS adds -1 after events, to give this new dynamic item page a unique URL. You can change this URL slug to a new structure that is not already used by your live site.
To edit your dynamic item page's URL slug structure:
- Go to your editor.
- Click Pages & Menu
 on the left side of the editor.
 - Click Dynamic Pages.
- Hover over the Events (Item) page under EVENTS/EVENTS COLLECTION and click the More Actions icon
 on the right.
 - Click SEO.
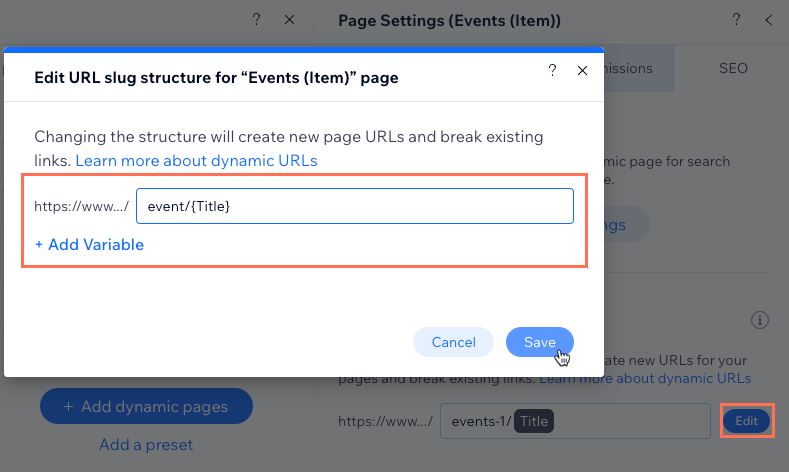
- Edit the URL slug structure field:
- Click Edit next to the URL slug structure field and choose what you want to do:
- Add Variable: Click + Add Variable and choose a 'Text' or 'Number' field to use its values in the URL slug structure.
- Add or edit static values: Click the field and enter the static values you want to use in the URL slug structure or edit the existing values. Use only English letters, numbers or dashes. For example, you could change events-1 to event.
- Click Save.
- Click Edit next to the URL slug structure field and choose what you want to do:
Step 3 | Customize your new dynamic item page
When using the CMS, datasets are the hidden tools that connect your page elements to the items in your collection. In this case, you're connecting text, buttons, and an image to your Events collection, which allows each version of the page to display details about the relevant event. You can add and connect more text or button elements then arrange the page as you see fit.
Important:
If you previously connected an element to the 'About (Rich Text)' collection field, make sure to remove this connection as it is being deprecated. Wix Events has released a new 'About the event (optional)' field where you can add rich media to showcase details about your events. This new field appears as the 'Long description (Rich Content)' collection field when you connect a rich content element to it.
See step 5 below to learn how to add a rich content element and connect it to your 'Long description (Rich Content)' collection field.
To customize this dynamic item page:
Wix Editor
Studio Editor
- Go to your editor.
- Go to your Events (Item) page.
- Connect the elements on the page:
- Back button: Click the Back button, then click the Link icon
 and choose where the button navigates visitors to.
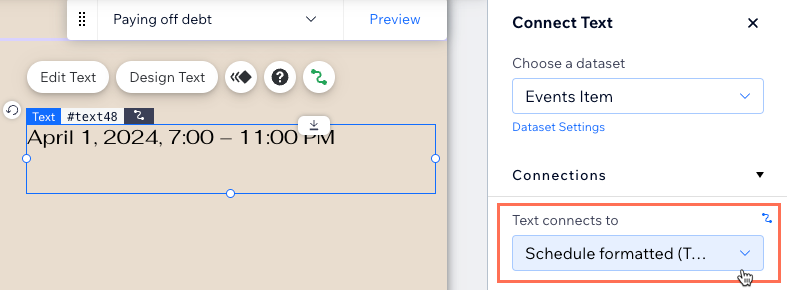
Tip: Link this button to a page or section on your site that has a list of your events. - Text elements: Click the relevant text element, then click the Connect to CMS icon
 . In the Connect Text panel, click the Text connects to drop-down and choose the Events field that you want to use in the text element. Repeat this step for each text element on the page that you want to connect to text from your events.
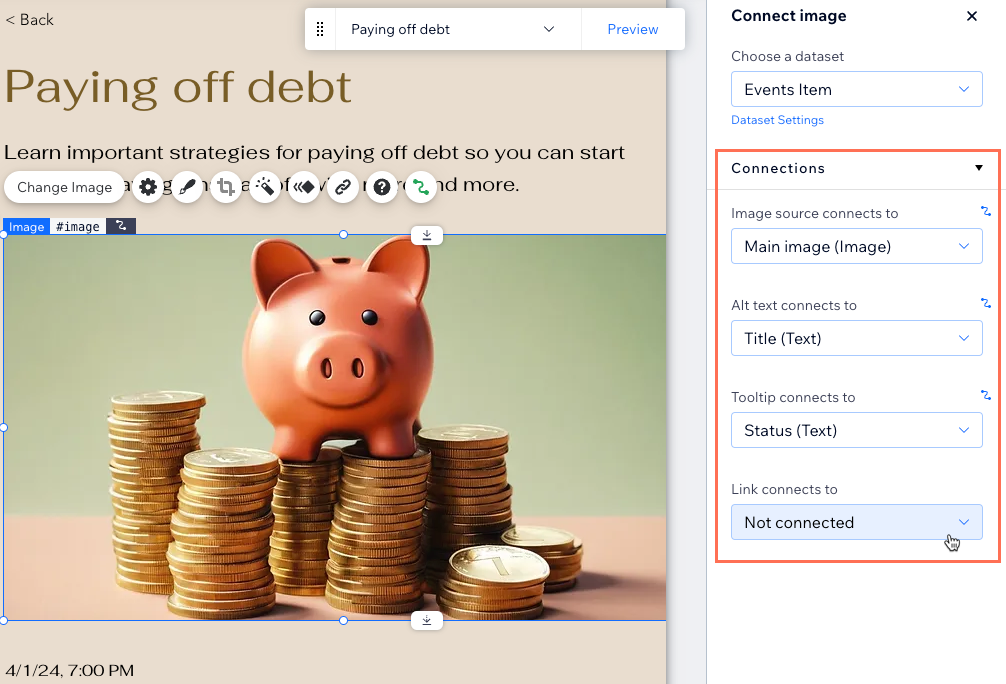
 - Image: Click the image, then click the Connect to CMS icon . In the Connect image panel, click the relevant drop-downs to connect the image, alt text, and link.
- Back button: Click the Back button, then click the Link icon
- (Optional) Add more text elements and click their Connect to CMS icons to connect them to your Events CMS collection. For example, you can connect text to the following Events fields:
- Title (Text): The event name.
- Description (Text): The description from the event's Short teaser (optional) field.
- About (Rich Text): The event's About the event (optional) rich text field.
Important: This field is being deprecated. See step 5 below to learn how to add a rich content element and connect it to the new 'Long description (Rich Content)' field instead. - Schedule formatted (Text): The event's date and time (e.g. "April 1, 2024, 7:00 - 11:00 PM")
- Start date formatted (Text): The event's start date (e.g. "April 1, 2024")
- Start time formatted (Text): The event's start time, formatted to your local settings. If the event schedule is TBD, this field is blank.
- Location name (Text): The event's location or the TBD message from Events dashboard.
- Location address (Text): The full address of the event. If the location is TBD, the field is blank.
- Status (Text): One of the following event statuses:
- SCHEDULED: The event date is in the future.
- STARTED: The event start time has arrived.
- ENDED: The event end time has passed.
- CANCELED: The event was canceled.
- Lowest price formatted (Text): The lowest price available, formatted with your currency. Note:
- If the event has RSVP registration or is external, this field is blank.
- If tickets are sold for this event, the lowest price available is displayed.
- If free tickets are offered, "Free" is displayed.
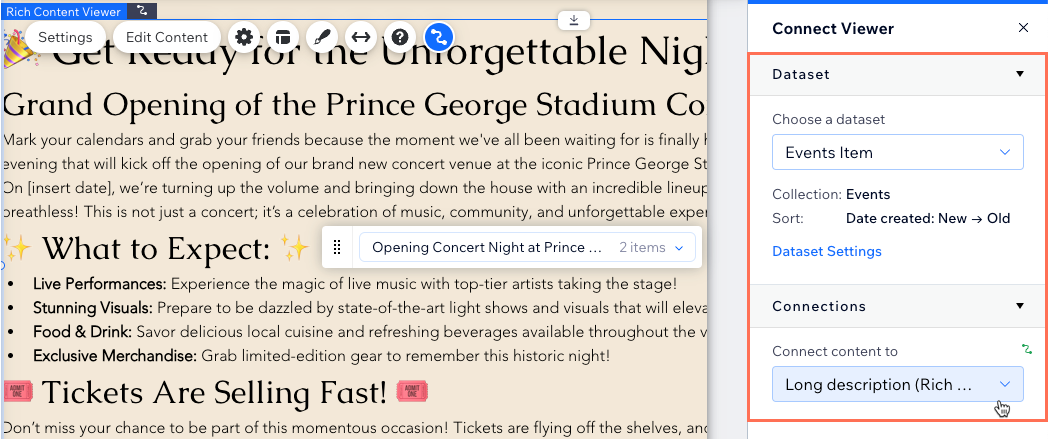
- (Optional) Add a rich content element to display the About the event rich media content field on the page:
- Click CMS on the left of the editor.
- Click Add Content Elements.
- Click Rich Content.
- Click the Choose a dataset drop-down and select the dynamic page dataset (Events Item).
- Click the Connect content to drop-down and select Long description (Rich Content).
- Click CMS
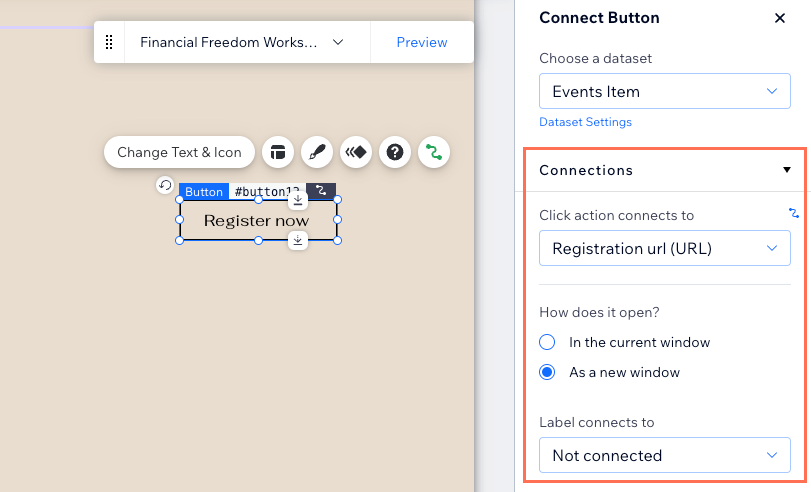
- Add dynamic buttons that allow guests to register for the event or add it to their calendar:
- Click Add Elements
 on the left, click Button, then select the button you want to add.
 - Click the button, then click the Connect to CMS icon .
- Click the Click action connects to drop-down and choose what happens when visitors click the button:
- Site event page url: Visitors go to the Event Details & Registration page where they can register for the event.
- Google calendar url (URL): The visitor adds the event to their Google calendar.
- iCalendar url (URL): The visitor downloads an iCalendar link to the event.
- Registration url (URL): Visitors go to the Registration URL if registration for the Wix event is managed externally.
- Choose how the link opens: In the current window or As a new window.
- Click the Label connects to drop-down and choose a field to use as the dynamic button text. Or click Change Text & Icon on the button to enter static button text (e.g. "Register").
- Click Add Elements
- Adjust the size, location, and design of the elements on your page to your liking.
- Click Preview to test your dynamic Events page.
- Click Publish when you're ready to make the changes go live.
