

CMS: Connecting an Audio Player to Collection Content
6 min
Dynamically showcase audio tracks on your site by connecting an audio player to your CMS (Content Management System) collection. In the audio player, you can play tracks stored in your collection's audio or URL fields. This allows you to manage a large library of audio content in a collection that is separate from your editor.
Before you begin:
- Add the CMS to your site if you haven't already.
- Create a collection with the audio tracks you want to play on your site.
To connect an audio player to the CMS:
Wix Editor
Studio Editor
- Go to your editor.
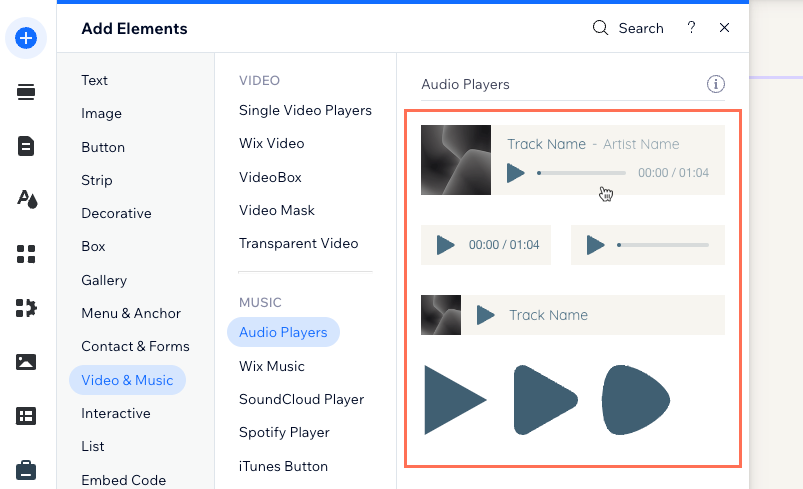
- Add an audio player:
- Click Add Elements
 on the left side of the editor.
 - Click Video & Music.
- Click Audio Players and drag the player you want to use onto your page.
- Click Add Elements
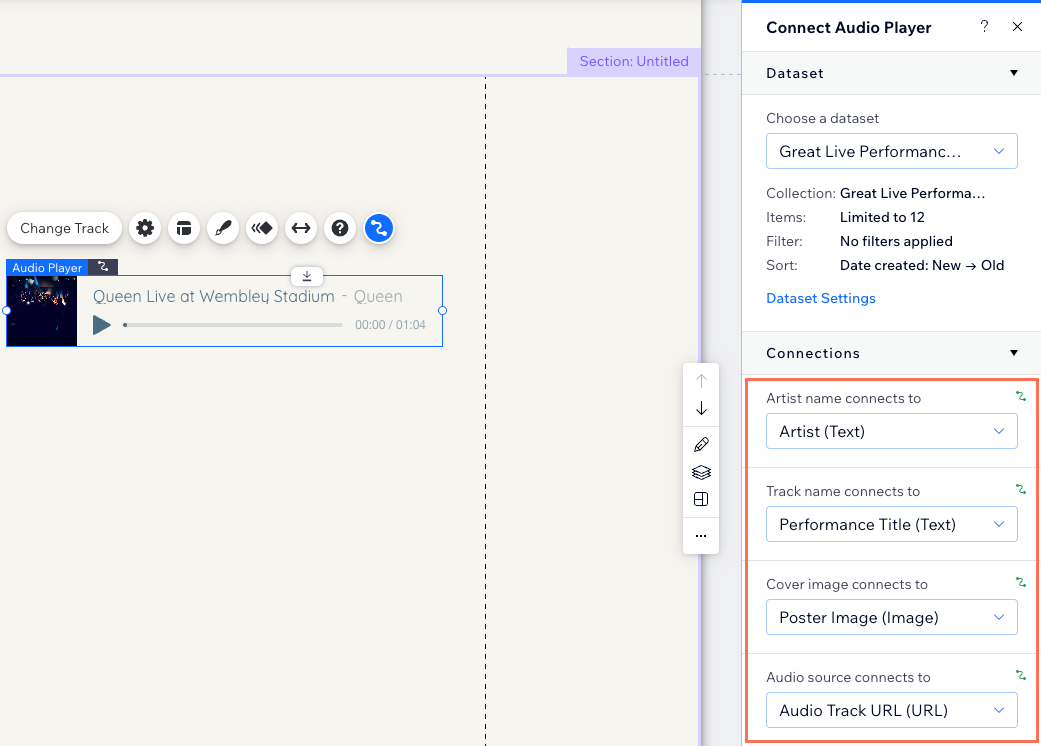
- Select the audio player you just added and click the Connect to CMS icon
 .
. - Click the Choose a dataset drop-down and select an existing dataset that connects to your collection. Alternatively, click Add a Dataset, then choose the collection you want to connect, give the dataset a name and click Create.
- Under Connections, click the relevant drop-downs to connect the player to the relevant collection fields:
Tip: Select + Add in any of the drop-downs if you want to add and connect new collection fields.- Artist name connects to: Select the text, address, or tags field you want to use for the names of the artists.
- Track name connects to: Select the text, address, or tags field you want to use for the names of the tracks.
- Cover image connects to: Select the image field that you want to use for the cover images.
- Audio source connects to: Select the audio or URL field that you want to use as the source of the audio tracks.
- Video title connects to: Select the Text, Address, or Tags field you want to use as the video title. Select + Add if you want to add and connect a new collection field for your video title.
- Video source connects to: Select the Video or URL field you want to use as the source of the video. Select + Add if you want to add and connect a new collection field for your video source.
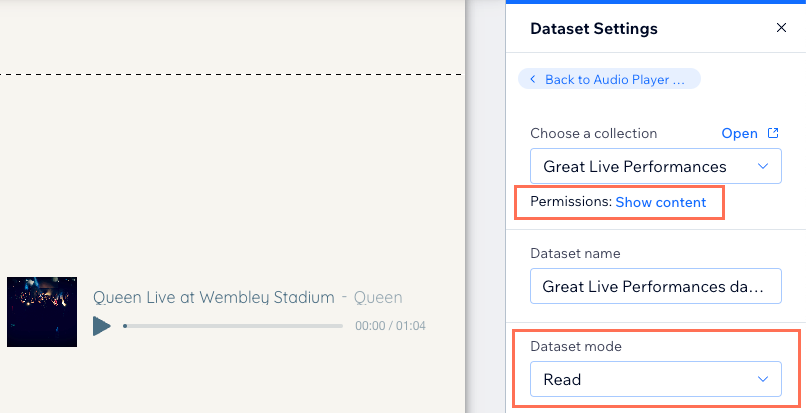
- (If needed) Adjust the dataset settings:
- Click Dataset Settings in the Connect Audio Player panel on the right.
- Click the permission type next to Permissions to edit your collection's permissions & privacy settings.
- Click the Dataset mode drop-down and select the relevant option:
- Read: Elements that are connected to the dataset can read and display content from your collection. The elements cannot modify the collection content.
- Read & Write: Elements that are connected to the dataset can display content from your collection. Input elements can add or edit content in your collection.
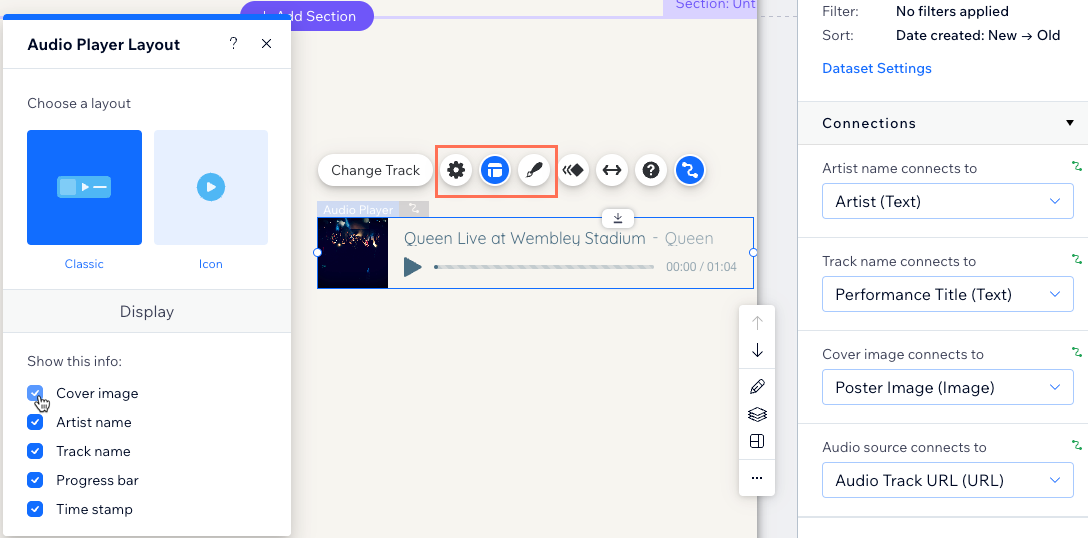
- Customize your audio player's settings, design, and layout. Learn more about customizing the audio player.
Tip: Click Settings on the audio player to adjust the playback options to play once or in a loop. The image, audio, and track details shown in the settings will be overridden if you connect them to collection fields in the dataset.
- Click Preview at the top right to test your audio player.
- Click Publish if you are ready to make the changes go live.
