CMS: Connecting the Signature Input Field to a Collection
7 min
In this article
- Step 1 | Add and set up the signature input element
- Step 2 | Connect the signature input to the CMS
- FAQs
The signature input element lets you collect digital signatures directly on your website. Connecting it to a CMS (Content Management System) collection allows you to store and manage signatures in one place.
You can add other input elements and connect them to the same dataset to create a custom CMS form with several fields. For example, a photography business can have clients sign release forms online and save their signatures in a database, streamlining document management.
Before you begin:
- Make sure to add the CMS to your site or enable coding if you haven't already.
- Make sure you have a CMS collection for storing the submitted signatures.
Step 1 | Add and set up the signature input element
Add the signature input element to your page and customize its settings, layout, and design.
Wix Editor
Studio Editor
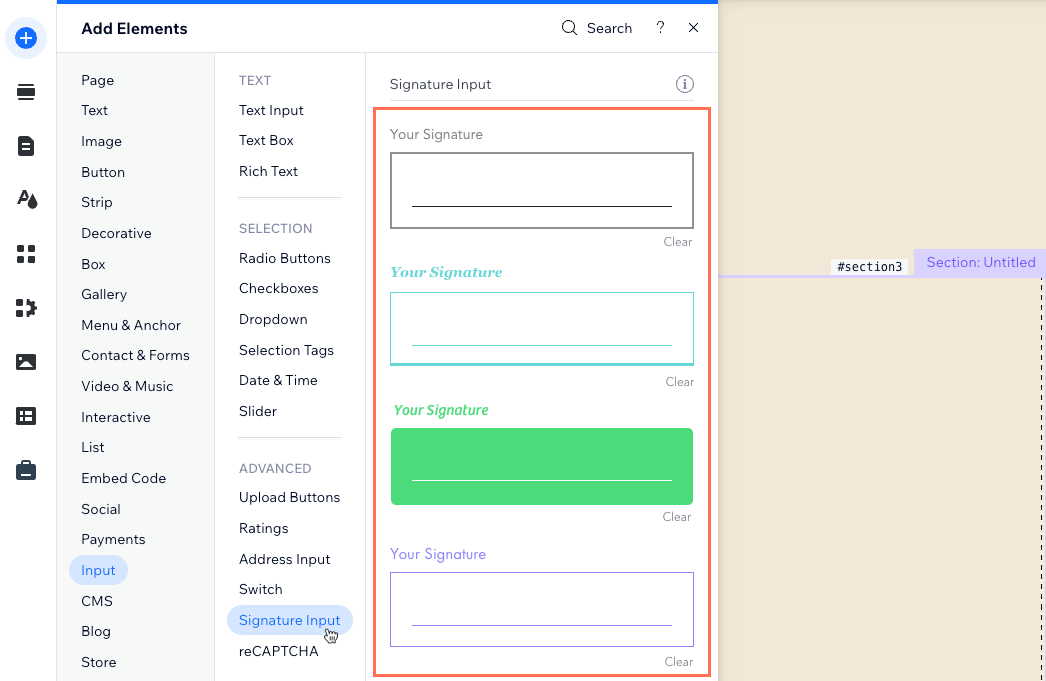
- Click Add Elements
 on the left side of the editor.
 - Click Input.
- Click Signature Input.
- Click and drag the Signature Input element of your choice onto the page.

- Click Settings on the signature element to edit the following:
- Field title: Edit the name that appears on the input, which also lets screen readers know what the input is about.
- Clear signature button: Edit the name that appears on the button visitors click to clear their signature.
- This field is: Select the Required checkbox to make it mandatory that the signature is filled out before it can be submitted to your collection.
- Click the Layout icon
 to adjust the indentation, spacing, text direction and alignment.
 - Click the Design icon
 to choose a preset design. Then click Customize Design to adjust the design further.
Step 2 | Connect the signature input to the CMS
Connect the signature input element to a dataset that binds to your CMS collection that will store the signatures. You can connect the signature value to image field types in your collection.
Wix Editor
Studio Editor
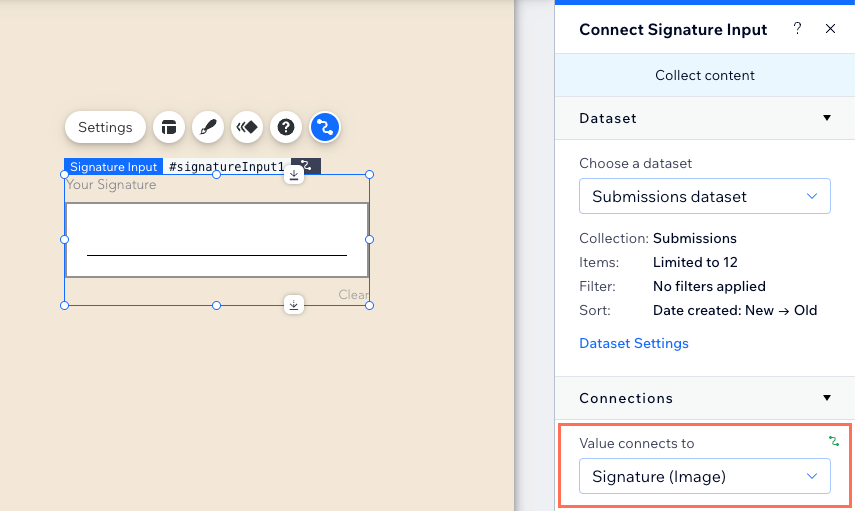
- In your editor, click the signature input element.
- Click the Connect to CMS icon
 .
. - Click the Choose a dataset drop-down and select an existing dataset that connects to your collection. Alternatively, select Add a Dataset, then choose the collection you want to connect, give the dataset a name and click Create.
- Click the Value connects to drop-down and select the 'Image' field in which you want to save the signatures. Select + Add if you need to add an Image field for storing the signatures.

- (If needed) Adjust the dataset settings:
- Click Dataset Settings in the panel on the right.
- Click the permission type next to Permissions to edit your collection's permissions & privacy settings.
- Click the Dataset mode drop-down and select the relevant option:
- Read & Write: Elements that are connected to the dataset can display content from your collection. Input elements can add or edit content in your collection.
- Write: Elements that are connected to the dataset can add and edit collection content. However, connected elements cannot display content from the collection.
- Add a 'Submit' button for visitors to click to submit their signature and responses to any other input elements that connect to the dataset.
- Click Preview to test your signature input.
- Click Publish if you are ready to make the changes go live.
FAQs
Click below for answers to common questions about the signature input element.
Are there specific regulations for collecting electronic signatures on my site?
What are the dataset modes I can use with the signature input element?
How do I find my submit button's success/failure messages in the editor?
Can I automate what happens when I receive form submissions?
Can I export the submissions that get saved to my collection?


