

Connecting Email Purchased Outside of Wix
6 min
In this article
- Connecting your email by choosing your provider
- Connecting your email by entering MX and other DNS records
- Video tutorial
- FAQs
You can connect an email purchased outside of Wix to continue using a mailbox from your existing email provider. In most cases, your mailbox's MX (Mail Exchange) records are automatically added when you connect your domain in Wix. This allows your emails to continue working. However, you may need to edit the MX records and other DNS records if your domain's emails are not working.
When connecting email in Wix, you can choose from a list of popular email providers to automatically add their DNS records. Or you can manually edit the DNS records yourself. You may need to confirm with your email provider that your email with them is still active and that you have the correct DNS records.
Important:
Connecting an email mailbox in your Wix account does not transfer ownership of the mailbox to Wix. You're adding the records that allow your mailbox to continue to send and receive emails. You still need to manage the billing for your mailbox with your current email provider. Alternatively, you can purchase a Google Workspace business email from Wix to manage the billing in your Wix account.
Before you begin:
Make sure your domain is connected via name servers and not via pointing. If your domain is connected via pointing, you must contact your domain host (not Wix) to configure the DNS records of your email provider. Learn how to switch your domain's connection method.
Connecting your email by choosing your provider
When connecting your mailbox, you can choose from a list of popular email providers. Selecting your email provider automatically adds their MX and other DNS records to your domain. This ensures your domain's emails will still work, as long as your domain's DNS records are correct and your mailbox is active with your email host.
Tip:
We recommend checking that the records Wix automatically adds are correct. Your email provider will be able to confirm the records required to connect your email.
To connect your email by selecting your email provider:
- Go to Domains in your Wix account.
- Click the Domain Actions icon
 next to the relevant domain.
 - Select Connect an email purchased outside of Wix or Edit MX records.
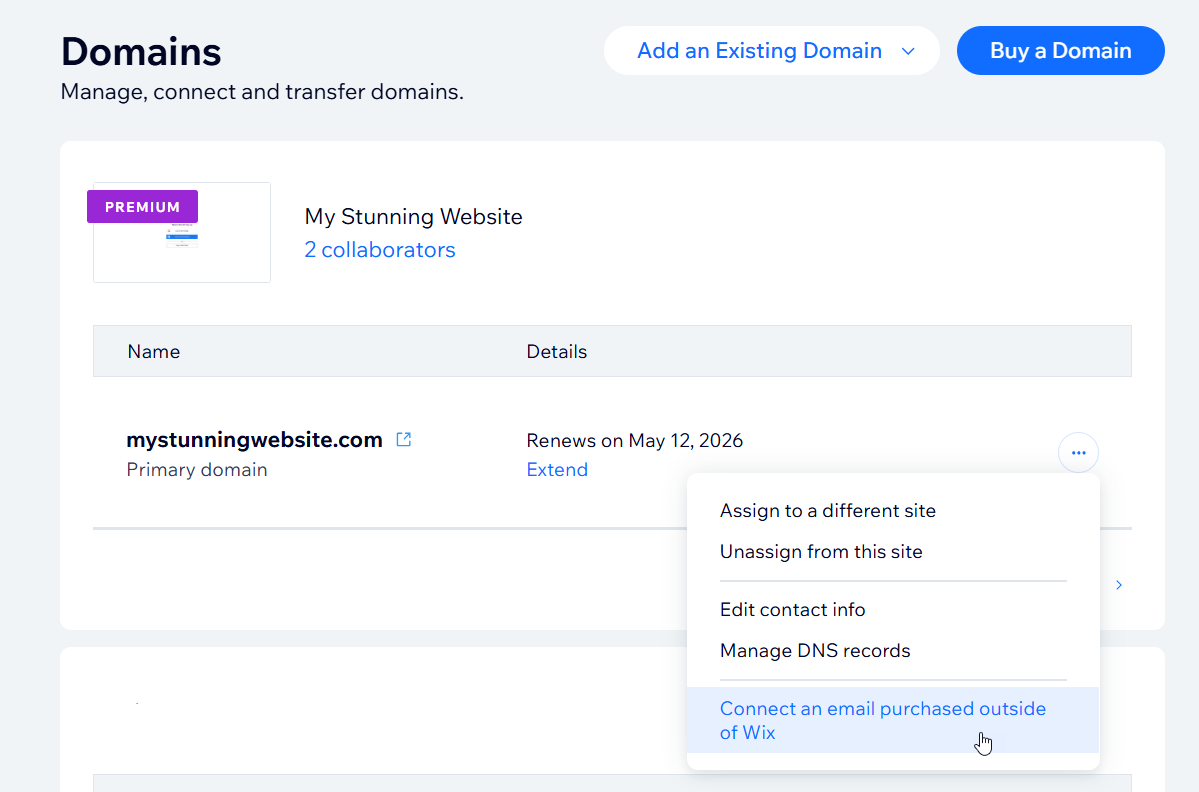
- Select your provider from the drop-down and click Save.
Note: If your provider isn't listed, select Other and go to the next section of this article for instructions.
Not seeing your provider on the list?
If your email provider is not listed, you'll need to get their MX records and any other DNS records they require. Go to the next section in this article for steps on adding the records manually. Click below for an email template you can use when contacting your email provider.
Email template for requesting DNS records from your email provider.
Connecting your email by entering MX and other DNS records
You can add MX records or other DNS records to your domain manually. You may want to do this if your email provider has given you specific MX records required to connect your email.
Some email providers require you to add additional DNS records. If instructed to do so, follow the steps here to add other DNS records (in addition to MX records).
To add your provider's MX and other DNS records:
- Go to Domains in your Wix account.
- Click the Domain Actions icon next to the relevant domain.
- Select Connect an email purchased outside of Wix or Edit MX records.
- Select Other from the list.
- Click the Points to field and enter the mail server address of your MX record.
Note: The Host name field cannot be edited. It is not currently possible to connect a business email to a subdomain in Wix.
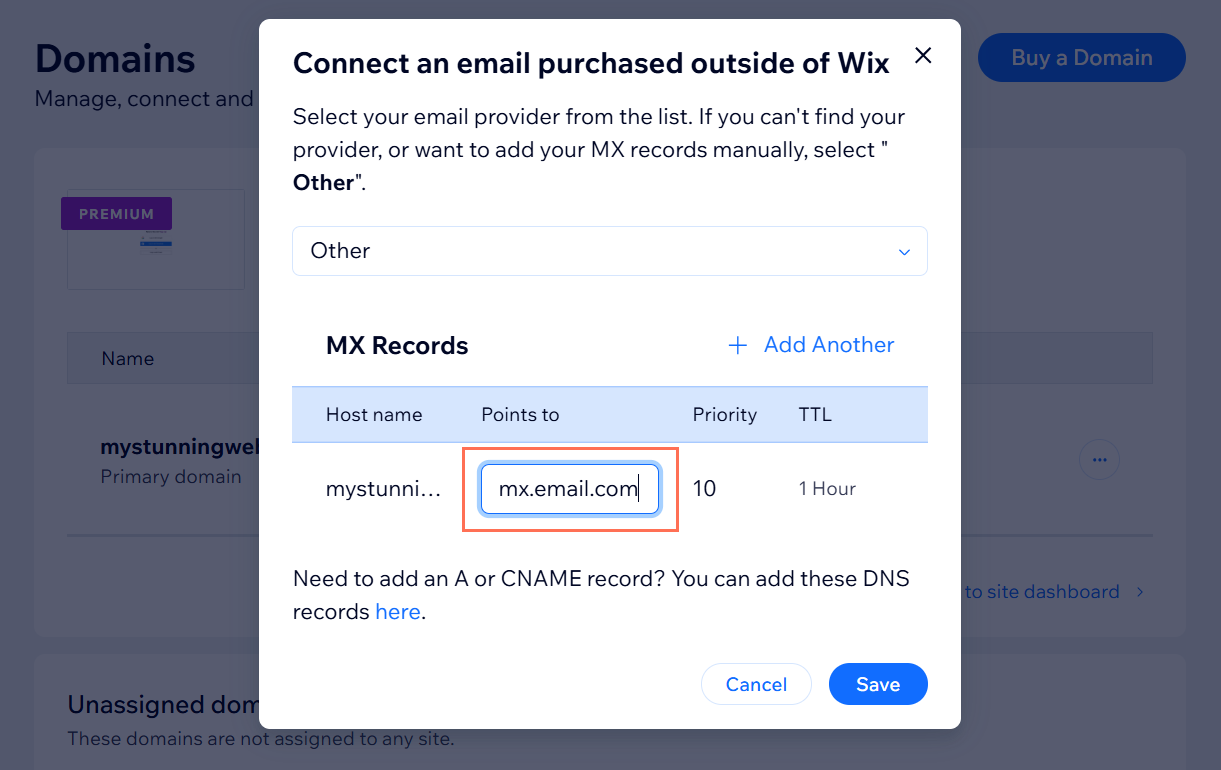
- (If you have multiple MX records) Add the additional MX records:
Note: Enter the record with the lowest Priority value first. The Priority values do not need to match your provider's directions, but they do need to be in the same order.- Click + Add Another.
- Click the Points to field and enter the mail server address of the next MX record.
- Repeat these steps for each additional MX record you need to add.
- Click Save when you're done adding all the MX records.
To add other DNS records (if required):
- Go to Domains in your Wix account.
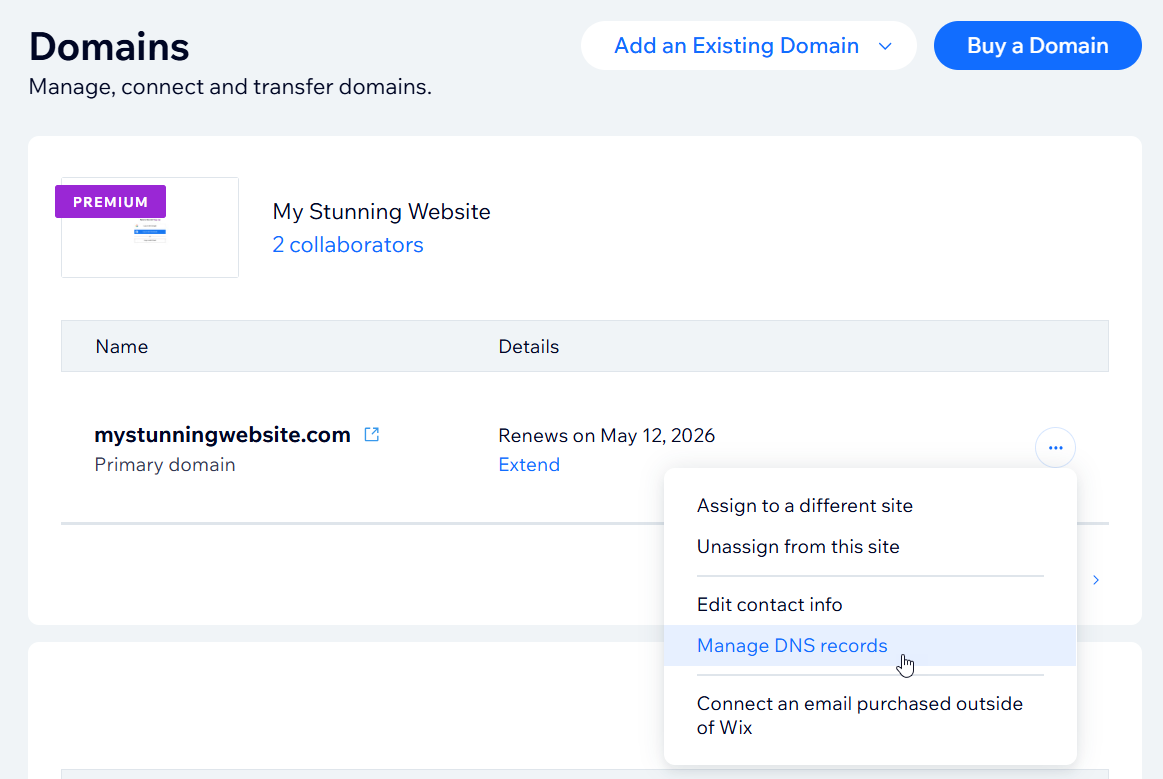
- Click the Domain Actions icon next to the relevant domain.
- Select Manage DNS Records.
- Scroll to the record type you'd like to add (e.g. CNAME, TXT) and click + Add Record.
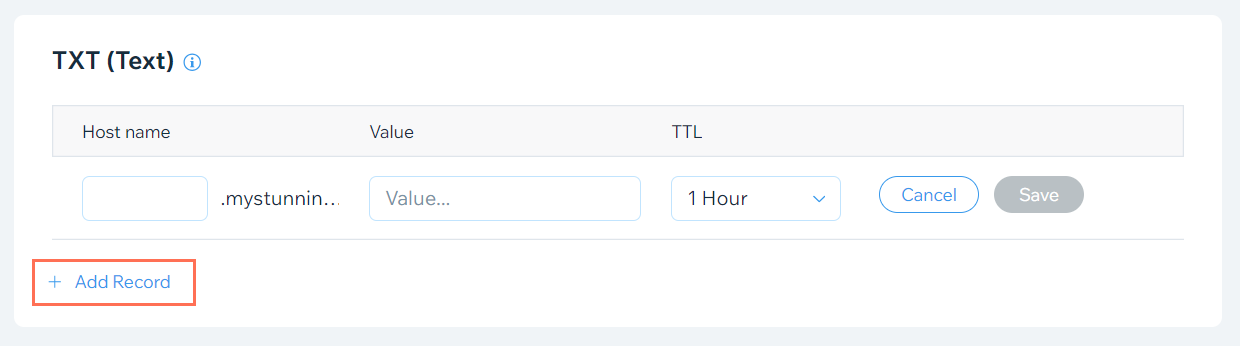
- Enter the DNS record in the relevant fields.
Note: If instructed to add an @ sign in the Host name field, leave the field blank instead. - Click Save.
- Repeat steps 3-5 above to add additional DNS records.
Video tutorial
Check out this short video tutorial, or scroll down to read the FAQs.
FAQs
Click a question below to learn more about connecting your email to Wix.
How long does it take to connect my email?
Can I set up my email address with Outlook?
Why am I not seeing the option to Edit MX records or Connect an email purchased outside of Wix?

