

CMS: Adding and Setting Up the Switch Input Element
7 min
Allow visitors to toggle a switch and submit a binary response to a Boolean (true or false) collection field. For example, you could use the Switch input element to allow visitors to opt-in to a newsletter from a custom form made up of other input elements.
Wix Editor
Studio Editor
- Go to your editor.
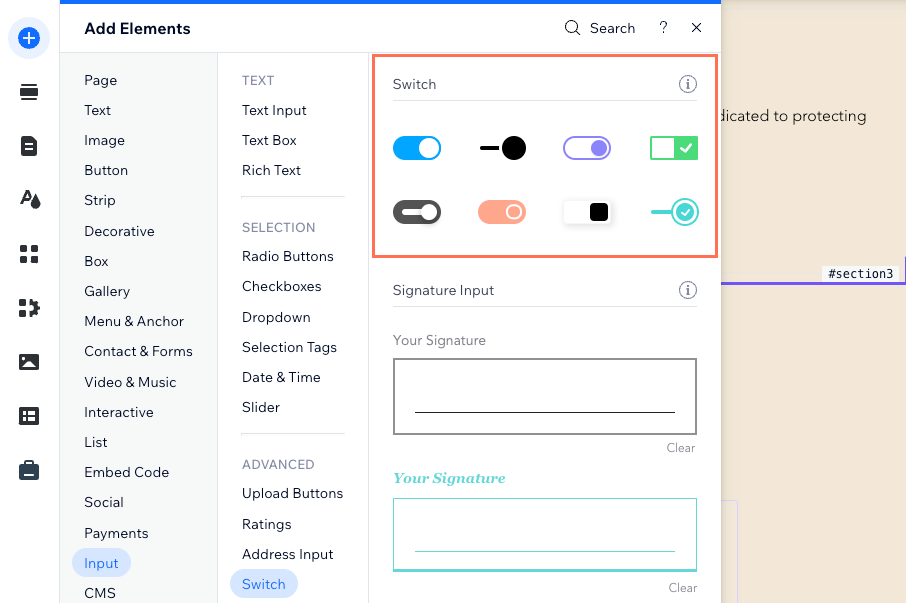
- Add the Switch input element:
- Go to the page where you want visitors to use the Switch input to submit a response.
- Click Add Elements
 on the left side of the editor.
 - Click Input.
- Click Switch.
- Click and drag the relevant Switch input element onto the page.
- Connect the Switch element to the CMS collection where you will store the submissions:
- Click the Connect to CMS icon
 on the Switch element.
 - Click the Choose a dataset drop-down and select a dataset that connects to the collection where you will store the submissions.
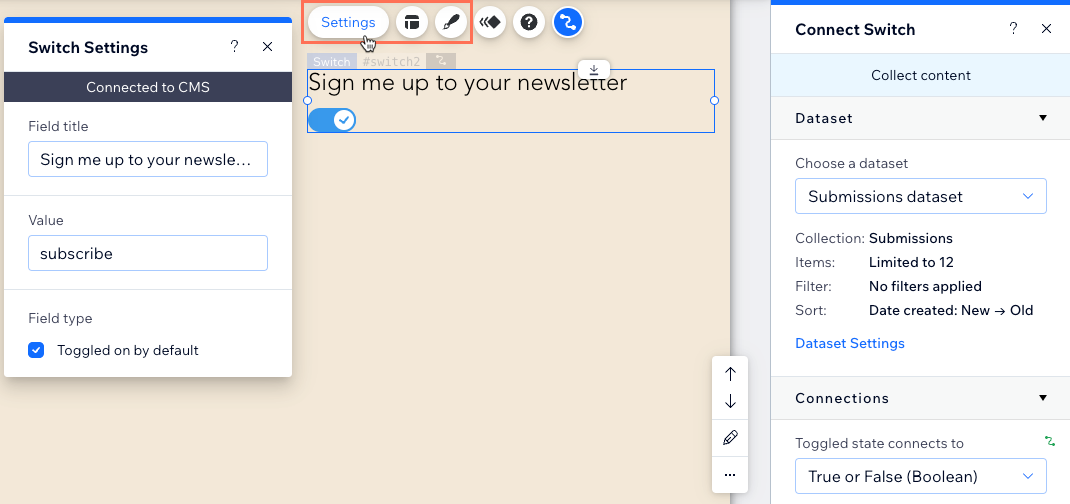
- Click the Toggled state connects to drop-down and choose the boolean field in which you will store the submissions.
Tip: To add a new field for storing submissions, select + Add, then enter the field name and click Add. - Set the dataset mode and collection permissions:
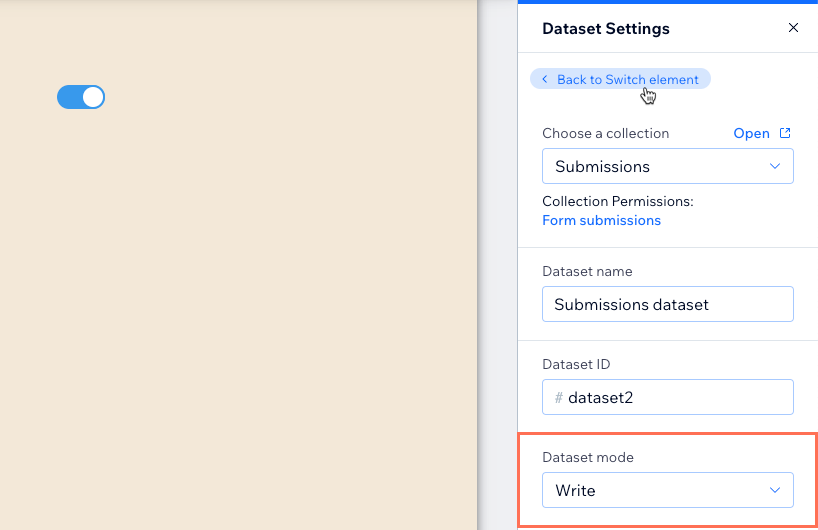
- Click Dataset Settings in the panel on the right.
- (Optional) Click the permission type next to Permissions to determine who can view, add, update, or delete collection content.
- Click the Dataset mode drop-down and select the relevant option:
- Write: Connected input elements can add new items to the collection, but cannot edit existing items.
- Read & Write: Connected elements can update existing items in the collection. If you connect a 'New' button, visitors can use it to update existing items and add new items to your collection.
- Click Back to Switch element at the top of the Dataset Settings panel.
- Click the Connect to CMS icon
- Customize the Switch input element:
- Click Settings to edit the following:
- Field title: Edit the title text that lets visitors know what the switch does.
- Value: (Velo only) Enter the component's value property used in your JavaScript code.
- Field type: Select the checkbox if you want the switch to be toggled on by default.
- Click the Layout icon
 to edit the following:
- Field title format: Choose how the field title displays if there is not enough space: Wrap or Show overflow
- Handle placement: Choose whether the handle appears inside or outside of the slider track.
- Handle / track size (% of the Track / handle): Drag the slider to change the handle or track size.
- Switch height: Set the height of the switch component.
- Space between switch and title: Edit the spacing between the title and the switch.
- Field title indent: Drag the slider to edit the indentation of the field title.
- Display handle icons: Click the toggle to enable or disable the handle icons.
- Formatting: Set the text direction and alignment.
- Click the Design icon
 to customize the design for both states: Switch On and Switch Off
- Click Settings to edit the following:
- Add a 'Submit' button for visitors to click to send their submissions.
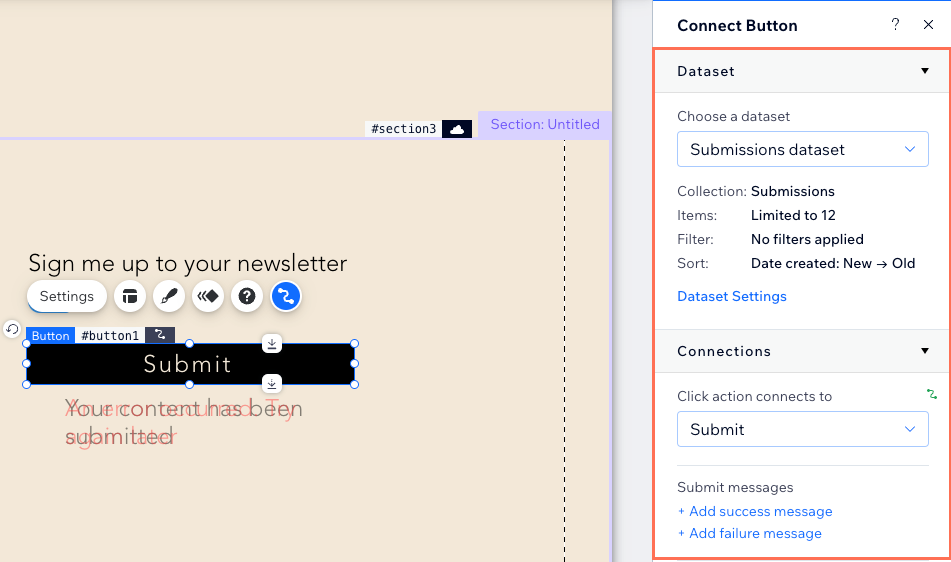
- Click Preview to test your connections.
- Click Publish if you are ready to make the changes go live.
