

Adding and Setting Up a Pay Button
10 min
In this article
- Step 1 | Add a Pay button
- Step 2 | Connect a payment provider
- Step 3 | Customize the settings of your button
- (Optional) Step 4 | Adjust the button's layout
- (Optional) Step 5 | Customize the design of your button
- FAQs
Important:
To accept online payments using a Pay button, you must purchase a site plan that allows you to accept payments.
Add a Pay button to your site for a quick and easy checkout for payments. When clicked, it takes visitors directly to the checkout page, streamlining the purchase process. After adding the button, you can link a payment provider, choose its layout, and customize the design to fit your site.

Step 1 | Add a Pay button
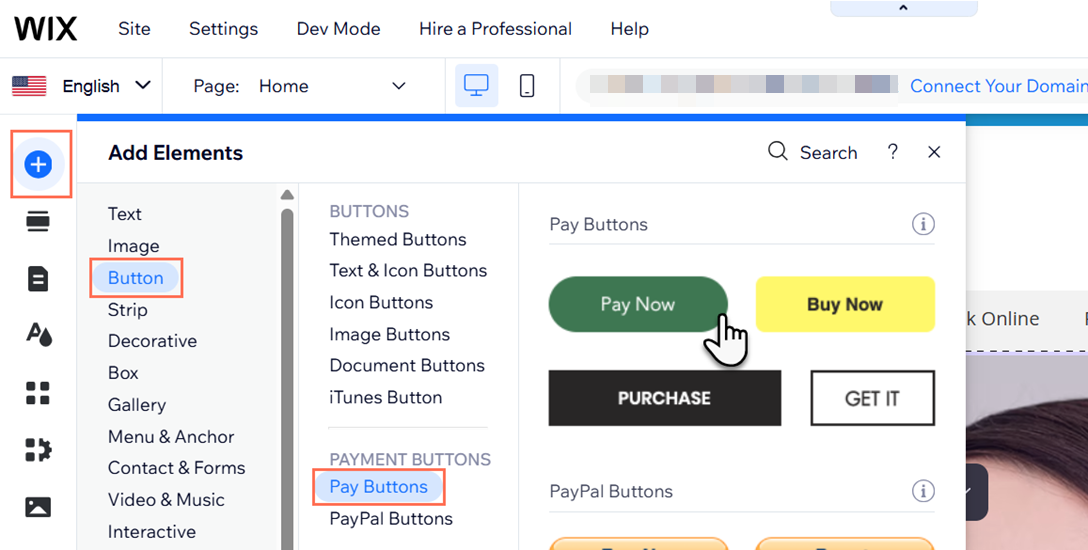
No matter which editor you're using, you can get started by adding a Pay button to your site from the Add panel / Add Elements panel. This automatically installs the Pay Button app to your site.
Wix Editor
Studio Editor
Harmony Editor
- Go to your editor.
- Click Add Elements
 on the left side of the editor.
 - Click Button.
- Select the Pay Buttons tab.
- Click the button you want to add it to your site.
Step 2 | Connect a payment provider
Before you begin:
If you already have a payment provider connected, you can skip this step and move on to step 3.
Connect a payment provider to process payments from visitors through your Pay button. Wix Payments is our native payment solution. We also offer a number of additional payment provider options that vary by location.
To connect a payment provider:
- Go to Accept Payments in your site's dashboard.
Tip: Check your business location at the top right. If incorrect, click the drop-down menu to change it. - See more options, or connect an option:
- See more options:
- Click See More Payment Options at the bottom to view more available providers in your location.
- If available, click See Options next to Third-Party Credit/Debit Card Providers to view additional providers.
- Connect: Click Connect next to the payment provider you want to use.
- See more options:

- Follow the steps to complete your account setup, or connect an existing 3rd party account.
Step 3 | Customize the settings of your button
Use the options in the Settings panel to finish setting up your Pay button. From here, you can enter the item's name and price, change the currency, and set up terms and conditions.
Note:
Only site owners can edit the following settings. Collaborators with other roles don't have access to this section.
Wix Editor
Studio Editor
Harmony Editor
- Click the Pay button in your editor.
- Click Settings.
- Use the options to set up the button:
- Item name: Enter the name of the product in the field.
- Item price: Enter the price of the item in the field. We recommend including any extra charges (e.g. tax, shipping).
Note: The item's price is automatically listed in the site's default currency. However, you can always click Change Currency to choose a different one. - Button text: Enter the text you want in the field.
- Terms & Conditions: Click the Show Terms & Conditions Checkbox toggle to enable or disable this option:
- Enabled: A terms and conditions checkbox is displayed. You can then add a link to the relevant terms and conditions in the field.
- Disabled: No terms and conditions checkbox is displayed.
- Email notifications: Check that the correct email address is listed for email notifications. If needed, you can change it by clicking General Info.
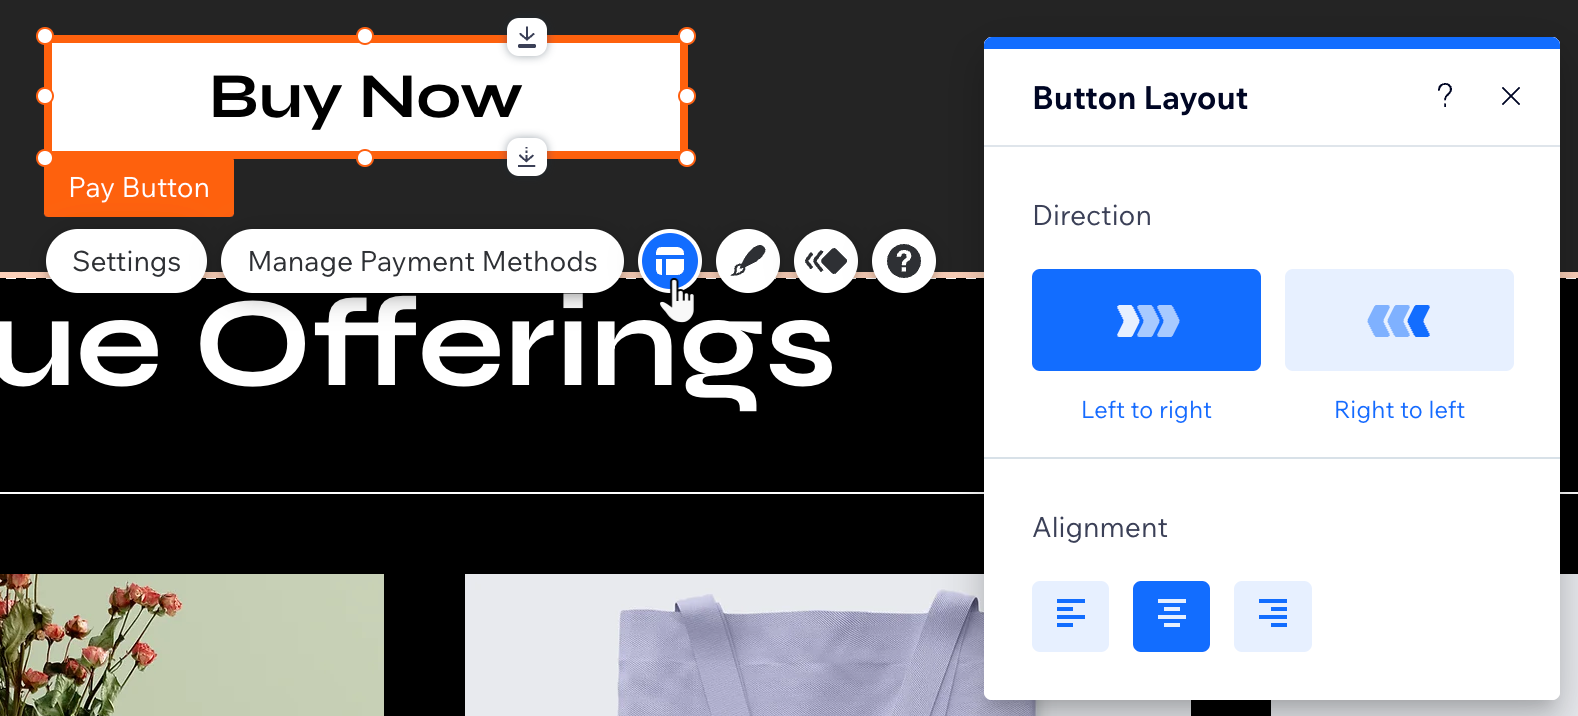
(Optional) Step 4 | Adjust the button's layout
Use the layout options to set the button's direction and alignment.
Wix Editor
Studio Editor
Harmony Editor
- Click the Pay button in your editor.
- Click the Layout icon
 .
. - Adjust the layout with the options:
- Direction: Choose whether the buttons reads left-to-right, or right-to-left.
- Alignment: Select whether the text is aligned to left, right, or center of the button. If you choose the left or right alignment, you can then use the slider to adjust the indent.
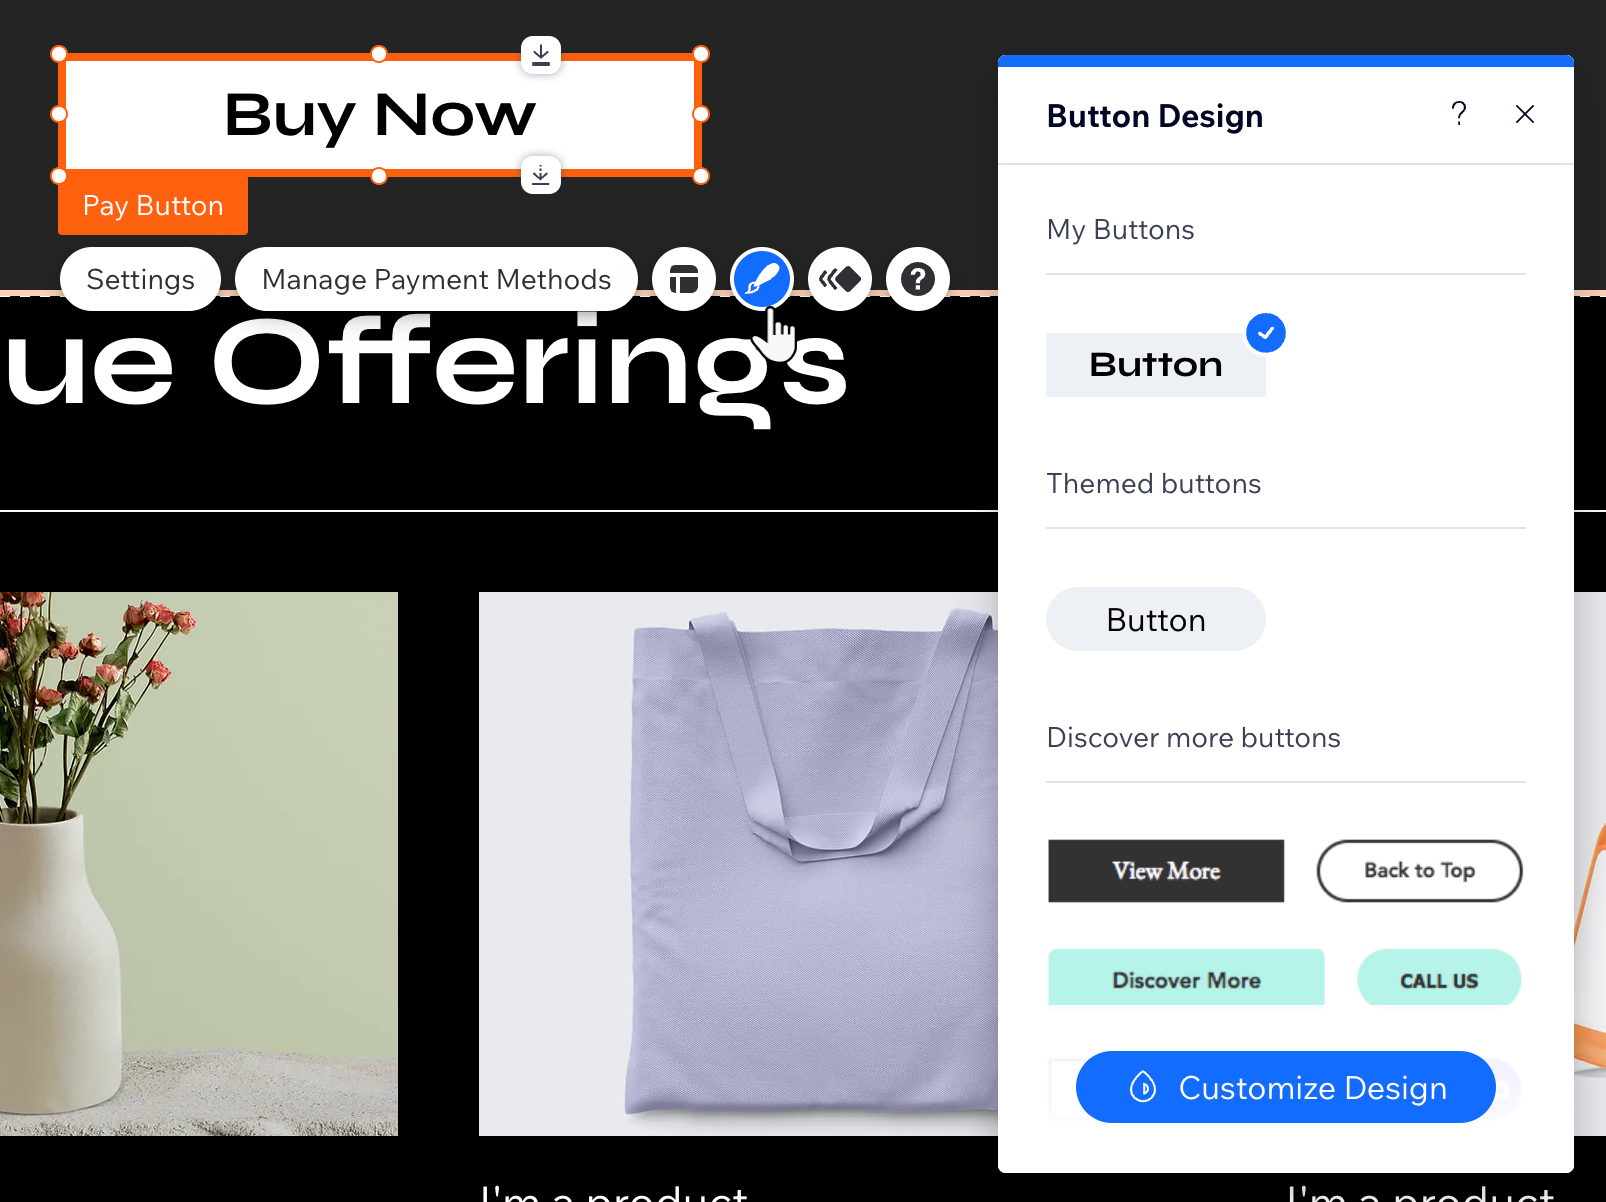
(Optional) Step 5 | Customize the design of your button
Design your Pay button to create an eye-catching call-to-action for visitors. No matter which editor you're using, you have full creative control over the button's look.
Wix Editor
Studio Editor
Harmony Editor
- Click the Pay button in your editor.
- Click the Design icon
 .
. - Choose one of the preset designs for your button.
- Click Customize Design for advanced options for the Regular and Hover view:
- Fill Color & Opacity: Select the button's color and opacity.
- Border: Design your button's borders.
- Corners: Round your button's corners.
- Shadow: Add and design a shadow for your button.
- Text: Design your button's text.
FAQs
Click a question below to learn more about setting up a Pay button.
Can I accept multiple payment methods for one Pay button?
Is it possible to track payments made through the Pay button?
How do I remove a Pay button from my site?
