Site Members: Adding and Customizing the Members List Element

7 min read
In this article
  • Adding the Members List element
  • Adjusting the layout of the Members List element
  • Designing the Members List element
  • Making the Members List public
  • Personalizing how badges look on the Members List
Add the Members List element to showcase your site members. You can add this element to any site page, making it your own by adjusting the layout, refining the design, and personalizing member badges.
You decide if this list is visible to all site visitors or just your logged-in members. 
Can't click on members in your live site?
Clicking a member on the Members List leads to their profile – unless that page / tab doesn't exist on your site. You can quickly add it from the Pages panel

Adding the Members List element

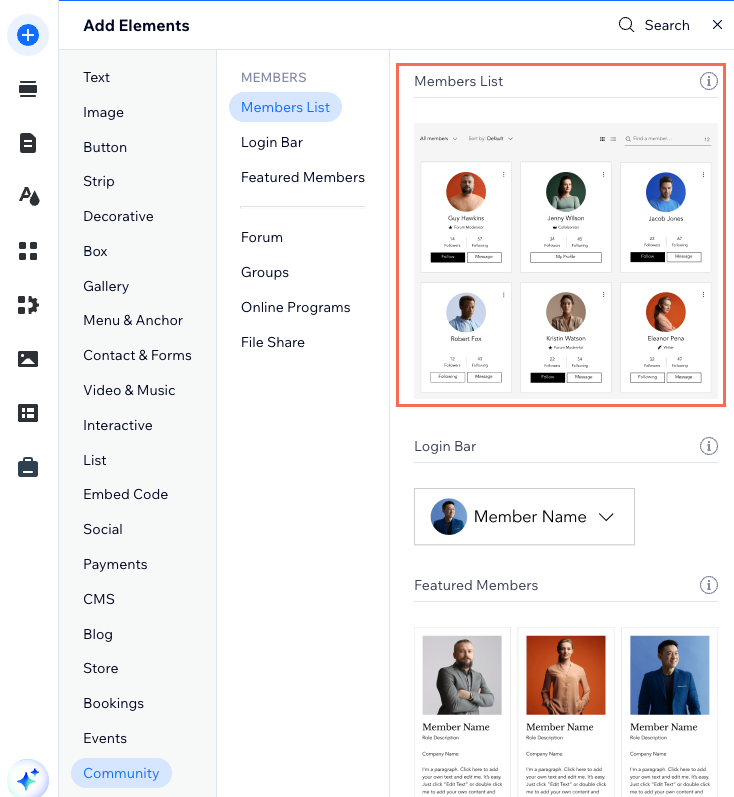
Head over to the Add Elements panel to add the Members List element. You can show the element anywhere on your site, whether it's a page in your Members Area or a site page that is visible to all visitors. 
Wix Editor
Studio Editor
  1. Click Add Elements  on the left side of the editor.
  2. Click Community.
  3. Drag the Members List element onto your page. 
The Members List element in the Add Elements panel in Wix Editor

Adjusting the layout of the Members List element

Choose from a Cards or List layout for the Members List. Then, customize the chosen layout to your needs, deciding how member profile pictures should look.   
Wix Editor
Studio Editor
  1. Select the Members List element.
  2. Click Settings.
  3. Click Layout.
  4. Select the layout you like best; Cards or List.
  5. Choose a shape for your members' profile pictures; Circle or Square.
The Layout tab in the Settings panel of the Members List element, in Wix Editor

Designing the Members List element

Make your Members List complement your site's design by customizing the fonts, buttons, colors, background, borders, and more.
Wix Editor
Studio Editor
  1. Select the Members List element.
  2. Click Settings.
  3. Click Design.
  4. Customize the design of this element to make it your own. Click below to learn more about the areas you can design:
The Design tab in the Settings panel of the Members List element, in Wix Editor

Making the Members List public

You can choose whether to display your Members List to the public or keep it private, available to your signed in members only. If the list is set to private, visitors will see an option to log in (hiding the actual element).  
Wix Editor
Studio Editor
  1. Select the Members List element.
  2. Click Settings.
  3. Click Settings.
  4. Enable the toggle to allow all site visitors to see this list.
The toggle that controls whether the Members List is public or private, in Wix Editor

Personalizing how badges look on the Members List

Inject some extra personality into your Members List by customizing the badges you assign to your members. Choose a badge layout (e.g. Name & Icon, Icon Only) that meets your needs, and change its size to match your style.
Wix Editor
Studio Editor
  1. Select the Members List element.
  2. Click Settings.
  3. Click Badges.
  4. Customize the appearance of member badges using the following options:
    • Layout: Choose a badge layout and your preferred badge size.
    • Style: Drag the slider to adjust the roundness of the badges.
    • Text: Choose a font for the badges' names.
The Badges tab in the Settings panel of the Members List element, in Wix Editor
Tip:
Further personalize your Members List by customizing member profile fields. Choose what information is displayed on a member's My Account and Profile tabs.