

Site Members: Adding and Customizing Your Login Bar
11 min
In this article
- Adding the login bar
- Setting up the login bar
- Managing the login bar menu
- Designing the login bar
Customize the login bar that members use to sign in to your members area, along with the menu it displays. You can decide which tabs and links appear on the menu, adjust the layout, and design the element to ensure it matches the overall style of your site.
Adding the login bar
When you add a members area to your site, a login bar is automatically included in the header section. This ensures it appears on all pages, giving members quick and convenient access to their account. If you need to re-add the login bar or want to add additional login bars, you can do so effortlessly.
Wix Editor
Studio Editor
Wix Harmony Editor
- Go to your editor.
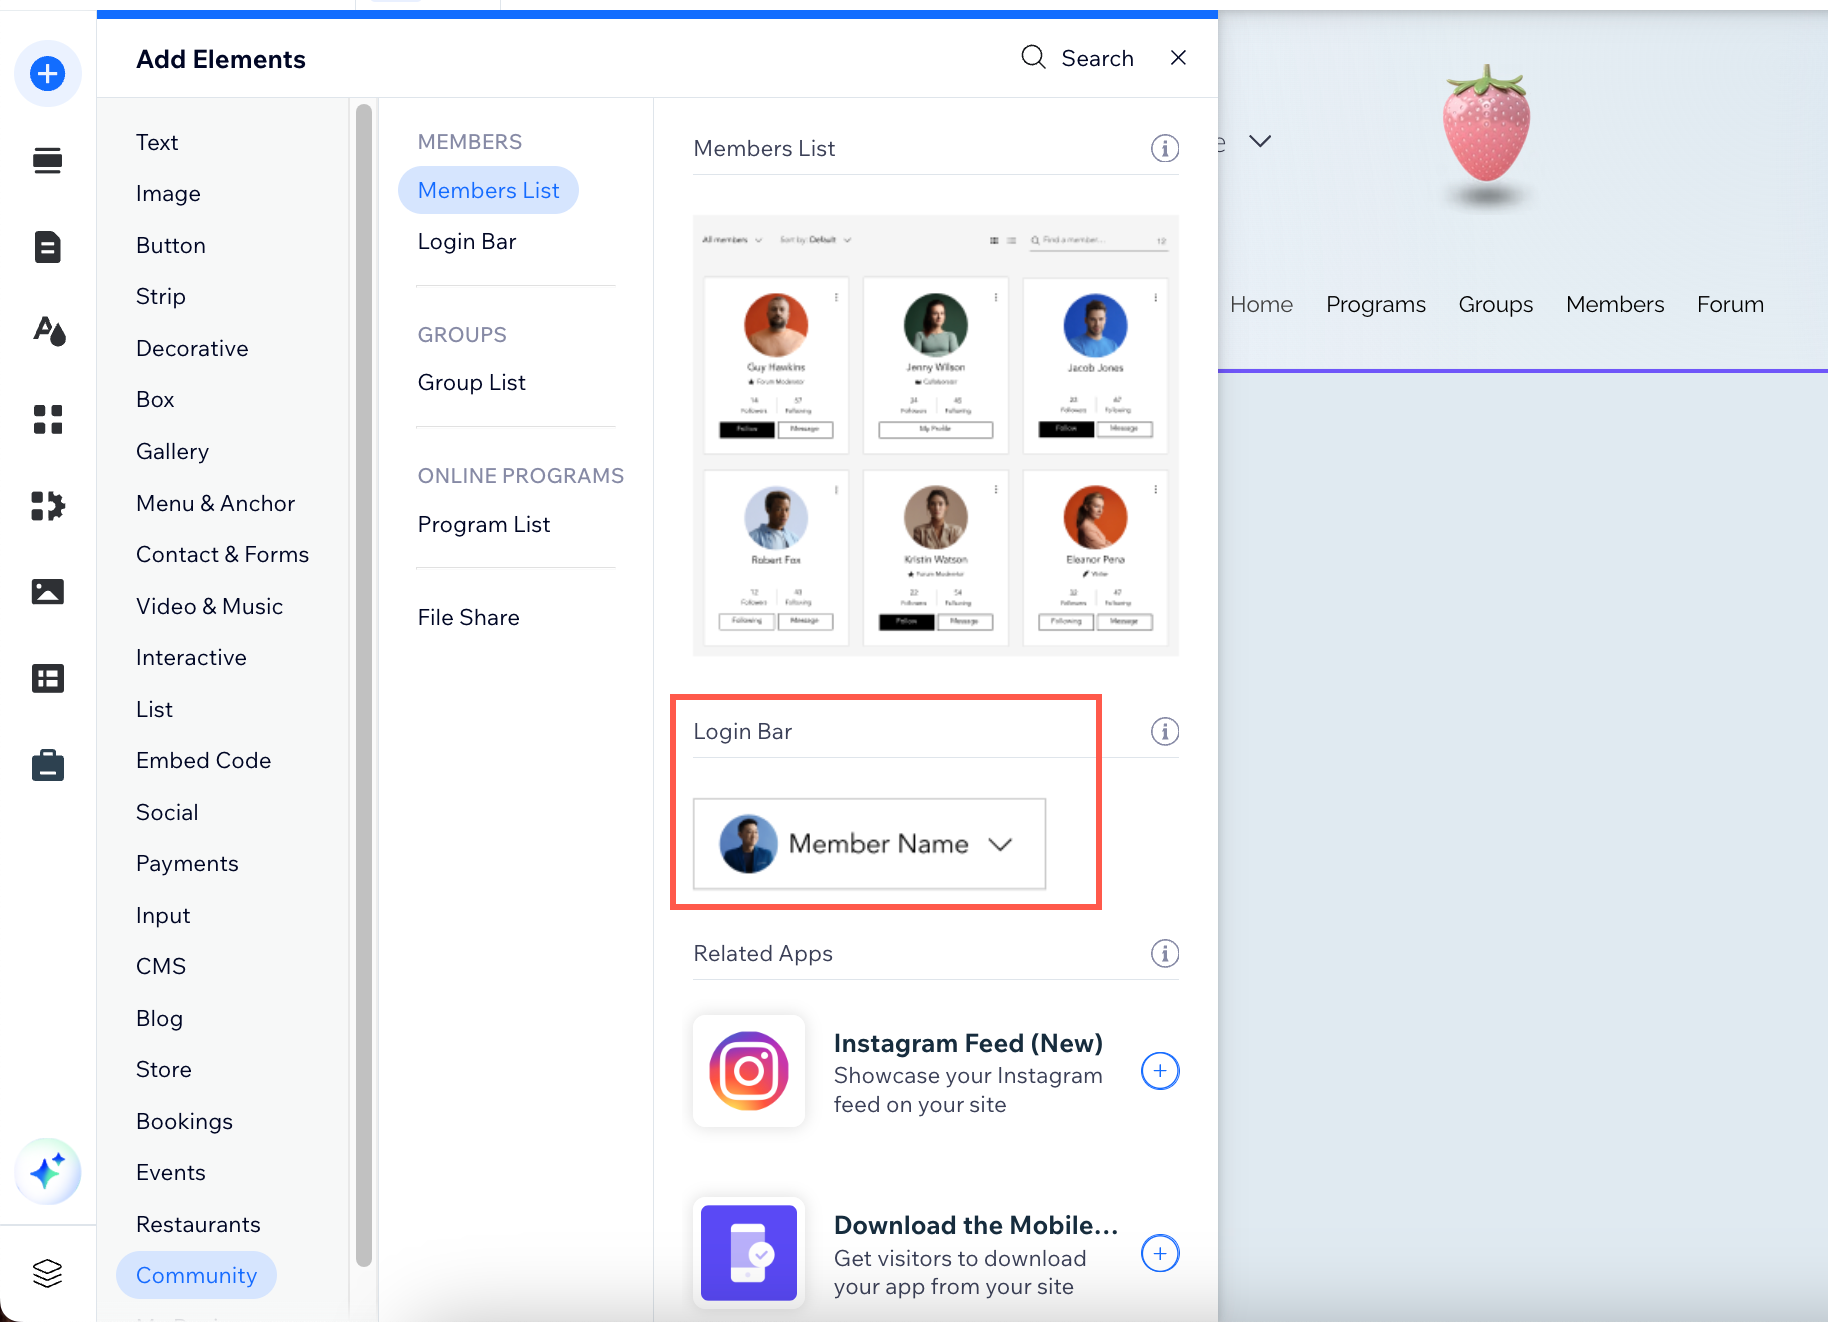
- Click Add Elements
 on the left side of the editor.
 - Click Community.
- Click Login Bar.
- Click or drag and drop the login bar to add it to your page.
Setting up the login bar
Select the information you want the login bar to display, customize the text, and add a friendly greeting, such as "Hey there, Lisa!" This personal touch can help create a welcoming experience for your members.
Wix Editor
Studio Editor
Wix Harmony Editor
- Go to your editor.
- Click the login bar element on your page.
- Click Set Up Login Bar.
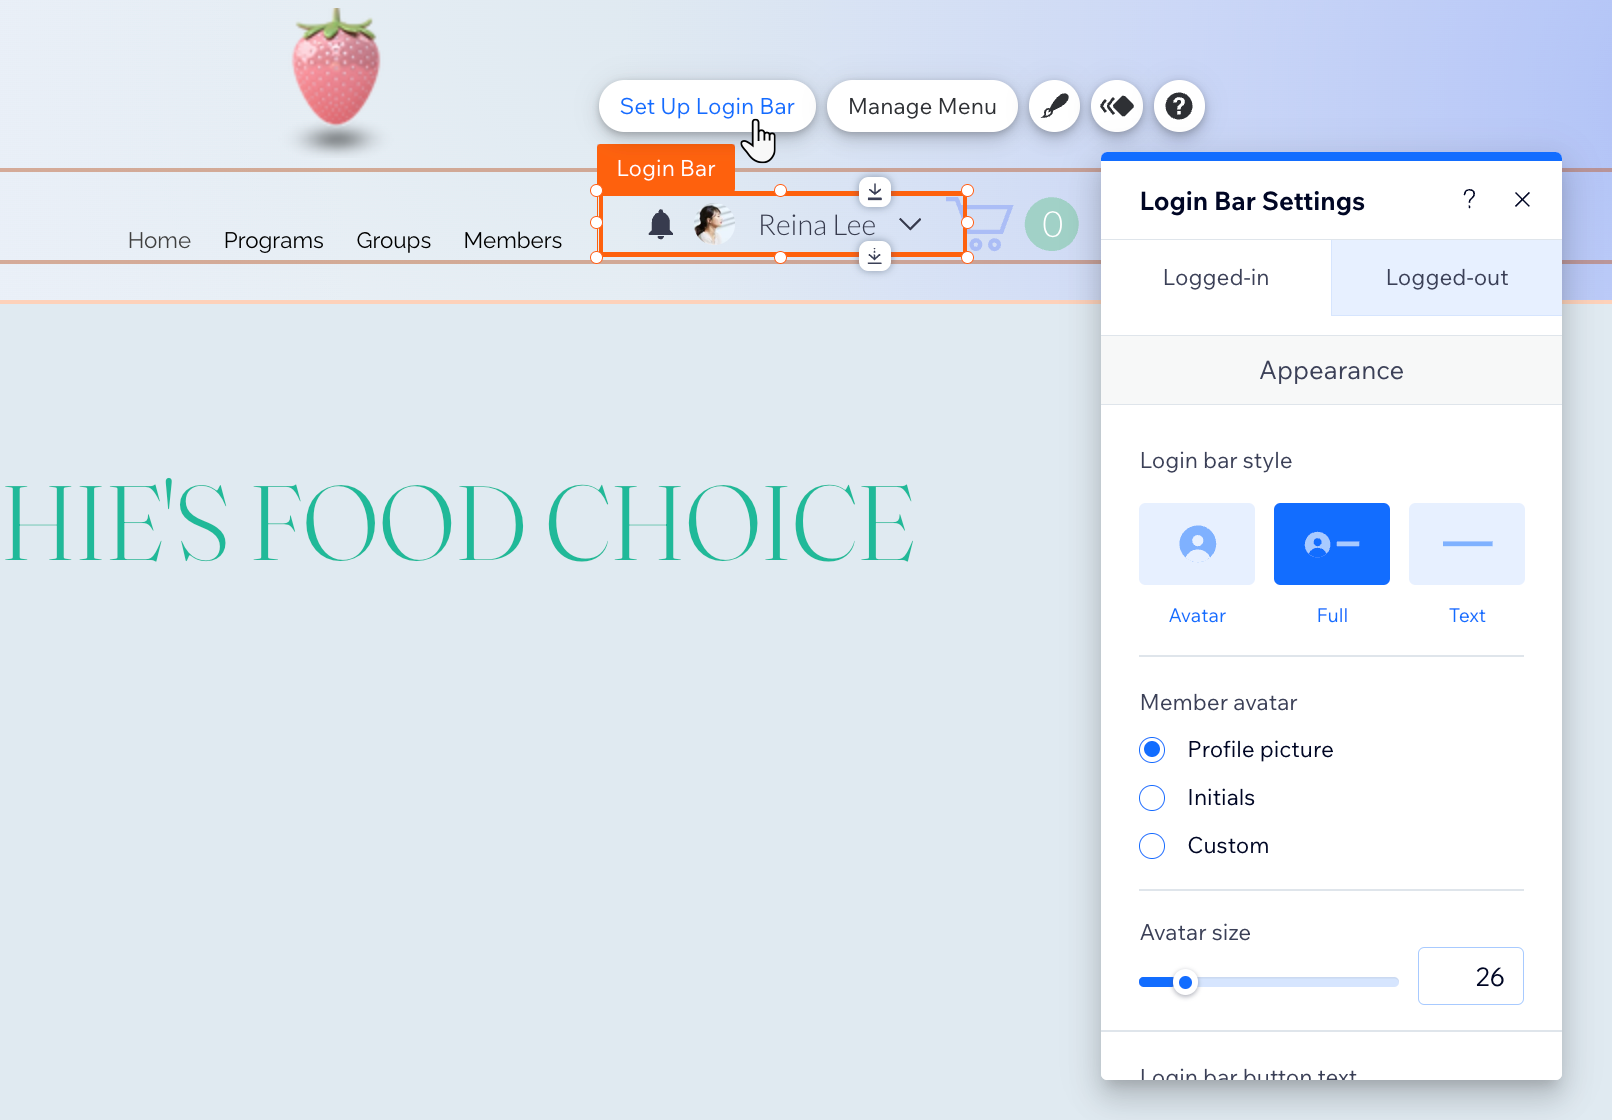
- Select the relevant login bar state: Logged-in or Logged-out:
- Customize the Logged-in version of your login bar:
- Appearance: Choose an avatar, full, or text style. If using an avatar, select an image, initials, or custom style and adjust its size. For text and full styles, add custom button text. Choose an arrow style and size. Optionally show a greeting before the member's name and display a notification bell icon.
- Layout: Select the login bar alignment and element direction.
- Dropdown menu: Select the items' alignment and change the logout button text.
- Customize the Logged-out version of your login bar:
- Choose an avatar, full, or text style. If using an avatar, select an image, initials, or custom style and adjust its size. For text and full styles, add custom button text.
- Customize the Logged-in version of your login bar:
Tip:
You can easily revert your changes by clicking the Reset to Original Design button located at the bottom of the panel.
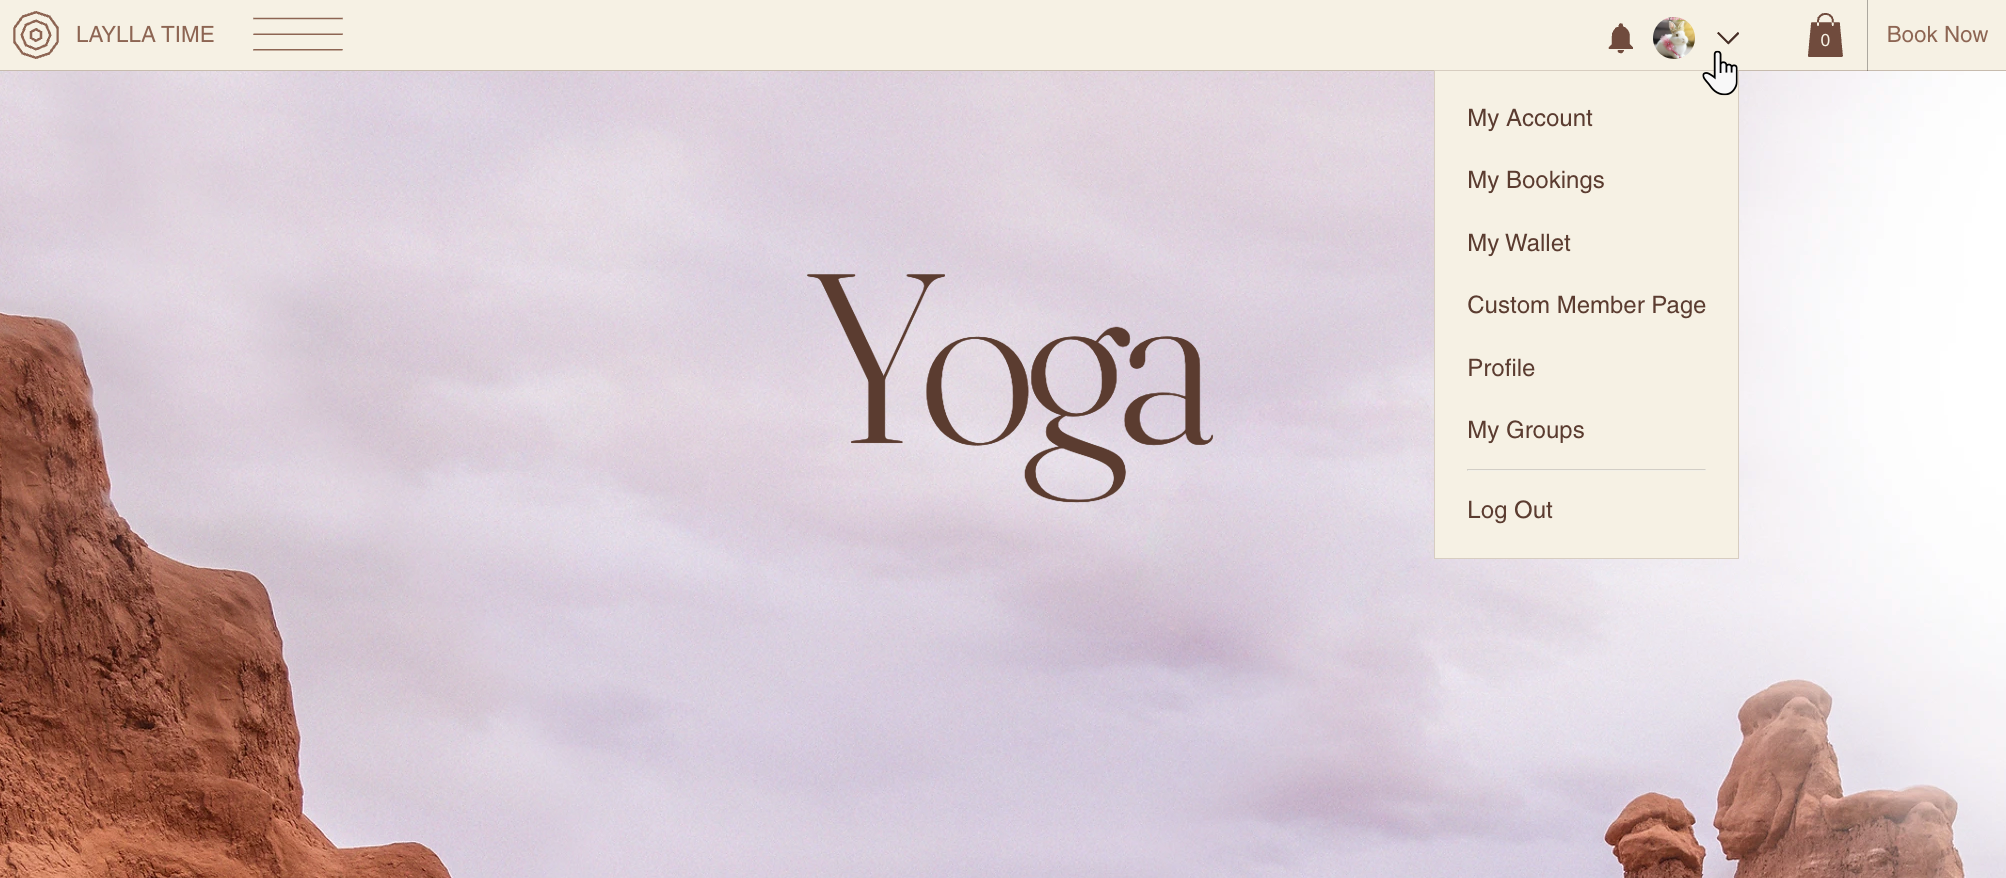
Managing the login bar menu
When logged-in members click the login bar, a drop-down menu opens. You can choose which member tabs and pages you want to display in this menu.
Wix Editor
Studio Editor
Wix Harmony Editor
- Go to your editor.
- Click the login bar element on your page.
- Click Manage Menu.
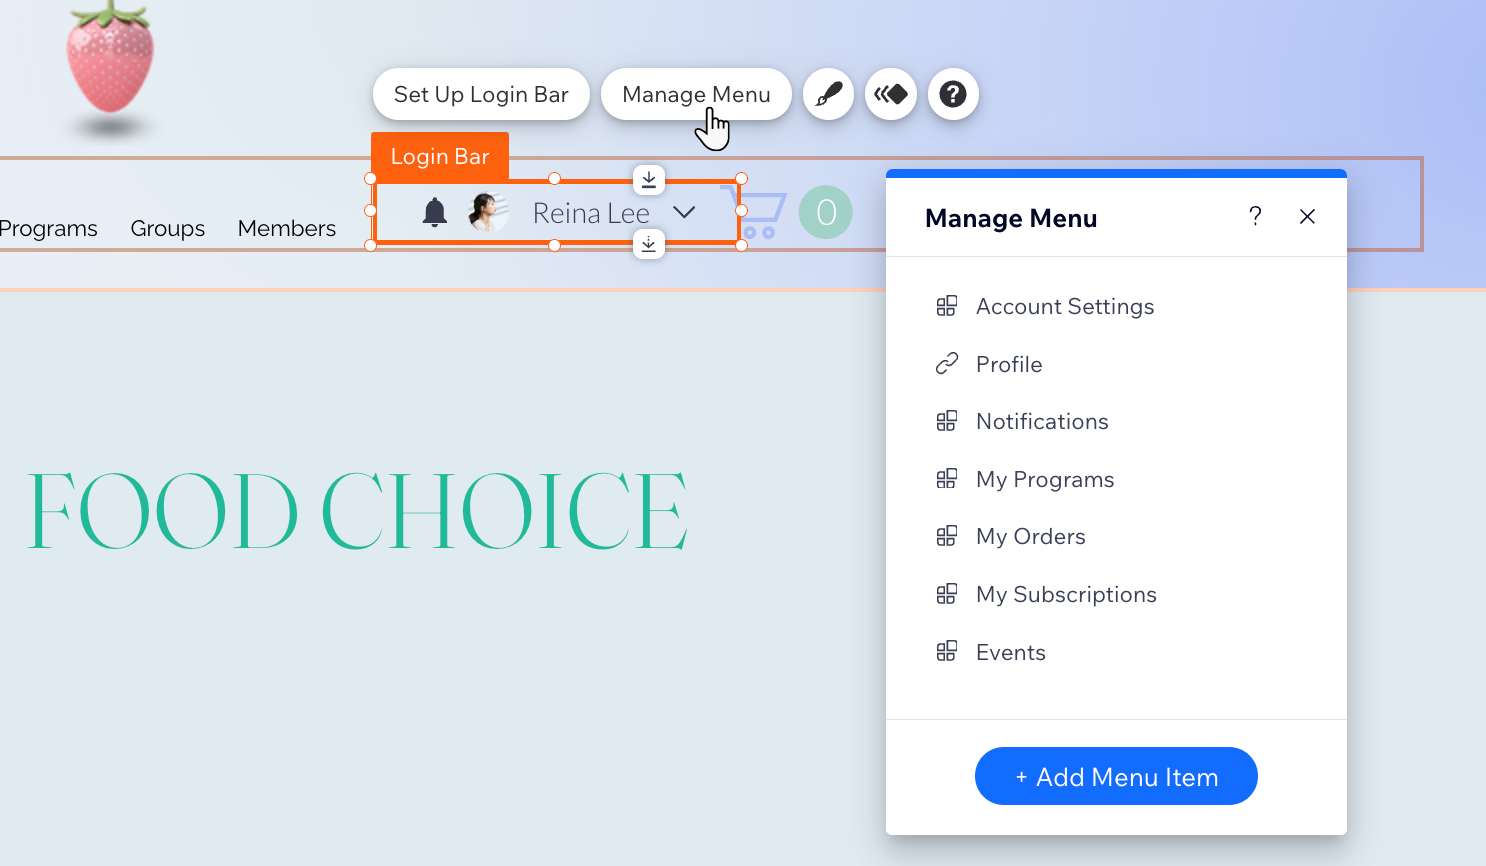
- Choose what you want to do next:
- Add more menu items:
- Click + Add Menu Item at the bottom.
- Click Link.
- Choose where you want to link to (e.g. site page, external web address) and set it up using the available options.
- Click Done.
- Rename a menu item: Double-click the menu item to enter a new name for it.
- Remove a menu item: Hover over the relevant item, click the More Actions icon
 and select Remove / Hide from menu.
 - Reorder the menu: Hover over the relevant item, hold the Reorder icon
 next to it and drag it to the relevant position.
- Add more menu items:
Designing the login bar
Customize the design of your login bar to match your site's theme. You can change the colors, fonts, borders, and more to create a cohesive look.
Wix Editor
Studio Editor
Wix Harmony Editor
- Go to your editor.
- Click the login bar element on your page.
- Click the Design icon
 .
.
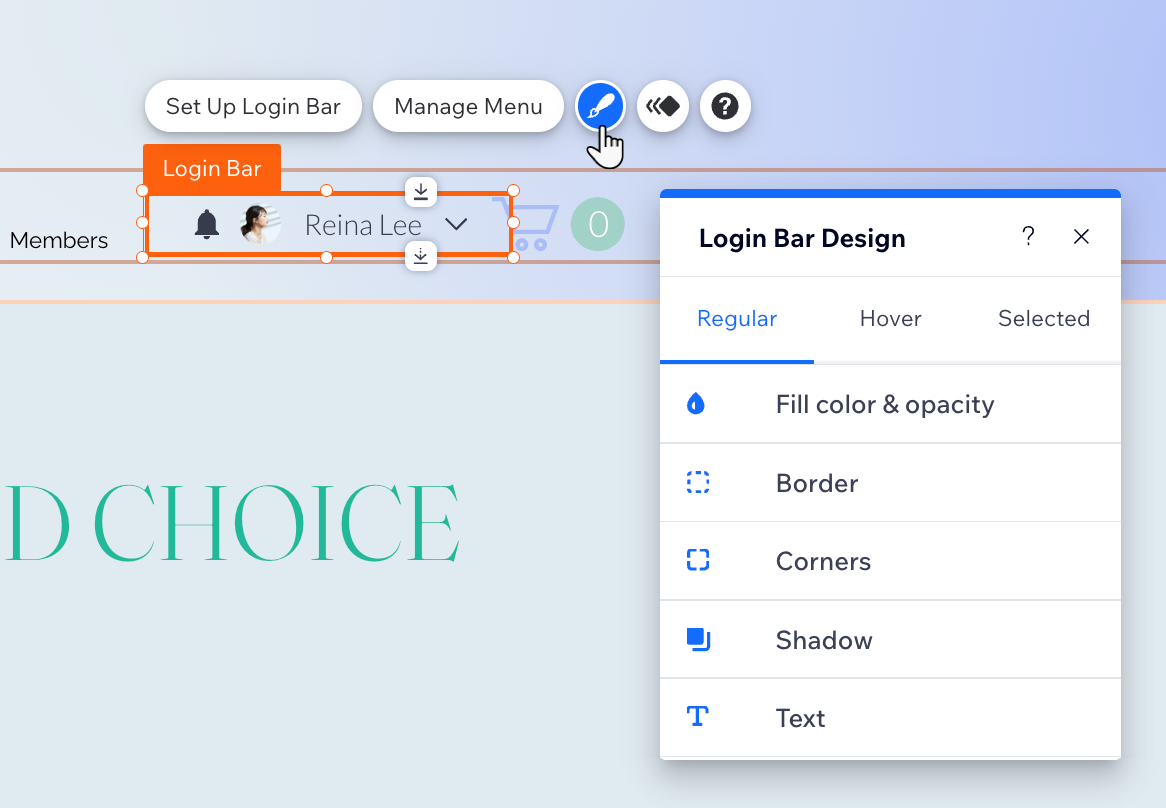
- Click the Regular tab and customize the design using the following options:
- Fill Color & Opacity: Change the colors and opacity of the icons, background and notifications on the login bar.
- Borders: Change the color, opacity and width of the login bar. and menu borders.
- Corners: Change the corner radius of the login bar and menu. The bigger the radius, the rounder the corners.
- Shadow: Add and design a shadow for your login bar and menu.
- Text: Change the colors and fonts of the text on the login bar and menu.
- Click the Hover and Selected tabs to update the text color when members hover over or select it.
