

Wix Contacts: An Overview
3 min
In this article
- Organize contacts for smarter communication
- Grow your contact list with simple tools
- Track and engage audiences at a glance
- Get actionable insights from every interaction
- Understand your audience with contact segments
Wix Contacts helps you stay connected with your site visitors, customers, and subscribers, all in one organized place. Whenever someone interacts with your site by filling out a form, signing up, making a purchase, or joining your members area, their details are automatically added to your contact list.
This gives you instant access to everyone interested in your business, making it easy to manage and grow your audience.
Ready to get started?
Go to Contacts in your site's dashboard.
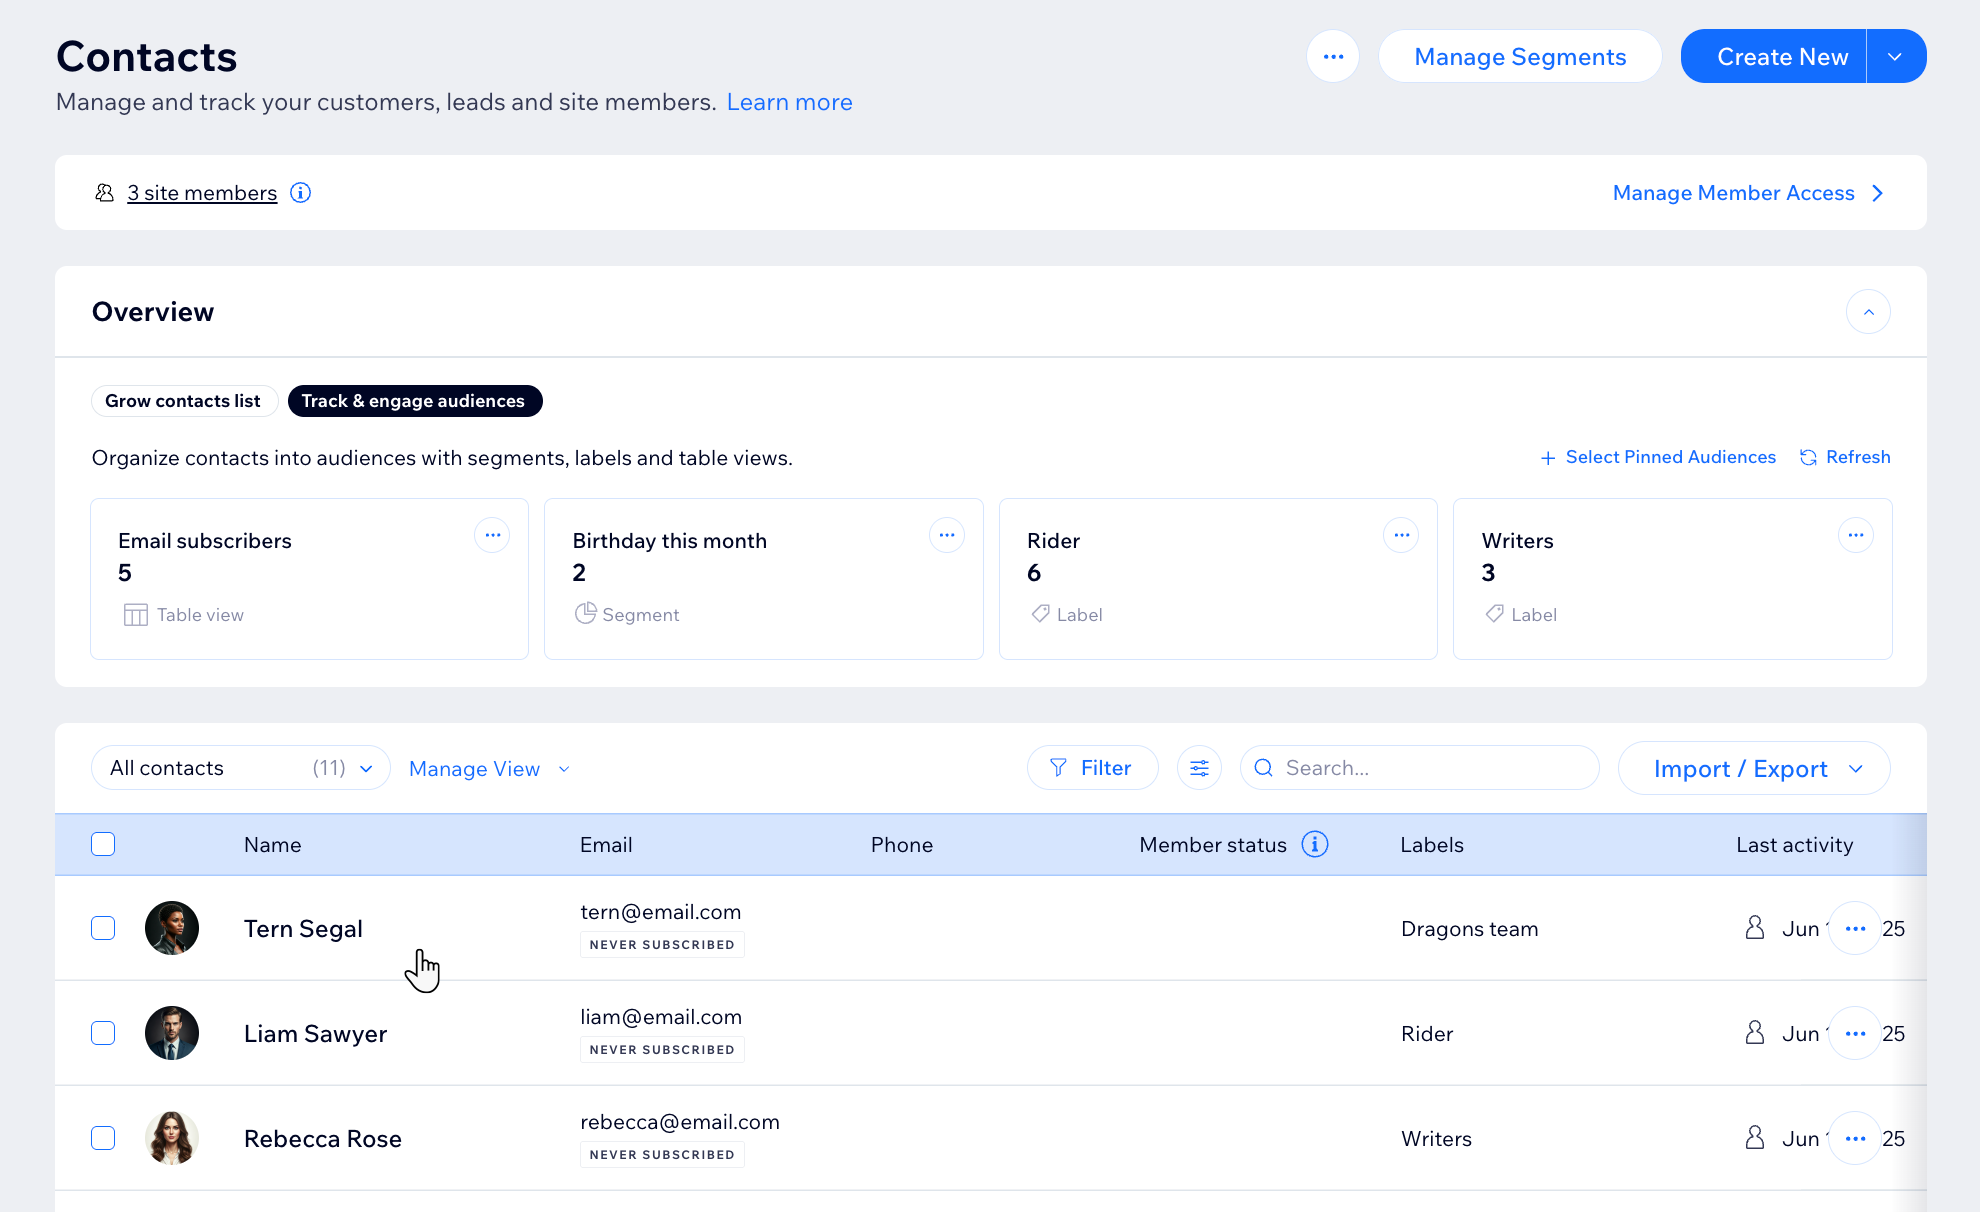
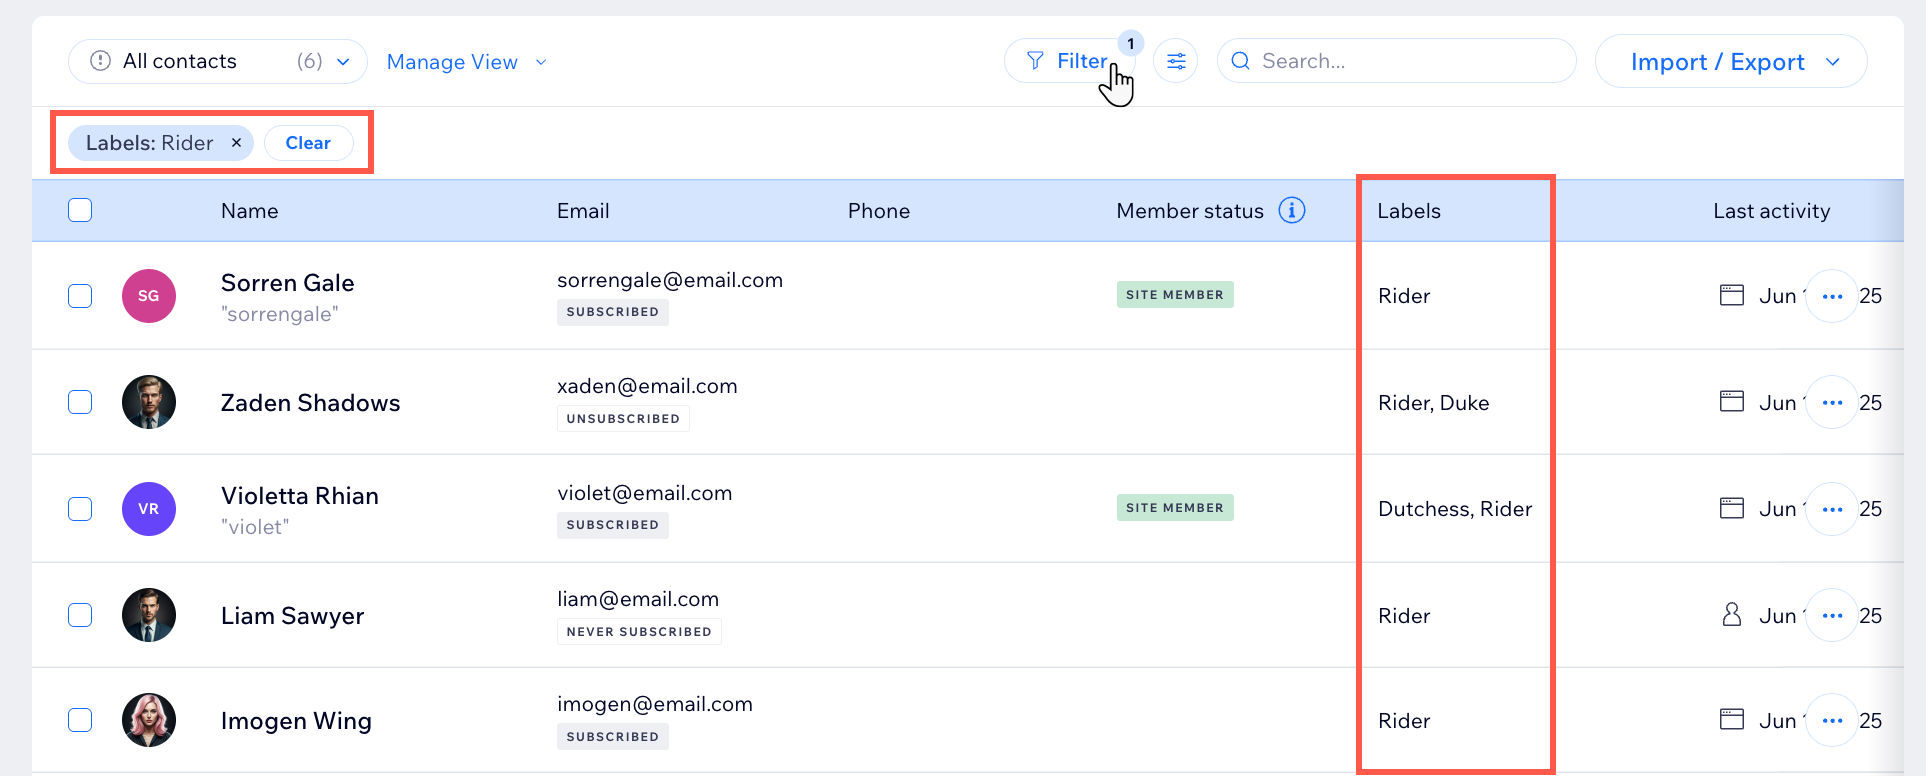
Organize contacts for smarter communication
Grouping your contacts lets you send the right message to the right people, boosting engagement and results for your campaigns.
With Wix Contacts, you have three ways to organize your audience:
- Segments: These update automatically using filters you set, so your groups stay up to date without any extra effort.
- Labels: Static tags you can use to identify and keep track of contacts based on shared traits or behaviors.
- Table views: Custom lists that help you focus on the contacts who matter most to your goals.
You can use these methods together to keep your contact list tidy and actionable, whether you are targeting, filtering, or sending bulk emails.
Learn more about managing your contact list.
Grow your contact list with simple tools
Bringing in new contacts is straightforward. You can import information or collect it directly from your site:
- Import contacts: Add existing email addresses, phone numbers, and details from external sources.
- Wix Forms: Capture contact details from visitors using forms embedded across your site.
- Wix Chat: Gather info from real-time conversations with a pre-chat form.
- Wix Members Area: Encourage signups to turn visitors into members and build lasting relationships.

Track and engage audiences at a glance
With the Track & engage audiences tab, you get a visual overview of all your groups, such as segments, labels, and table views, right on your dashboard. Take action quickly by choosing the audiences you want to focus on and using the More Actions icon  in each card. You can also create new segments with a single click from the suggested options.
in each card. You can also create new segments with a single click from the suggested options.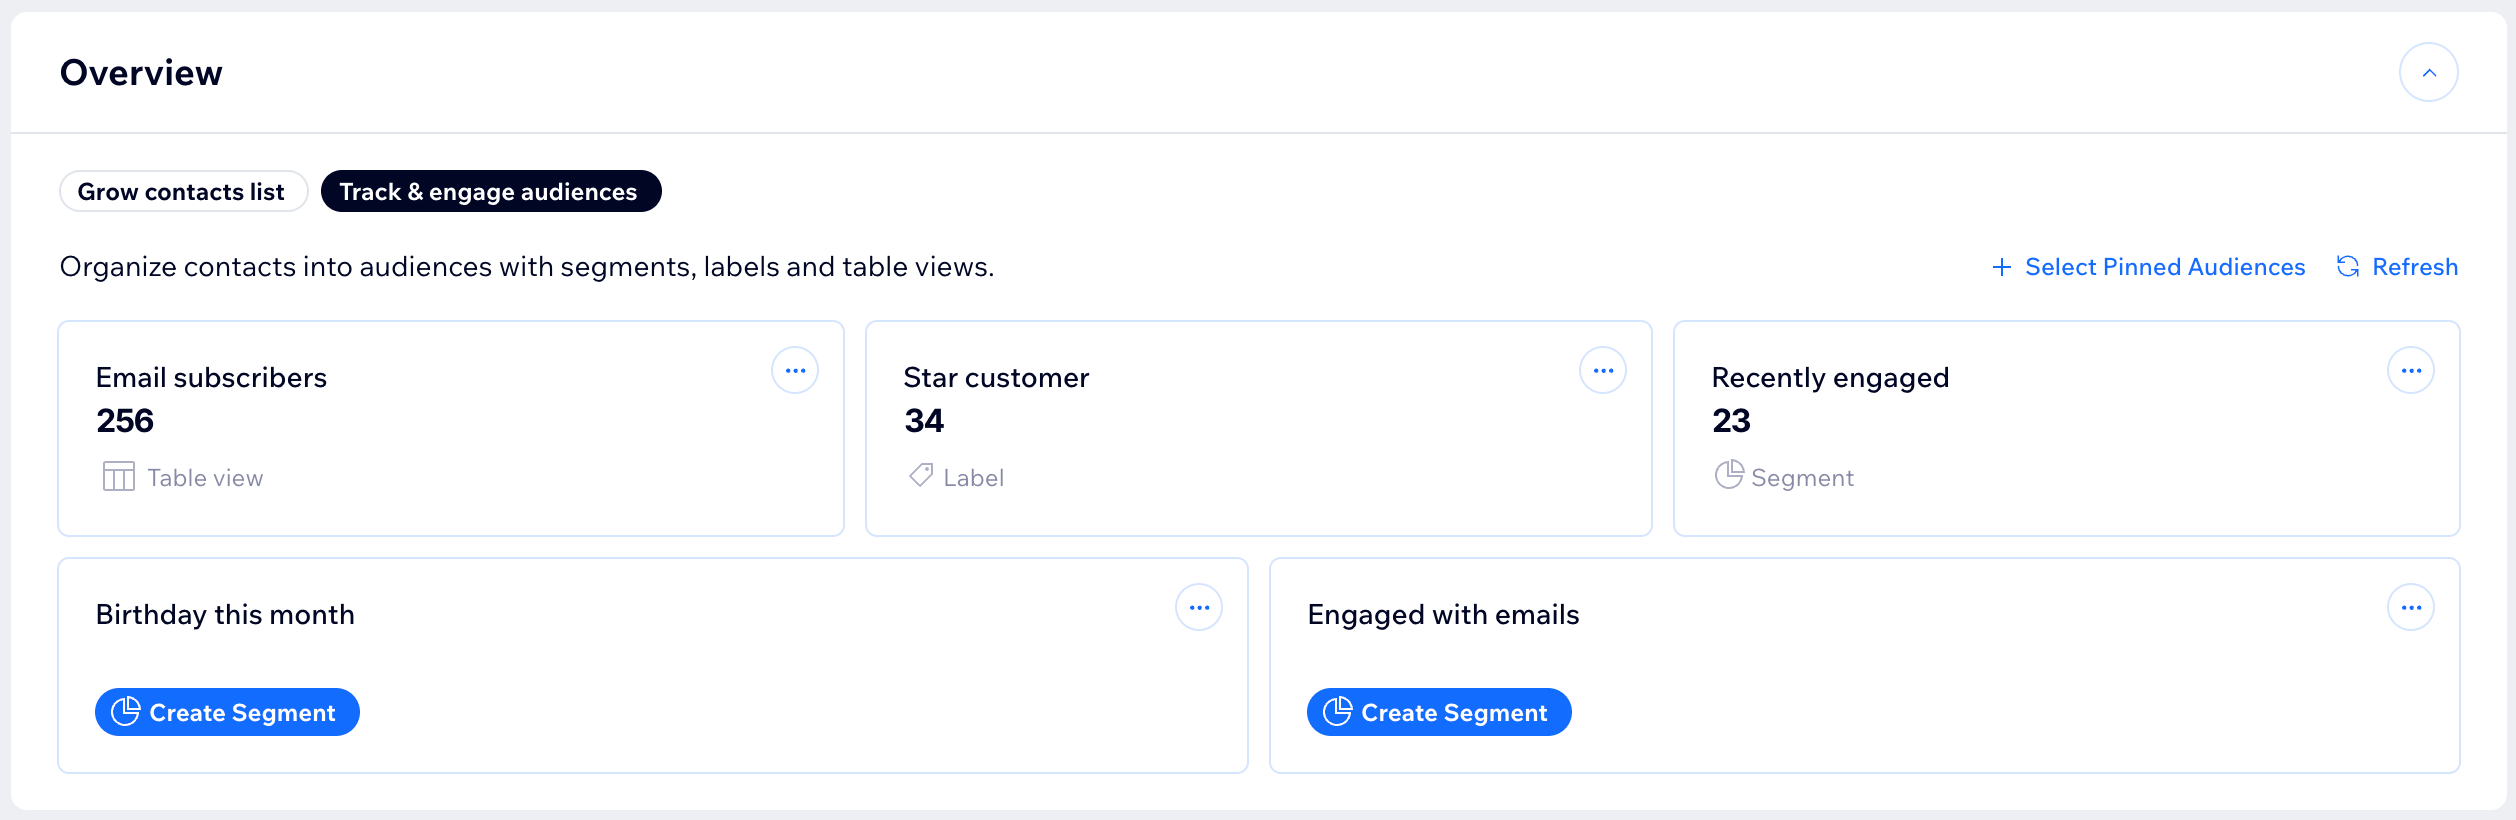
Get actionable insights from every interaction
Go to your contact list to see details about how people interact with your site. Select any contact to view a detailed panel showing everything from purchases and signups to pages viewed. Wix Contacts automatically records this information so you can understand what your audience cares about and personalize your outreach to the people who are most engaged.
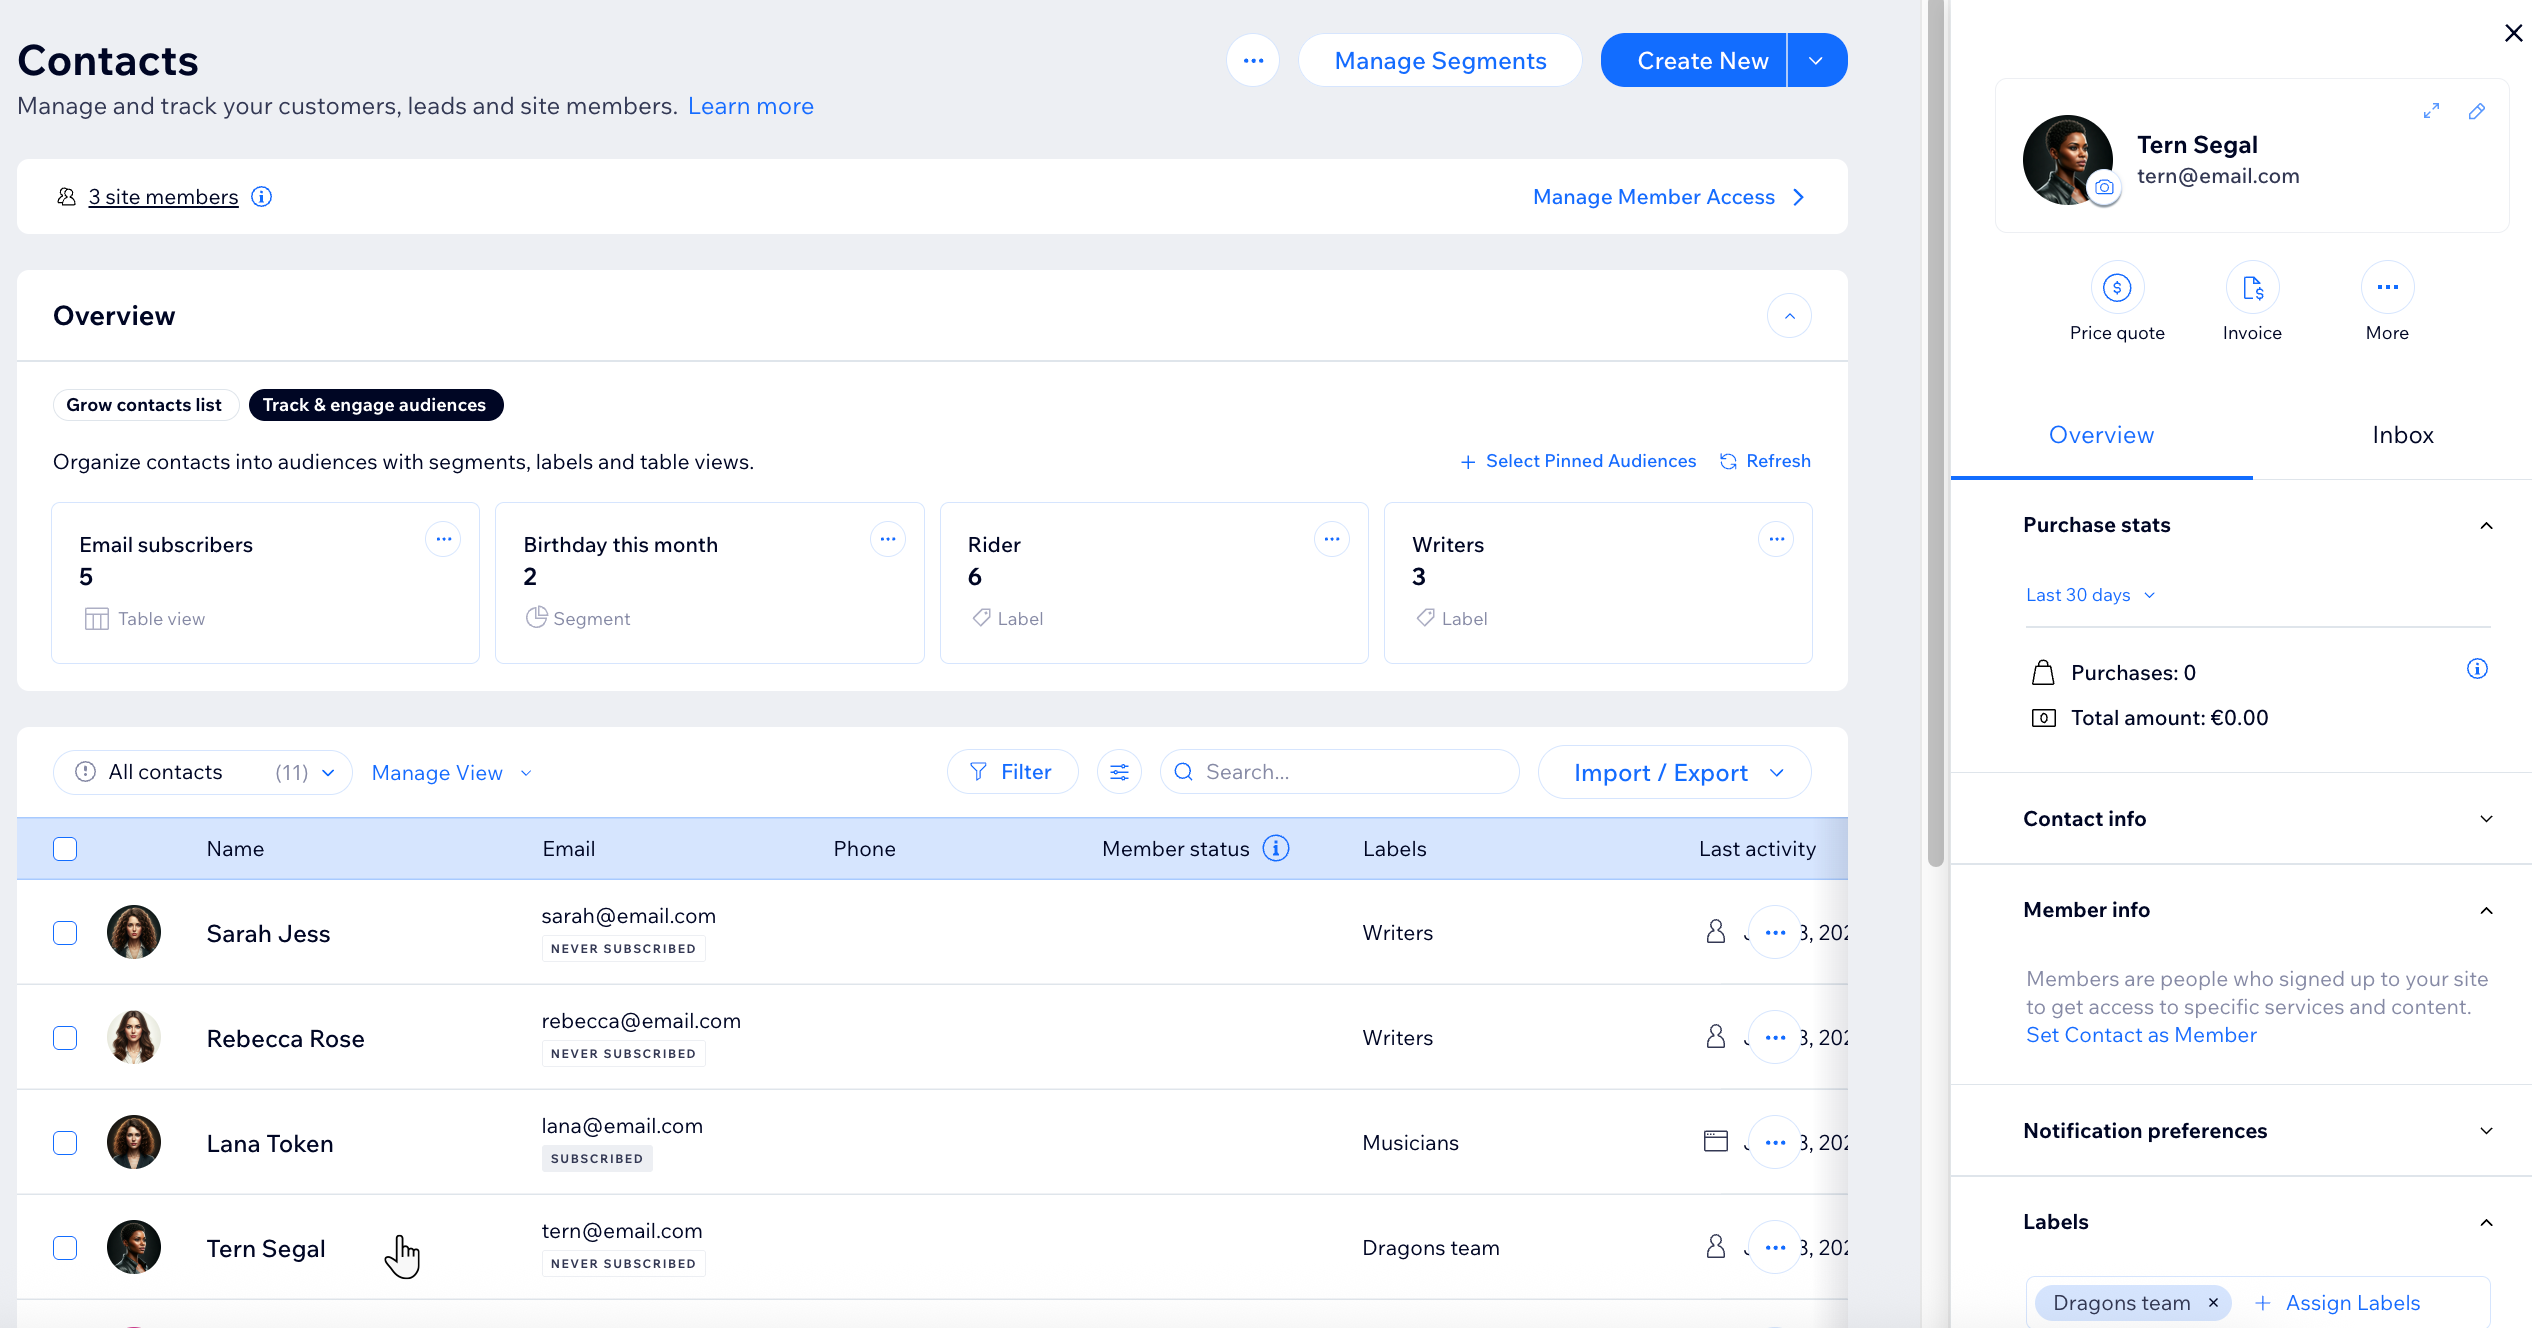
Learn more about managing your contact list.
Understand your audience with contact segments
Contact segments help you analyze your customer base and create focused messaging. You can group contacts by behavior or characteristics, for example, everyone who made a purchase in the last year or customers who have not visited your site in the past three months. These insights allow you to send more relevant communications, build stronger relationships, and drive growth.

Learn more about defining your target audience and creating contact segments.
