


Wix Editor: Adding and Customizing Shape Dividers
In this article
- Adding a shape divider
- Customizing your shape divider
- Designing a custom shape divider
- FAQs
Add shape dividers to your strips and sections to create an interesting and stylish layout. Instead of using clear-cut lines to divide content, choose a shape (e.g. Ellipse, Waves) or upload your own. These dividers can go at the top and bottom of a strip or section, and you can customize their design as needed.

Before you begin:
Make sure you
add and set up the strip first.
Adding a shape divider
Get started by adding a shape divider to your section or strip. You can add the divider to the top or bottom of your strip / section, or both.
There are a range of shapes you can choose from, as well as additional designs in the Wix Media catalog. You can also upload your own shape to give this transition a personal touch.
To add a shape divider to your section or strip:
- Select your section or strip:
- (For strips) Click the strip in your editor.
- (For sections) Double-click the section in your editor.
- Click the Shape Dividers icon
.
- Click the Top or Bottom tab to choose where to add the divider.
- Select a divider to add:
- Suggested designs: Click one of the styles available in the panel.
- Additional designs offered by Wix:
- Click + More Shapes.
- (In the Media Manager) Select a design from the Media from Wix tab.
- Click Choose File to apply it.
- Your own shape divider:
- Click + More Shapes.
- (In the Media Manager) Select the shape you want to use from the Site Files tab, or upload a new one.
- Click Choose File to apply it.

Customizing your shape divider
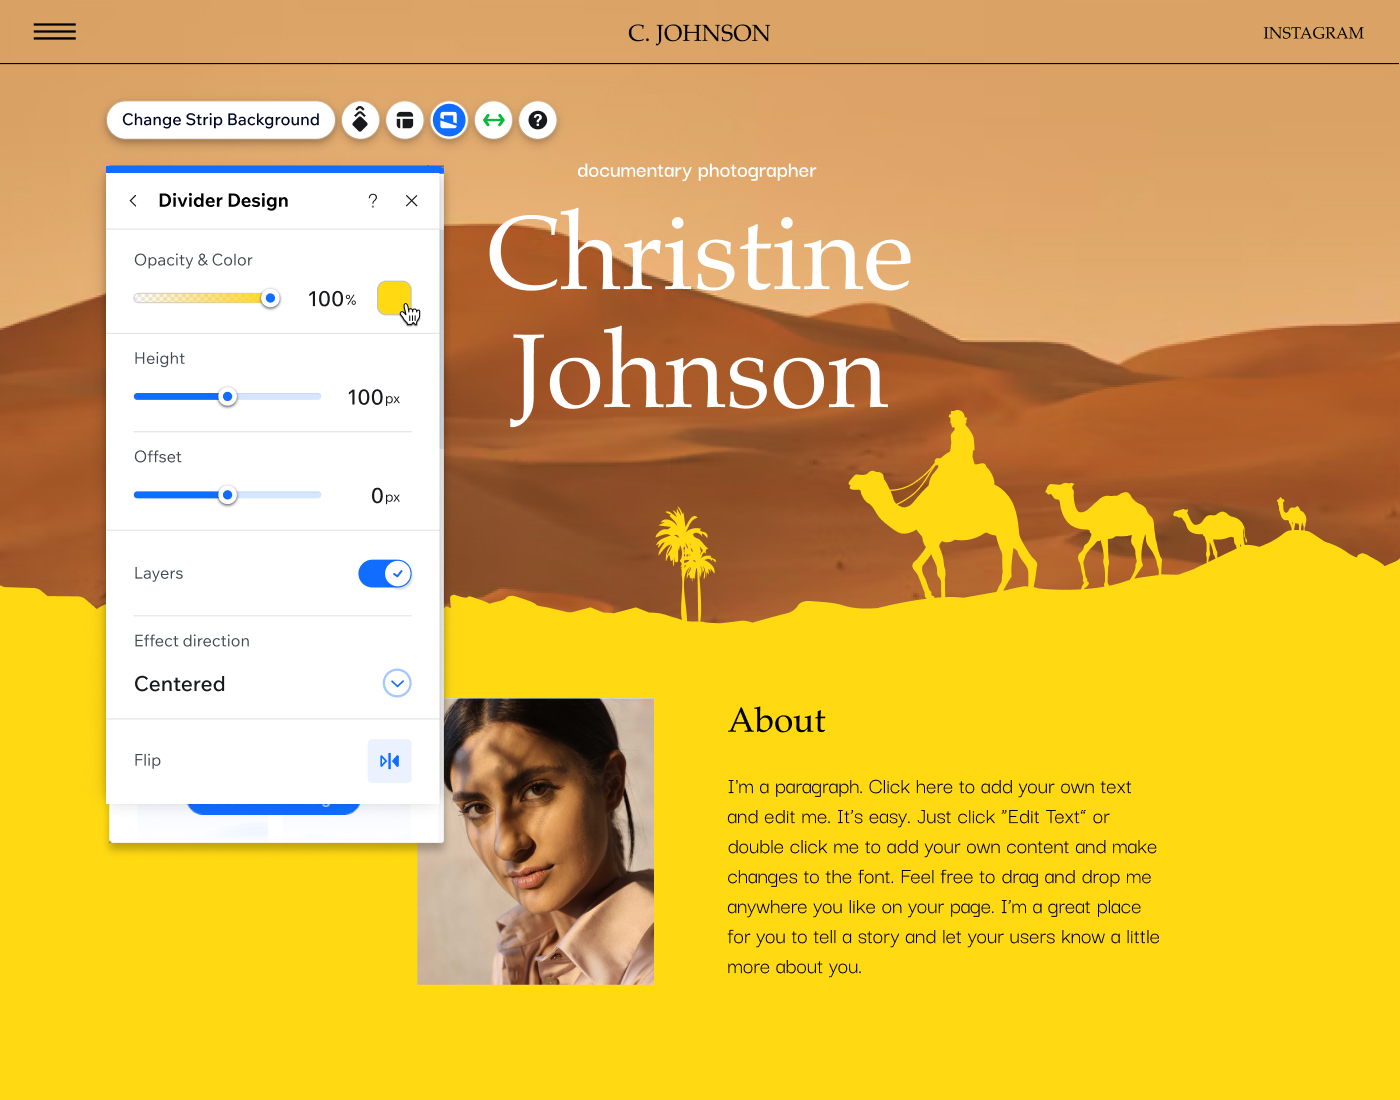
After adding a divider, you can customize its design to your liking. Adjust the height, color, opacity and layers to personalize the transition and make it look exactly how you want.
Note:
The available options depend on the shape divider you choose.
To customize your shape divider:
- Select your section or strip:
- (For strips) Click the strip in your editor.
- (For sections) Double-click the section in your editor.
- Click the Shape Dividers icon
- Click the Top or Bottom tab to access the divider you want to design.
- Click Customize Design at the bottom.
- Choose how you want to adjust the look of your shape divider:
- Opacity & color: Choose whatever color you want for your divider, and make it more or less visible on the section or strip.
- Height: Set how high or low you want the divider to go on your section or strip.
- Horizontal offset: Re-position your shape divider, moving it to the left or right.
- Layer effect: Click the toggle to add a fade effect to the divider, then select a direction from the drop-down:
- Centered: The effect is visible on the entire divider.
- Fade to top: The effect lessens towards the top of the divider.
- Fade to bottom: The effect lessens towards the bottom of the divider.
- Invert: Invert the shape of the divider (vertically).
- Flip: Set the divider to display the opposite way (horizontally) on your strip / section.
- Number of repeats: Set how many times the pattern repeats across the divider.
Designing a custom shape divider
When you upload your own shape divider, you can use a variety of options to further personalize it. Adjust settings like the divider's color, visibility and scale to create a unique structure and design on your page.
Note:
The available design options for your custom divider depend on the specific file you upload.
In order to customize the design of your SVG, the file needs to:
- Be a closed shape.
- Only contain one level of opacity (transparency).
- Not contain any text, strokes, gradients, filters etc.
Additionally, you can only change the color of SVG files that are the color RGB = #000000 (black).
To customize the design of your own shape divider:
- Select your section or strip:
- (For strips) Click the strip in your editor.
- (For sections) Double-click the section in your editor.
- Click the Shape Dividers icon
- Click the Top or Bottom tab to access the divider you want to design.
- Click Customize Design at the bottom.
- Choose how you want to adjust the look of your shape divider:
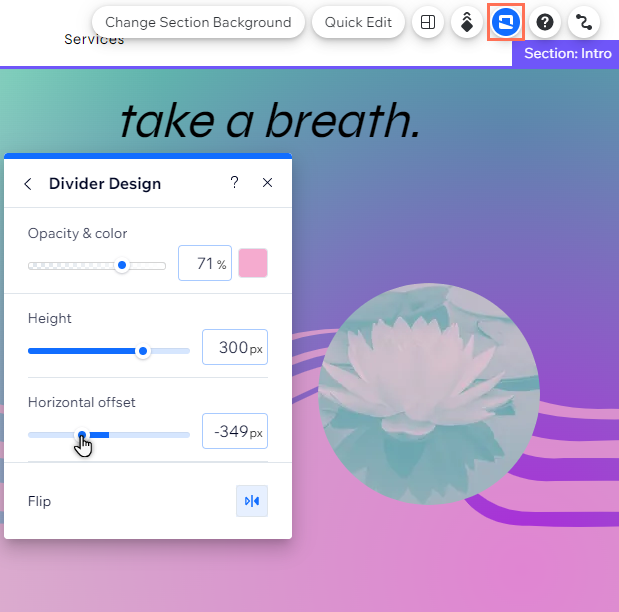
- Opacity & color: Choose whatever color you want for your divider, and make it more or less visible on the section or strip.
- How's the divider scaled?: Select whether you want the divider pattern to stretch across the strip / section or repeat.
- Height: Set how high or low you want the highest point of the divider to be on your strip or section.
- Horizontal offset: Set the divider's offset from the sides of the section / strip.
- Flip: Set the divider to display the opposite way (horizontally) on your strip or section.
FAQs
Click a question below to learn more.
What kind of custom shape dividers can I upload?
Are shape dividers responsive?
Can I add dividers to columns on a strip?
How do they work on mobile?
