Wix Studio: Managing Sites in a Workspace
5 min read
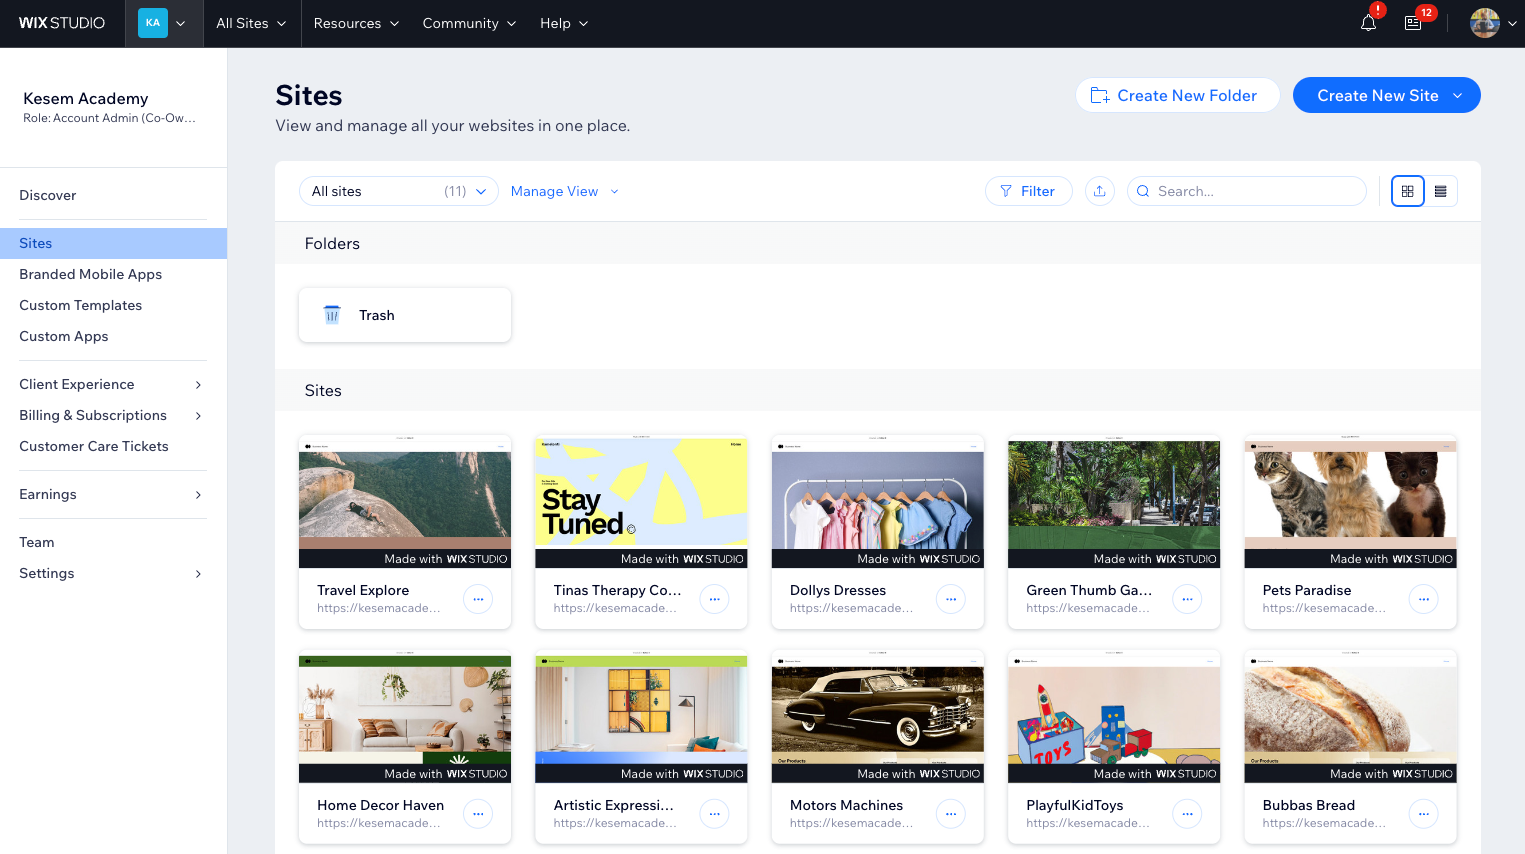
Wix Studio is a comprehensive website management solution that helps you to handle all the sites created by you and your team in your workspace.
Access a site's dashboard and perform various actions like editing, renaming, previewing, and duplicating. You can also create a personalized onboarding kit for Wix Studio sites, providing clients with helpful resources.
Efficiency is at the core of Wix Studio's design. Easily locate the specific site you need by sorting and filtering based on Editor type, Premium plans, and publish status. To further enhance productivity, you can save filtered views, ensuring quick access to the sites you regularly manage.
Check out our Wix Studio Academy tutorial on how to get started with your Wix Studio workspace.
In this article, learn more about:
Creating a new site in a workspace
Creating a new site in Wix Studio offers a wide range of options. You can choose to build a site from a blank canvas, customize a ready-made Wix Studio template, or use a custom template created by you and your team. You can also choose which Editor you want to use depending on your needs and proficiency.

To create a new site:
- Go to Sites in your Wix Studio workspace.
- Click Create New Site at the top right.
- Choose how to create a new site:
- Studio Template: Use a ready-made Wix Studio template.
- Studio blank canvas: Build a site from scratch using the Studio Editor.
- Use Wix Editor: Create a site using the Wix Editor.
- Use your own template: Use one of the custom template you've created in your workspace.
Managing a site in a workspace
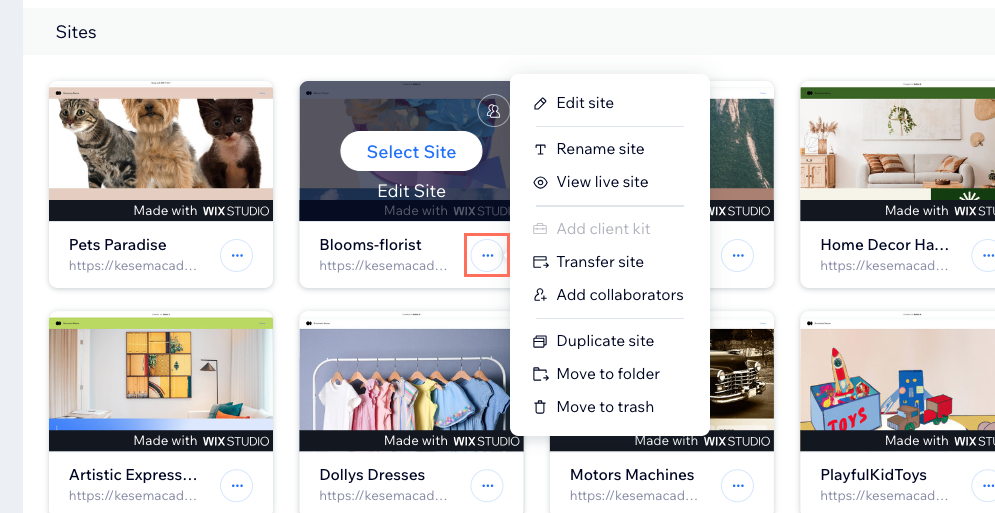
From Sites, hover over a site to access its dashboard or click the Site Actions icon to perform various site-level actions, such as editing, renaming, previewing and duplicating. You can also add a client kit, transfer the site or add collaborators to the site.
To work on a site:
- Go to Sites in your Wix Studio workspace.
- Hover over a site and choose what you want to do:
- Go to the site’s dashboard: Click Select Site.
- Access the site’s Editor: Click Edit Site.
- Additional actions: Click the Site Actions icon
 to perform site-level actions, including renaming the site, viewing live site, adding a client kit and transferring the site to someone else.
Tip:
You can invite people outside of your team to collaborate on this site. Hover over the site's People & Roles icon  and click Invite People.
and click Invite People. Creating a new folder for sites
Organizing the sites in a workspace is essential to effectively manage them and collaborate with others on your team. Create folders and group sites together based on your preferences. By creating folders, you can quickly locate specific sites and manage them more efficiently.
You can also delete a site you no longer need. Once you delete a site, the trash folder will be visible, allowing you to manage your deleted sites.
To create a new folder:
- Go to Sites in your Wix Studio workspace.
- Click Create New Folder at the top.
- Enter a name for your folder and click Create.
- (Optional) Move sites into the folder:
- Select the sites you wish to move.
- Click Move to Folder at the top.
- Click on the folder you wish to move the sites to.
- Click Move Here.
Tip:
To move multiple sites to a folder at once, click the List View icon  .
.
.Organizing your workspace site list
Explore our shortcuts to effortlessly navigate through your long list of sites and find exactly what you're looking for.
You can quickly search for specific sites based on their site name, or filter your site list to see a specific subset of sites based on your criteria. Once you've filtered your site list, you can save those filtered views to access them quickly in the future.
To filter the site list and save views:
- Go to Sites in your Wix Studio workspace.
- Click Filter.
- Select the filters to apply to the site list.
- Click Manage View and choose Save as new view.
- Enter a name for the saved view.
- Click Save.
Tip:
Click the Customize columns icon  and select the columns to show in your site list. You can also drag and drop the columns to reorder them.
and select the columns to show in your site list. You can also drag and drop the columns to reorder them.FAQs
Click a question below to learn more about managing your sites in Wix Studio.
Can I transfer sites between workspaces?
Can teammates work on a Wix Studio site at the same time?
Can I choose which teammates can manage the sites in the workspace?
Can I invite people to collaborate on a specific site?
I saved a new view. Who can see it?
Can I switch back if I decide I don't want to use Wix Studio?
Did this help?
|