Wix Stores: Sending Orders by Email to Fulfillers
4 min
In this article
- Step 1 | Add and set up a fulfillment service
- Step 2 | Select which products are fulfilled by the service
- Step 3 | Set fulfillment for new products
- FAQs
As your business grows, you may need other fulfillment services to take over some or all of the process. These services can include:
- Fulfillment centers
- Distribution centers
- Suppliers (individuals or companies who create the products and fulfill them directly to customers)
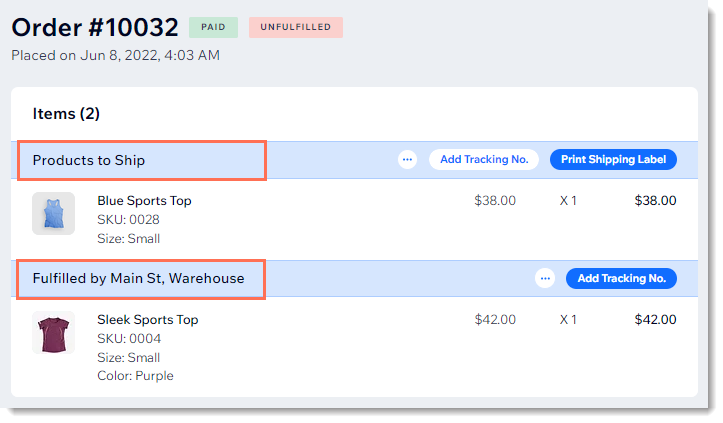
You can connect to any fulfiller you choose. After setup, store orders display an indication of who is supposed to fulfill the purchased items.

Email notifications are then sent to your fulfillers (manually or automatically) to let them know when there are orders they need to fulfill.
Tip:
You can also connect to any of the available third-party logistics providers that service your region.
Step 1 | Add and set up a fulfillment service
Add one or more fulfillers to help you handle orders. In the next step you can select which of your products they fulfill.
To connect a fulfiller:
- Go to the fulfillment services settings in your site's dashboard.
- Click Add Fulfiller.

- Enter the service name (seen only by you).
- Enter the email address (orders are sent to this address).
- Select the action that triggers sending a store order to the fulfiller.
- Click Save & Continue.
Step 2 | Select which products are fulfilled by the service
Before a custom fulfillment service can start fulfilling your store orders, you need to select which of your products will be fulfilled by them.
To assign products to a fulfiller:
- If not already on the Assign products to fulfiller page:
- Go to the fulfillment services settings in your site's dashboard.
- Click Assign Products.

- Depending on the products you want to assign, follow the steps:
- Assign individual products to a service: Click the Fulfillment service drop-down next to a product and select a fulfiller.

- Assign multiple products at once:
- Select which products you want to assign:
- All products: Select the checkbox at the top left.
- Individual products: Select or deselect the checkboxes next to products.
- Click the Choose Service drop-down and select a fulfiller.
- Select which products you want to assign:
- Assign individual products to a service: Click the Fulfillment service drop-down next to a product and select a fulfiller.

- Click Done.
Step 3 | Set fulfillment for new products
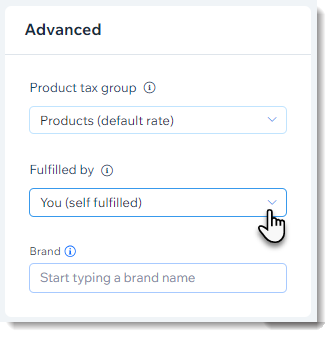
By default, when you add a new product to your store, it is set to be fulfilled by you. To select a different fulfillment service, go to the Advanced section and select a service.
To assign a fulfiller to a new product:
- Go to Products in your site's dashboard.
- Create a new physical product or edit an existing one.
- Click the Fulfilled by drop-down and select a fulfiller.

FAQs
How can my fulfiller see new orders from my store?
What is the difference between custom fulfillers and 3rd-party logistics fulfillment apps?
After I add a custom fulfillment service, can they start fulfilling orders immediately?


